• Don't overlook our Welcome Package, it contains many links to important and helpful information about functions at VHT like posting pictures and sending PMs (private messages), as well as finding the parts you need.

    AD

CA95 Barn Find

The small end of the counter shaft appears blackened like loss of oil pressure/feed.
In the pic below that, it looks like the bronze bushing for that end is turned and maybe didn't get its splash feed of oil in the catch slot. Usually a knock pin is there to keep it oriented with the slot up. I'd look at the bore of that bush. Hopefully it'll clean up and that small end of the shaft.
That seems common to have the knock pins incorrectly seated, or missing, or not having hollow ones in the right place. Same with the bearings that have the half ring retainers.
Overall, it looks really good, compared to the 160 and 150 I've been into.

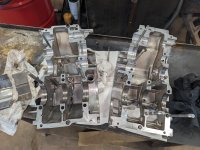
If you push down slightly on the windage trays, those pins slide out and then you can really clean out the sump area.

Now you can really clean the crank sludge traps and oilways to the big end of the con rods.
 
Last edited:
The small end of the counter shaft appears blackened like loss of oil pressure/feed.
It's the lighting, haha! Perfectly shiny. Went over everything including the crank specs and all was good and look real good. I'll these down the rest of the way and clean everything.
 
It's the lighting, haha! Perfectly shiny. Went over everything including the crank specs and all was good and look real good. I'll these down the rest of the way and clean everything.
Well that's good news. I was suspicious of the lighting possibly being the cause but figured I'd say something.
 
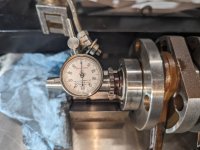
Straight as an arrow. The axial play on the rods are near perfect and the bearings have no play.

Still going to pull it apart because the nut on the end doesn't appear to have been torqued down right and the lock washer wasn't folded over.

1000003778.jpg
 
Yep, looks like you got a cremepuff.

If you mean the centrifugal oil filter, that's mandatory, but are you going to flush the crank sludge traps? Now or never.
There's a good thread on crank cleaning.
 
Am I correct that the two main bearings on the outsides of the shaft are 2 x 94001-202-000, and the center main bearings is a 91001-259-010?
 
Am I correct that the two main bearings on the outsides of the shaft are 2 x 94001-202-000, and the center main bearings is a 91001-259-010?
My parts catalogue is clear as mud. We know the knock pin and oil holes must line up. Hmmm... it may take me awhile to figure this out.
 
My parts catalogue is clear as mud. We know the knock pin and oil holes must line up. Hmmm... it may take me awhile to figure this out.
This is all I have; do you think all three bearings are the same?

1000003784.jpg
 
This is all I have; do you think all three bearings are the same?
It really only matters if you plan to use a 20 ton press to take the crankshaft apart and replace the inner bearing. In my experience, these ball and roller bearing crankshafts rarely need main bearings, it's the rods and oil passages that need attention after all these decades later.
 
I don't have that pic. It doesn't say about the rollers in the center, they may be different from the rods. My pic only shows the ball type but the listing says rollers ??? and N304SHS. The book says it's a 1973 2nd edition for CA95 only. I honestly don't know what to make of it.
I know Graham Curtis (G-man, member here) has a press and has done these. Could always PM him for advice.
I take it, you have, or access to, a press? If the center one can be flushed out with confidence, why not let it go at that? I see the rollers themselves, are available separately.
 
It really only matters if you plan to use a 20 ton press to take the crankshaft apart and replace the inner bearing. In my experience, these ball and roller bearing crankshafts rarely need main bearings, it's the rods and oil passages that need attention after all these decades later.
As AD said, the actual crank bearings are pretty robust, unless heavily abused by plugged/ dirty oilways. My first concern is the small end rod bushings that suffer from oil lack due to the big ends not splashing up to them or the pistons.
I see you showed good on axial play. What is your focus here?
 
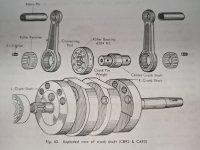
I found the pics in the FSM!!
Let us pause and give thanks that we do not have the old 2 bearing motors.
The 8 small holes in the center bearing then supply the centrifugal crank sludge traps and then the rods. The center bearing, then, is first to receive oil (hollow knock pin or drilling in upper case journal) so it's usually fine. The written description on page 34 is speaking to the old 2 bearing motor.
 
As AD said, the actual crank bearings are pretty robust, unless heavily abused by plugged/ dirty oilways. My first concern is the small end rod bushings that suffer from oil lack due to the big ends not splashing up to them or the pistons.
I see you showed good on axial play. What is your focus here?

Honestly I didn't realize it was a multi peice pressed crank. I do have a press, but I think I'll forgo that. Everything on the lower end has been in really good shape, I'll just take apart what I can and make sure everything is clean. (I own a 70 year old excavating company with my Dad, I'm not the mechanically inclined one, but I remember my Grandpa had a rule, if the crank was out, we replace the bearings, lol)
 
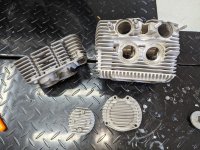
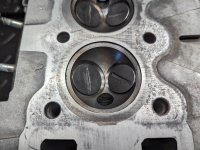
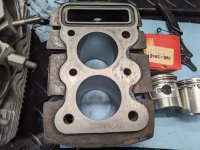
Walnut blasted the head and cylinder today; look brand new! Going to take them to the machinist tomorrow to be bored and ground.

1000003785.jpg
 
Looks Good. Grandpa had good sense but these motors are a totally different animal. In this case it's about cleaning the oilways because the only oil for the pistons, pins, rings, rods and cylinders come from those crank oilways. You could seize a piston because you didn't clean your crank. So yeah, as long as it's out....
 
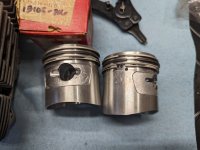
I'm still here! Just got back my goodies from machining. I had the cylinders bored to .25, they put the rings on the new pistons and checked the gap for me. Had the valve seats ground and they went ahead and set the valves and springs while they had them (I replaced the exhaust valves due to some big nicks).

They double checked my carb for me; it was rebuilt by me just fine except I put the float needle in upside down, doh!!! At least that's a simple explanation for the flooding!

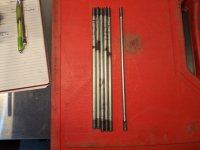
That's it, that's everything! Only thing I'm waiting on is a few long case studs, the then I should be ready for assembly!

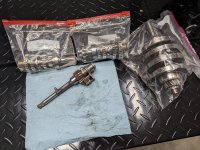
1000003839.jpg1000003840.jpg1000003841.jpg
 
Is there a special ring gap orientation like 90°-90°-180°? Or just equally spaced 120°?
 
Is there a special ring gap orientation like 90°-90°-180°? Or just equally spaced 120°?
That's fine. Don't put any directly forward or back. They rotate on their own anyway to some extent.
Don't forget to measure the gaps and adjust if needed. Seems I always find them near the max, but one can get the next OS and file to fit.
 
That's fine. Don't put any directly forward or back. They rotate on their own anyway to some extent.
Don't forget to measure the gaps and adjust if needed. Seems I always find them near the max, but one can get the next OS and file to fit.
Thank you! I think I need your sleuthing; I can't find a part number for the oil seal that goes on the gear shift drum. I've got two manuals and only one gives a number and it's an old one - 12254.5V
 
91201-283-000
Thank you!!!

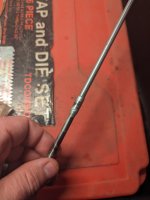
Today I did a lot of cleaning. Tap and dyed all of the studs and cruddy bolt holes for the head and crank case. All of my mating surfaces are clean and ready to go. I did some deep cleaning on the main, secondary, and crank shafts. I think I'm ready to assemble!

1000003844.jpg1000003842.jpg
 
Do tell, how much funk came out the big end rod notches from flushing the center bearings on through the flywheel sludge traps and rod pins.
 
I don't have that pic. It doesn't say about the rollers in the center, they may be different from the rods. My pic only shows the ball type but the listing says rollers ??? and N304SHS. The book says it's a 1973 2nd edition for CA95 only. I honestly don't know what to make of it.
I know Graham Curtis (G-man, member here) has a press and has done these. Could always PM him for advice.
I take it, you have, or access to, a press? If the center one can be flushed out with confidence, why not let it go at that? I see the rollers themselves, are available separately.
It's normal to have at least one ball bearing for when thecases get hot and expand.
Is there a special ring gap orientation like 90°-90°-180°? Or just equally spaced 120°?
120 degrees is fine.
I don't bother to be accurate as the rings all rotate at different rpm so the gaps probably line up frequently?
I know they are never at 120 spacing when I take top end back off after few thousand miles
 
Do tell, how much funk came out the big end rod notches from flushing the center bearings on through the flywheel sludge traps and rod pins.
Honestly, nothing extraordinary. The lower end was in great shape when I opened it; the odometer is probably correct with 6k miles. I don't think it ever had anything but fresh oil in it throughout it's lifespan. I probably could have put rings and a clutch pack in and been on my way!
 
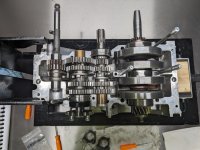
Set rings in position on the large transmission bearings? Small end transmission bearings located properly on the alignment pins in the upper case? Crankshaft bearings too? Otherwise looking very nice.
 
Set rings in position on the large transmission bearings? Small end transmission bearings located properly on the alignment pins in the upper case? Crankshaft bearings too? Otherwise looking very nice.
Yuppers, except the center crank / main bearing is still turning; is that right?
 
My parts book shows a center bearing knock pin 8x8, not sure if in the upper or lower case. I will go out and look.
 
I didn't have the crank quite right; I got the center bearing to lock on the oil port
 
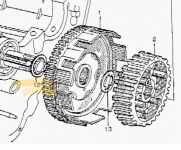
@ballbearian With the five disc / steel offset clutch setup; am I correct that I'll not be using #12 and everything else goes together the same?

1000003854.png
 
Not shown in your pic above is the circlip #11. It must fit on the shaft without some huge amount of play. Due to several variations and I can't see yours, if yours needs the #12 to have the circlip fit right then leave it in. Both of the thrust washers are 1.5mm thick, so it's pretty obvious whether it should stay or go, again depending on the fit of the circlip.
Both of the ones I've messed with were pre '64, so the spacing on yours may be slightly different. I'd be curious to see if there is any differences on yours.
Excellent, I double checked the schematic and see that #11 circlip! Thank you!
 
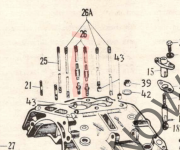
@ballbearian looking at this schematic, I can't quite figure out the cylinder studs. This one shows #26 as 8x249. I feel like that's twice the length it should be? When I disassembled, I'm pretty sure I had 1 x stud A #25, and 5 x stud C #26A.

1000003866.png1000003867.png
 
I've been twitterpated by typos before. :unsure: 10mm longer makes sense. Did you take a pic before you pulled them out of the upper case?
 
I've been twitterpated by typos before. :unsure: 10mm longer makes sense. Did you take a pic before you pulled them out of the upper case?
They had a mishmash of wrong studs. I'm pretty sure #26 is the same stud as #26A, but #26 has this wider section. It should be obvious, hopefully, putting it back together.1000003884.jpg
 
Just looked at the empty case and appears all the same length. Right rear for the skinny one and knock pins (sleeves) on left rear and right front.
 
I've been twitterpated by typos before. :unsure: 10mm longer makes sense. Did you take a pic before you pulled them out of the upper case?
Sorry, case not head stud, so no typo. Confused by your fragment of parts list and I don't have my book always open. Book says 3 different but I only see 2 different (1 skinny and 5 fat) on my empty case.

Your post # 62 pics are same as mine. I don't get the mish-mash comment, I think they are all like that.
 
Last edited:
Sorry, case not head stud, so no typo. Confused by your fragment of parts list and I don't have my book always open. Book says 3 different but I only see 2 different (1 skinny and 5 fat) on my empty case.

Your post # 62 pics are same as mine. I don't get the mish-mash comment, I think they are all like that.
This is what came out of it. Three different types.1000003889.jpg
 
This makes better sense. the 3 with the longer threads must go in the case in the same spots as the 3 10x14 knock pins. All washer are the same and 5 hex nuts plus 1 acorn nut for the oil stud.
 
I think it's been decided; I'm going to get the bike a new paint job. I have a very talented car resto guy and he's going to try fit me in and he'd teach me how to do it.

Did I read somewhere that this white matches Ford Wimbledon White?
 
I think it's been decided; I'm going to get the bike a new paint job. I have a very talented car resto guy and he's going to try fit me in and he'd teach me how to do it.

Did I read somewhere that this white matches Ford Wimbledon White?
Funny, I seem to remember Ford Oxford white.
 
@ballbearian Looking at my carb cover panels and things like the side crank cases, it would seem that the aluminum is painted.

Stuff is starting to peel and I'm wondering if I can sand them and repaint them? What did they use to finish / paint those cases with?
 
@ballbearian Looking at my carb cover panels and things like the side crank cases, it would seem that the aluminum is painted.

Stuff is starting to peel and I'm wondering if I can sand them and repaint them? What did they use to finish / paint those cases with?
I think they used to call it Honda Cloud Silver but it's NLA so many have used a Honda marine silver that want the correct shade. I just use Rustoleum engine enamel silver, close enough for me and affordable for my many bikes. No clear coat.
I differ to others here for more exacting restoration knowledge and skill, especially for finishes.
 
This is turning into a more thorough resto, 😆

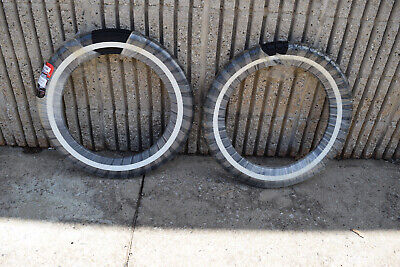
I ordered new wheel hoops and spokes (aftermarket). I'm finding out that 90/90-r16 /mj90r16 / 3.00r26 tires don't seem abundant and I've not seen any white walls.
 
Also, I bought a new (to me) bike and am picking it up Monday. This is a running and good conditioned bike, so not a project!
 
Back
Top Bottom