
RockReef
Veteran Member
How do you prevent that?
There's a valley where the washer meets the outer tube, fill it with RTV so water can't collect there. I probably went overboard doing it but I used enough that there's a slope from the edge of the washer up the sides.How do you prevent that?
It still baffles me how that much water could get in there. Let alone the dirt. I still think a rear facing weep hole would have been beneficial.There's a valley where the washer meets the outer tube, fill it with RTV so water can't collect there. I probably went overboard doing it but I used enough that there's a slope from the edge of the washer up the sides.


That is too logical. I'll bet on an inadvertent micro climate dew collection device design aspect.My theory would be that water can get by the grooves in the top cushion of the fork ear
Any water that does get in is trapped by the lower fork ear cushion

copious amounts of red RTV would be my choiceFill the cavity with desiccant bags??
It is pricey but I bought a can probably ten years ago and I've used it on four different bikes I've rebuilt and I still have half a can left.That’s good stuff. Made by Boeing. Popular in the mt bike world, but it’s expensive.
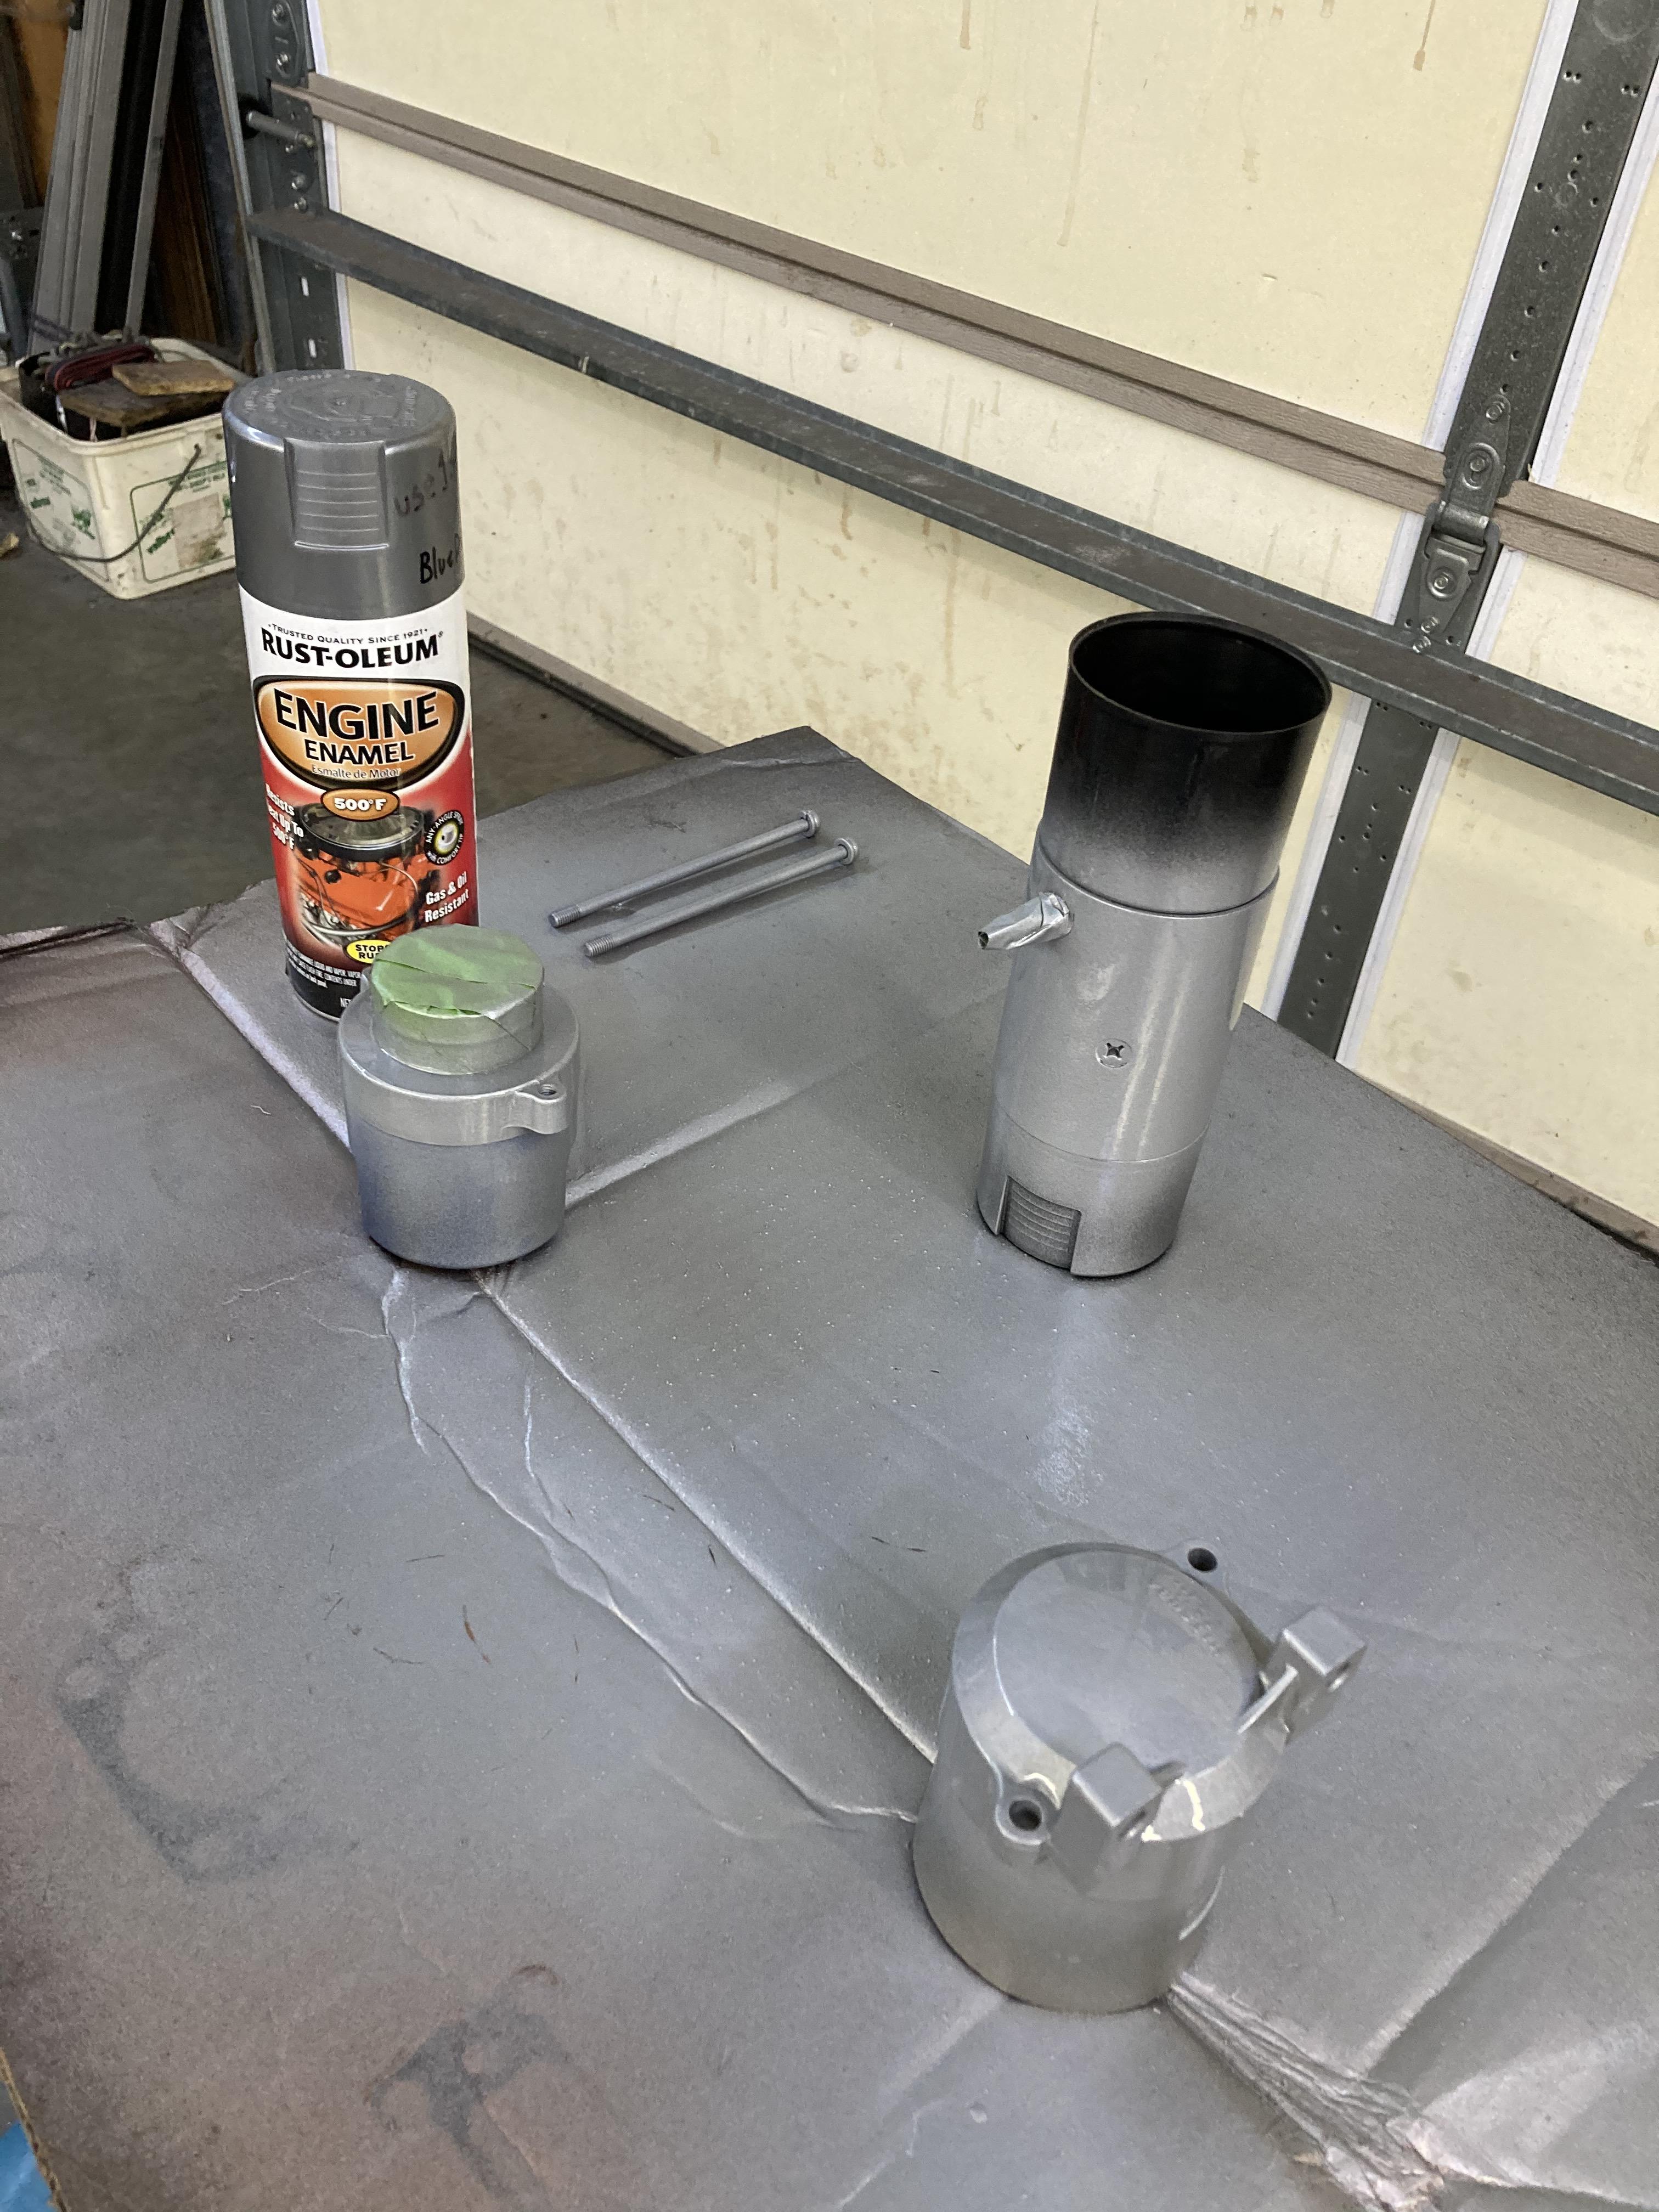


Once in a while, I get an upside to packratism.I wish I'd noticed the size of the paint cap when I painted my starter..
Would have saved a few minutes.

Oh yeah, the time of using ATF is long past, like wise 10-w30.Fork oil didn't exist in the 1970's so ATF was used, similar properties as hydraulic oil but cheaper.
Last time I bought a couple of cans of VHT couple of months ago they were ~$16-17? a can I think, I was surprised.Paint came out great on the starter and side covers. The Rustoleum isn't around these parts in an engine enamel, just more normal paints and they are part of the Sherwin Williams company. Which also owns Dupli Color and the VHT brand I believe. This stuff has gone from $12.99 a can just before Covid to around $20-24 now at the usual retailer's.
How is the price for your paints down the US way?
Thanks, I always go too fast and too much and end up with runs. I think this is my best so far.Paint came out great on the starter and side covers. The Rustoleum isn't around these parts in an engine enamel, just more normal paints and they are part of the Sherwin Williams company. Which also owns Dupli Color and the VHT brand I believe. This stuff has gone from $12.99 a can just before Covid to around $20-24 now at the usual retailer's.
How is the price for your paints down the US way?
No primer, just sanded with fine foam blocks.Perfect. I only have the 71 FSM. I still have some 10w fork oil, I wonder if that is sufficient?I believe the shop manual calls for "Honda ATF". The K4 Owners Manual I have just says "ATF".
Personally I use 15w Bel-Ray fork oil.
This is from the 1974 shop manual.
View attachment 27543
ATF is 7-8w so 10w is just a bit heavierPerfect. I only have the 71 FSM. I still have some 10w fork oil, I wonder if that is sufficient?
I'm a light rider. It will have street tires (no heavy off roading). I used the 10w in the CB160 and it feels good. I'd like to have a standard for all the others that need it, the CB400T2, the GS750L and the 350's to come.ATF is 7-8w so 10w is just a bit heavier
Perfect. I only have the 71 FSM. I still have some 10w fork oil, I wonder if that is sufficient?
Yes, 10w should be fine. I only use15w because I'm a big guy (6'3") and I figure those 50 year old springs could use the help.
I switched to Amazon Canada and it shows not available, yet it did quote a price of about $12.00 Canadian which is a deal if/when they get it back in stock. Strange they don't recommend curing it with heat. The VHT and Dupli Color products do recommend 200-250F and about 1 hr of cure time to set the paints ability to resist chemicals and oils etc.Thanks, I always go too fast and too much and end up with runs. I think this is my best so far.
This was a bout the cheapest. Hopefully durable but not high heat particularly. It does not say to bake it but requires some time to reach max durability.
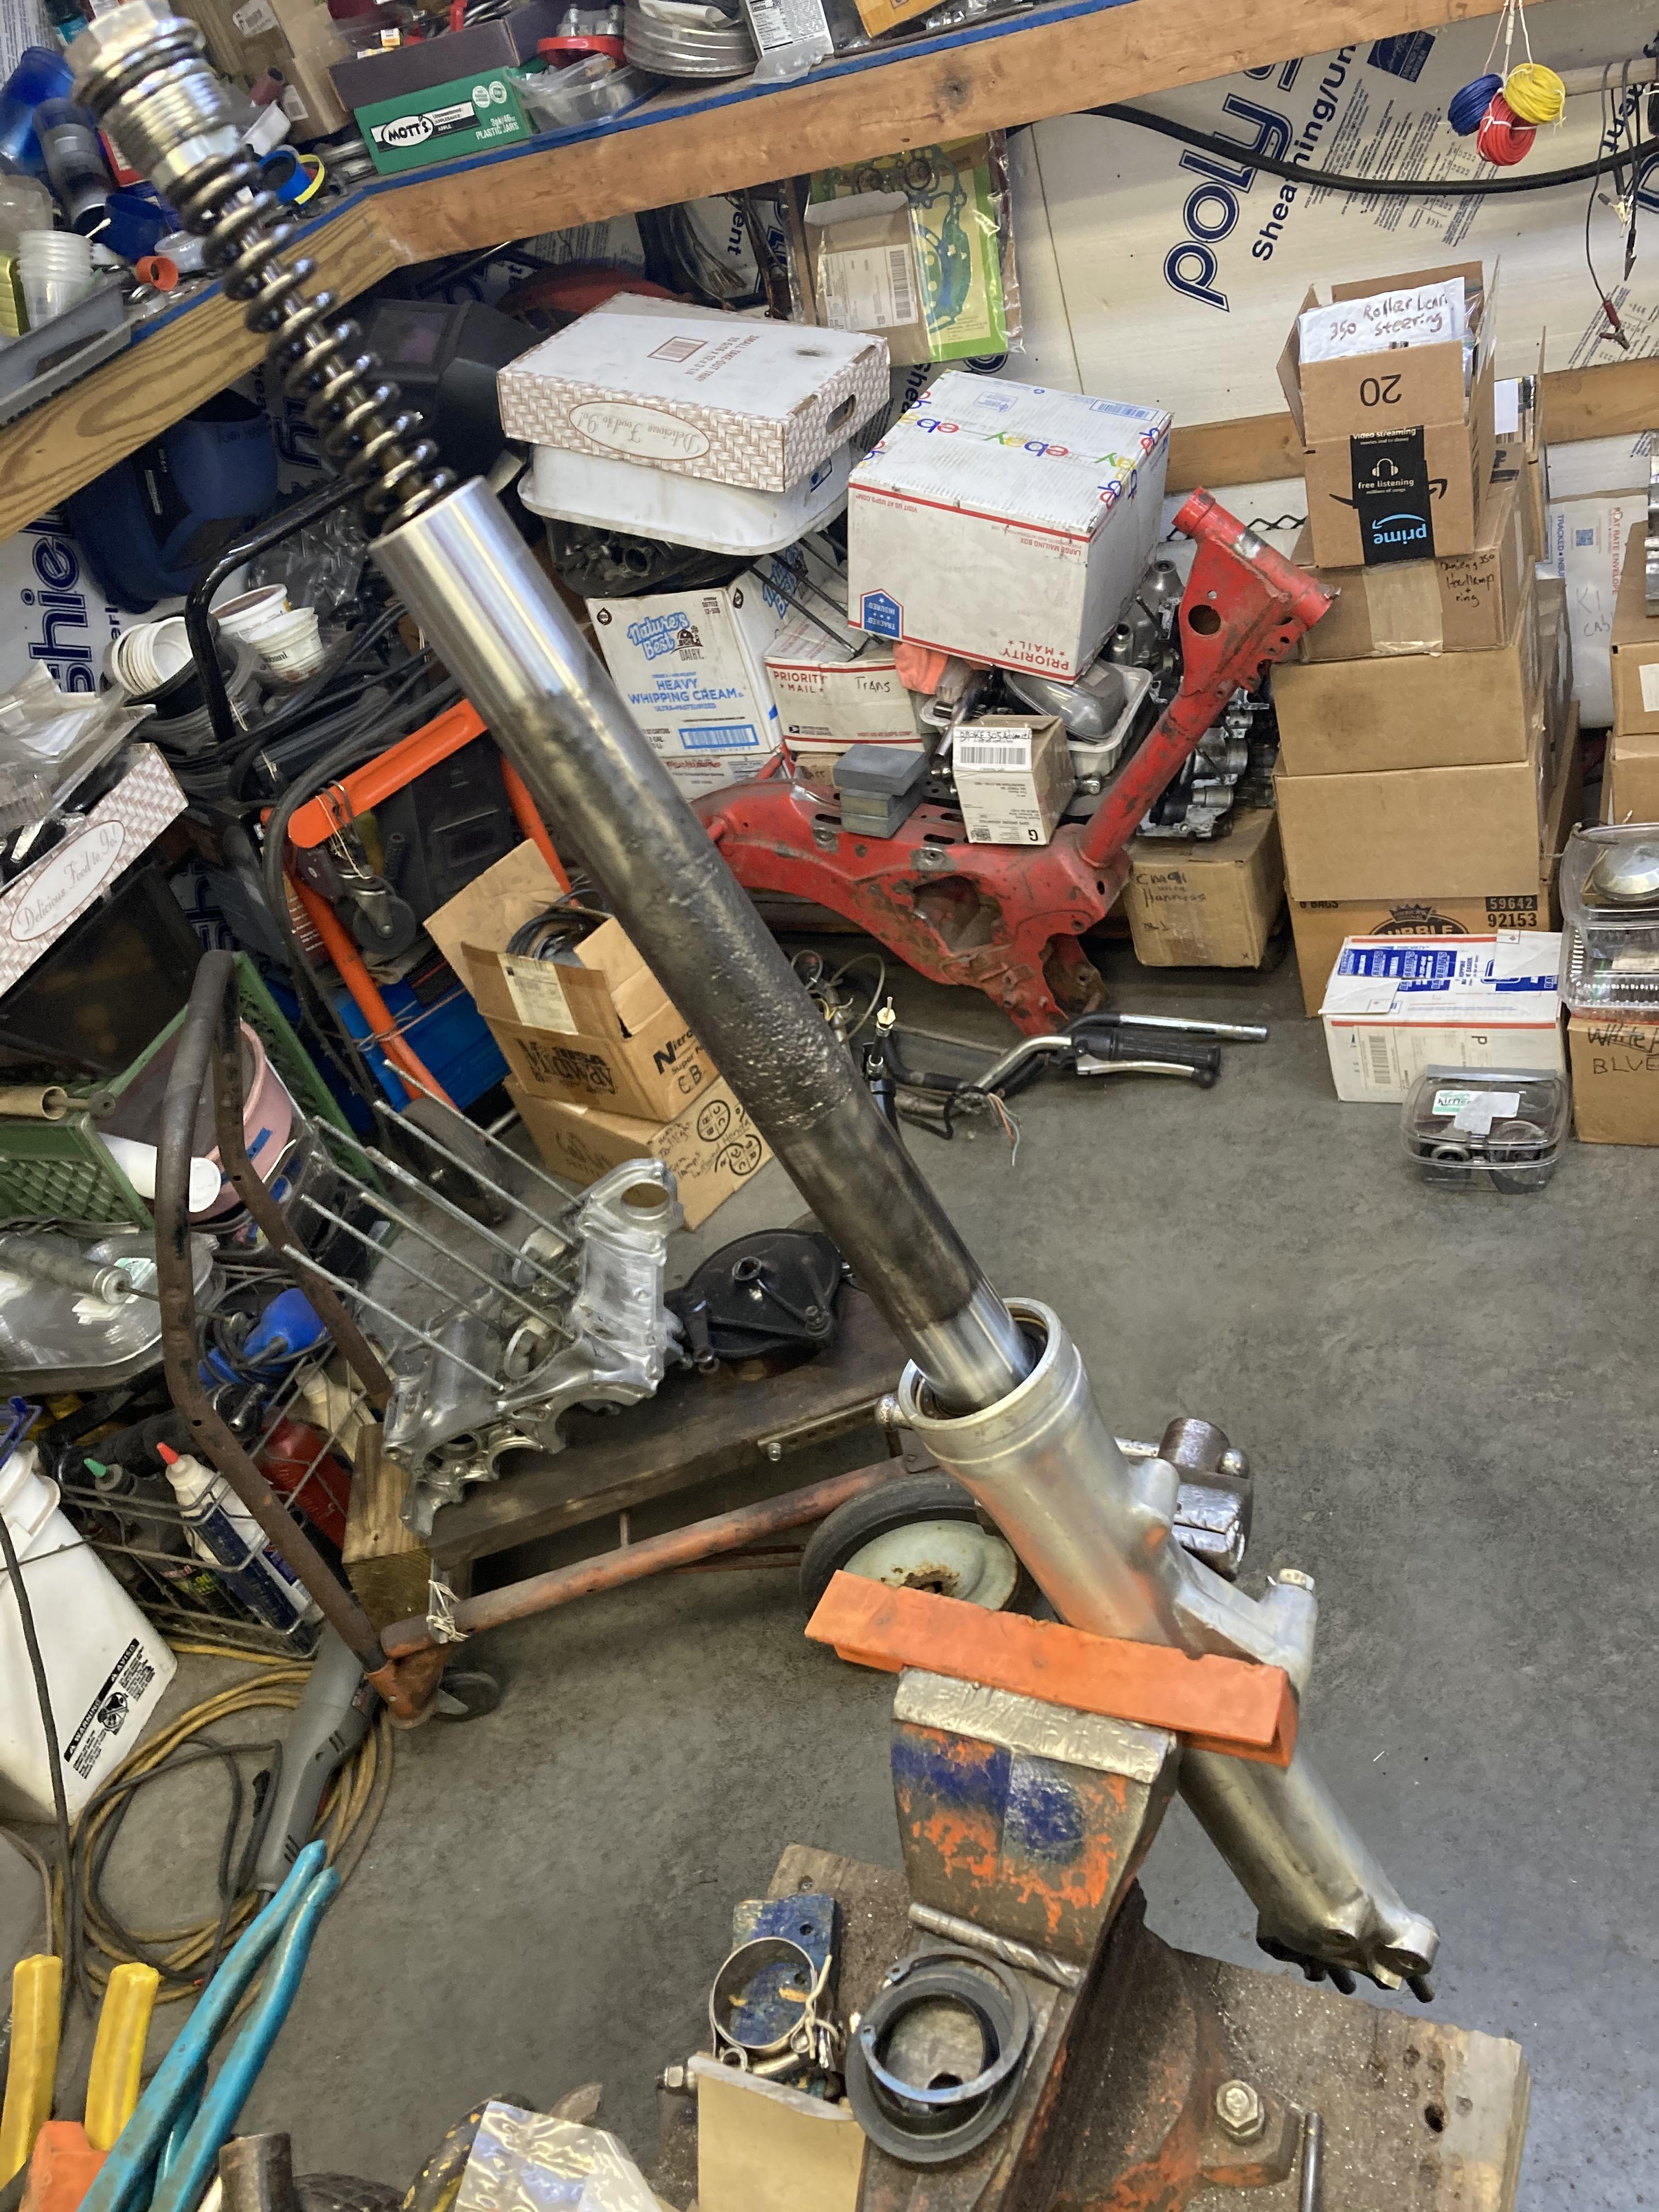
You have to remove the allen screw on those forks.Besides the gasket question, I'm not sure how these come apart. The circlip is removed but the inner rod won't slide right out. I didn't loosen the bottom allen as I've heard it can be a pain. K5 here.
Correct, then the whole upper tube, cap and spring slides out together.You have to remove the allen screw on those forks.
) was doing the bottom allen screw back up again. Just refitting the fork springs etc didn't hold things tight enough to stop the piece that the allen screw threads into from rotating.
Hmmm, I don't see a Honda part number on that special tool, wonder if it's still available...So I used this special tool. Springs etc all removed, shoved this down the tube, leaned on it while tightening the screw. Rubber ferule gripped the rotating part brilliantly.
Special damper rod holder tool ! Lol ! If it worksSeconded on the electric impact driver, whips those bolts out a treat.
I did the fork seals on my Hornet recently and the problem I had ( apart from brain fade, fitting seals wrong way up
So I used this special tool. Springs etc all removed, shoved this down the tube, leaned on it while tightening the screw. Rubber ferule gripped the rotating part brilliantly.
Ha! That's brilliant. Unfortunately, or fortunately, I don't have one those special tools yet.Seconded on the electric impact driver, whips those bolts out a treat.
I did the fork seals on my Hornet recently and the problem I had ( apart from brain fade, fitting seals wrong way up
So I used this special tool. Springs etc all removed, shoved this down the tube, leaned on it while tightening the screw. Rubber ferule gripped the rotating part brilliantly.


Nice gasketI got it with just a key and a cheater. I should get a set of allen drivers to have around.
My goal was to just clean and rinse these forks, as they did seem fine and had no leaks, just old oil with a little contamination. I'll just rinse out the lowers and skip further disassembly of the inner tube and spring. Not even a half teaspoon of sludge in the bottom.
I was surprised to see the oil pump factory gasket come off with the pump intact. I suppose I could just bolt it right back on as is. No one has commented on using a thicker gasket as a replacement. Either way, I'm saving my one and only OEM gasket until I'm comfortable with my hand cut thick ones or I find some that aren't ridiculous in price. What is it with these gasket sets being so darn stingy with oil pump gaskets? My 305 Dream was the same way.
I have noticed this before as well. And I have read about the old school way of using an old cereal box to make a quick side cover gasket. There is a thin brown material they slip over the bottle at the local corner store that could possibly be used in a similar fashion as the cereal box. I have considered this option myself, yet cannot completely endorse since I haven’t actually done it. Perhaps it could be a consideration to help scratch the “packratitis” itch of a resourceful individual like ballbearian?The factory oil pump gaskets as you know are usually a thin brown material. .
Seconded on the electric impact driver, whips those bolts out a treat.
I did the fork seals on my Hornet recently and the problem I had ( apart from brain fade, fitting seals wrong way up
So I used this special tool. Springs etc all removed, shoved this down the tube, leaned on it while tightening the screw. Rubber ferule gripped the rotating part brilliantly.
Yeah, there was remnants of some wimpy sealer, like GasketCinch, but nothing that looked like a threadlock. Same stuff found on the cam cover, cam box, side covers, etc. Pretty sure this was factory.Richard, I guess you didn't check the bolt screwed all the way into damper rod before assembly. In all probability, there was still thread lock or sealer in damper rod threads
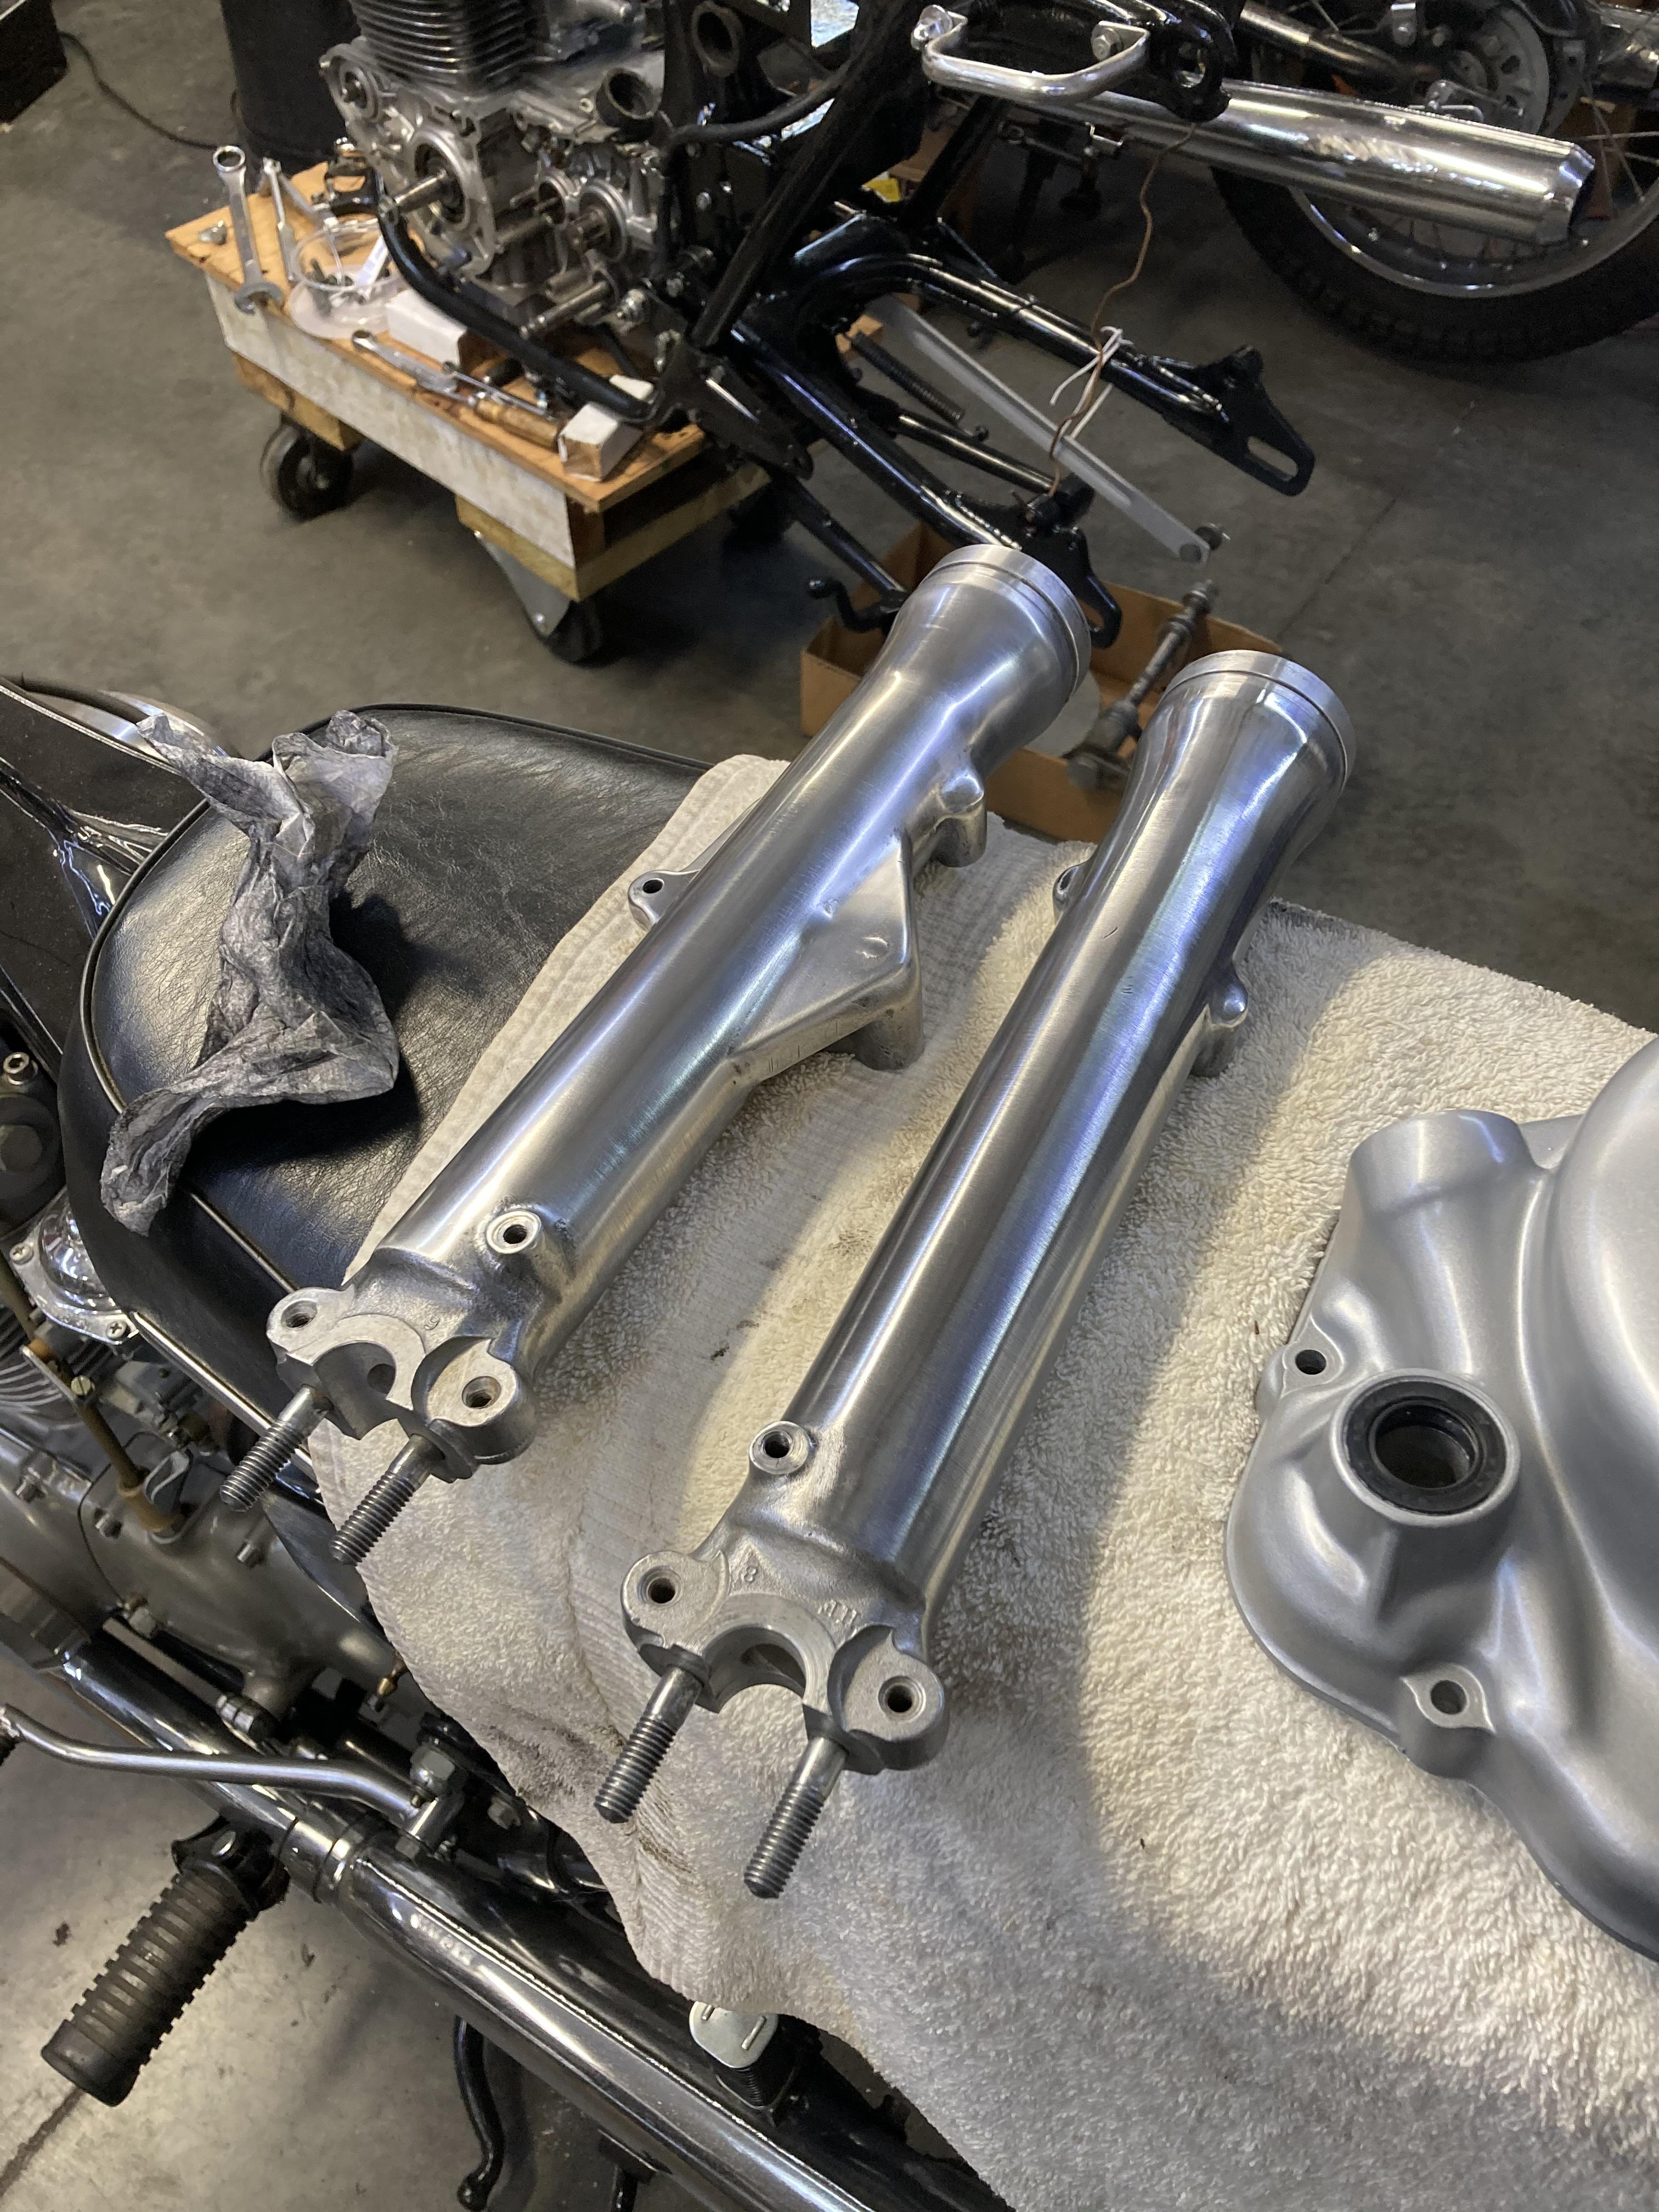

I honestly don't think it matters which way the hole is oriented on the fork tube;I would do it forward,imo.It's just too cold out to use my buffer, which has been living under a wheelbarrow on the patio, so I drug it in the shop attached to two 50lb. cinder blocks and sits on an old truck mudflap to keep the vibrations from sliding around. I removed the clear coat on the fork lowers with emery cloth strips and then buffed it to an acceptable polish. Not as nice as ancientdads 450 legs, but passable.
Also got the rear fender back together with the repainted tailight and a once over on the chrome with the Turtlewax polish after it got a soak in the Bilthamber Deox-C 5 gallon bucket. It was pretty bad but straight. Again passable. The factory wheel/tire info sticker was long gone and it needed the VHT touch. I need to get some more stickers for the herd.
In order to get the forks reassembled, I needed a better circlip pliers, so I finished filing the tips of a pair of needlenose that had been repurposed many years ago for FIATs that are now my official fork clip tool.
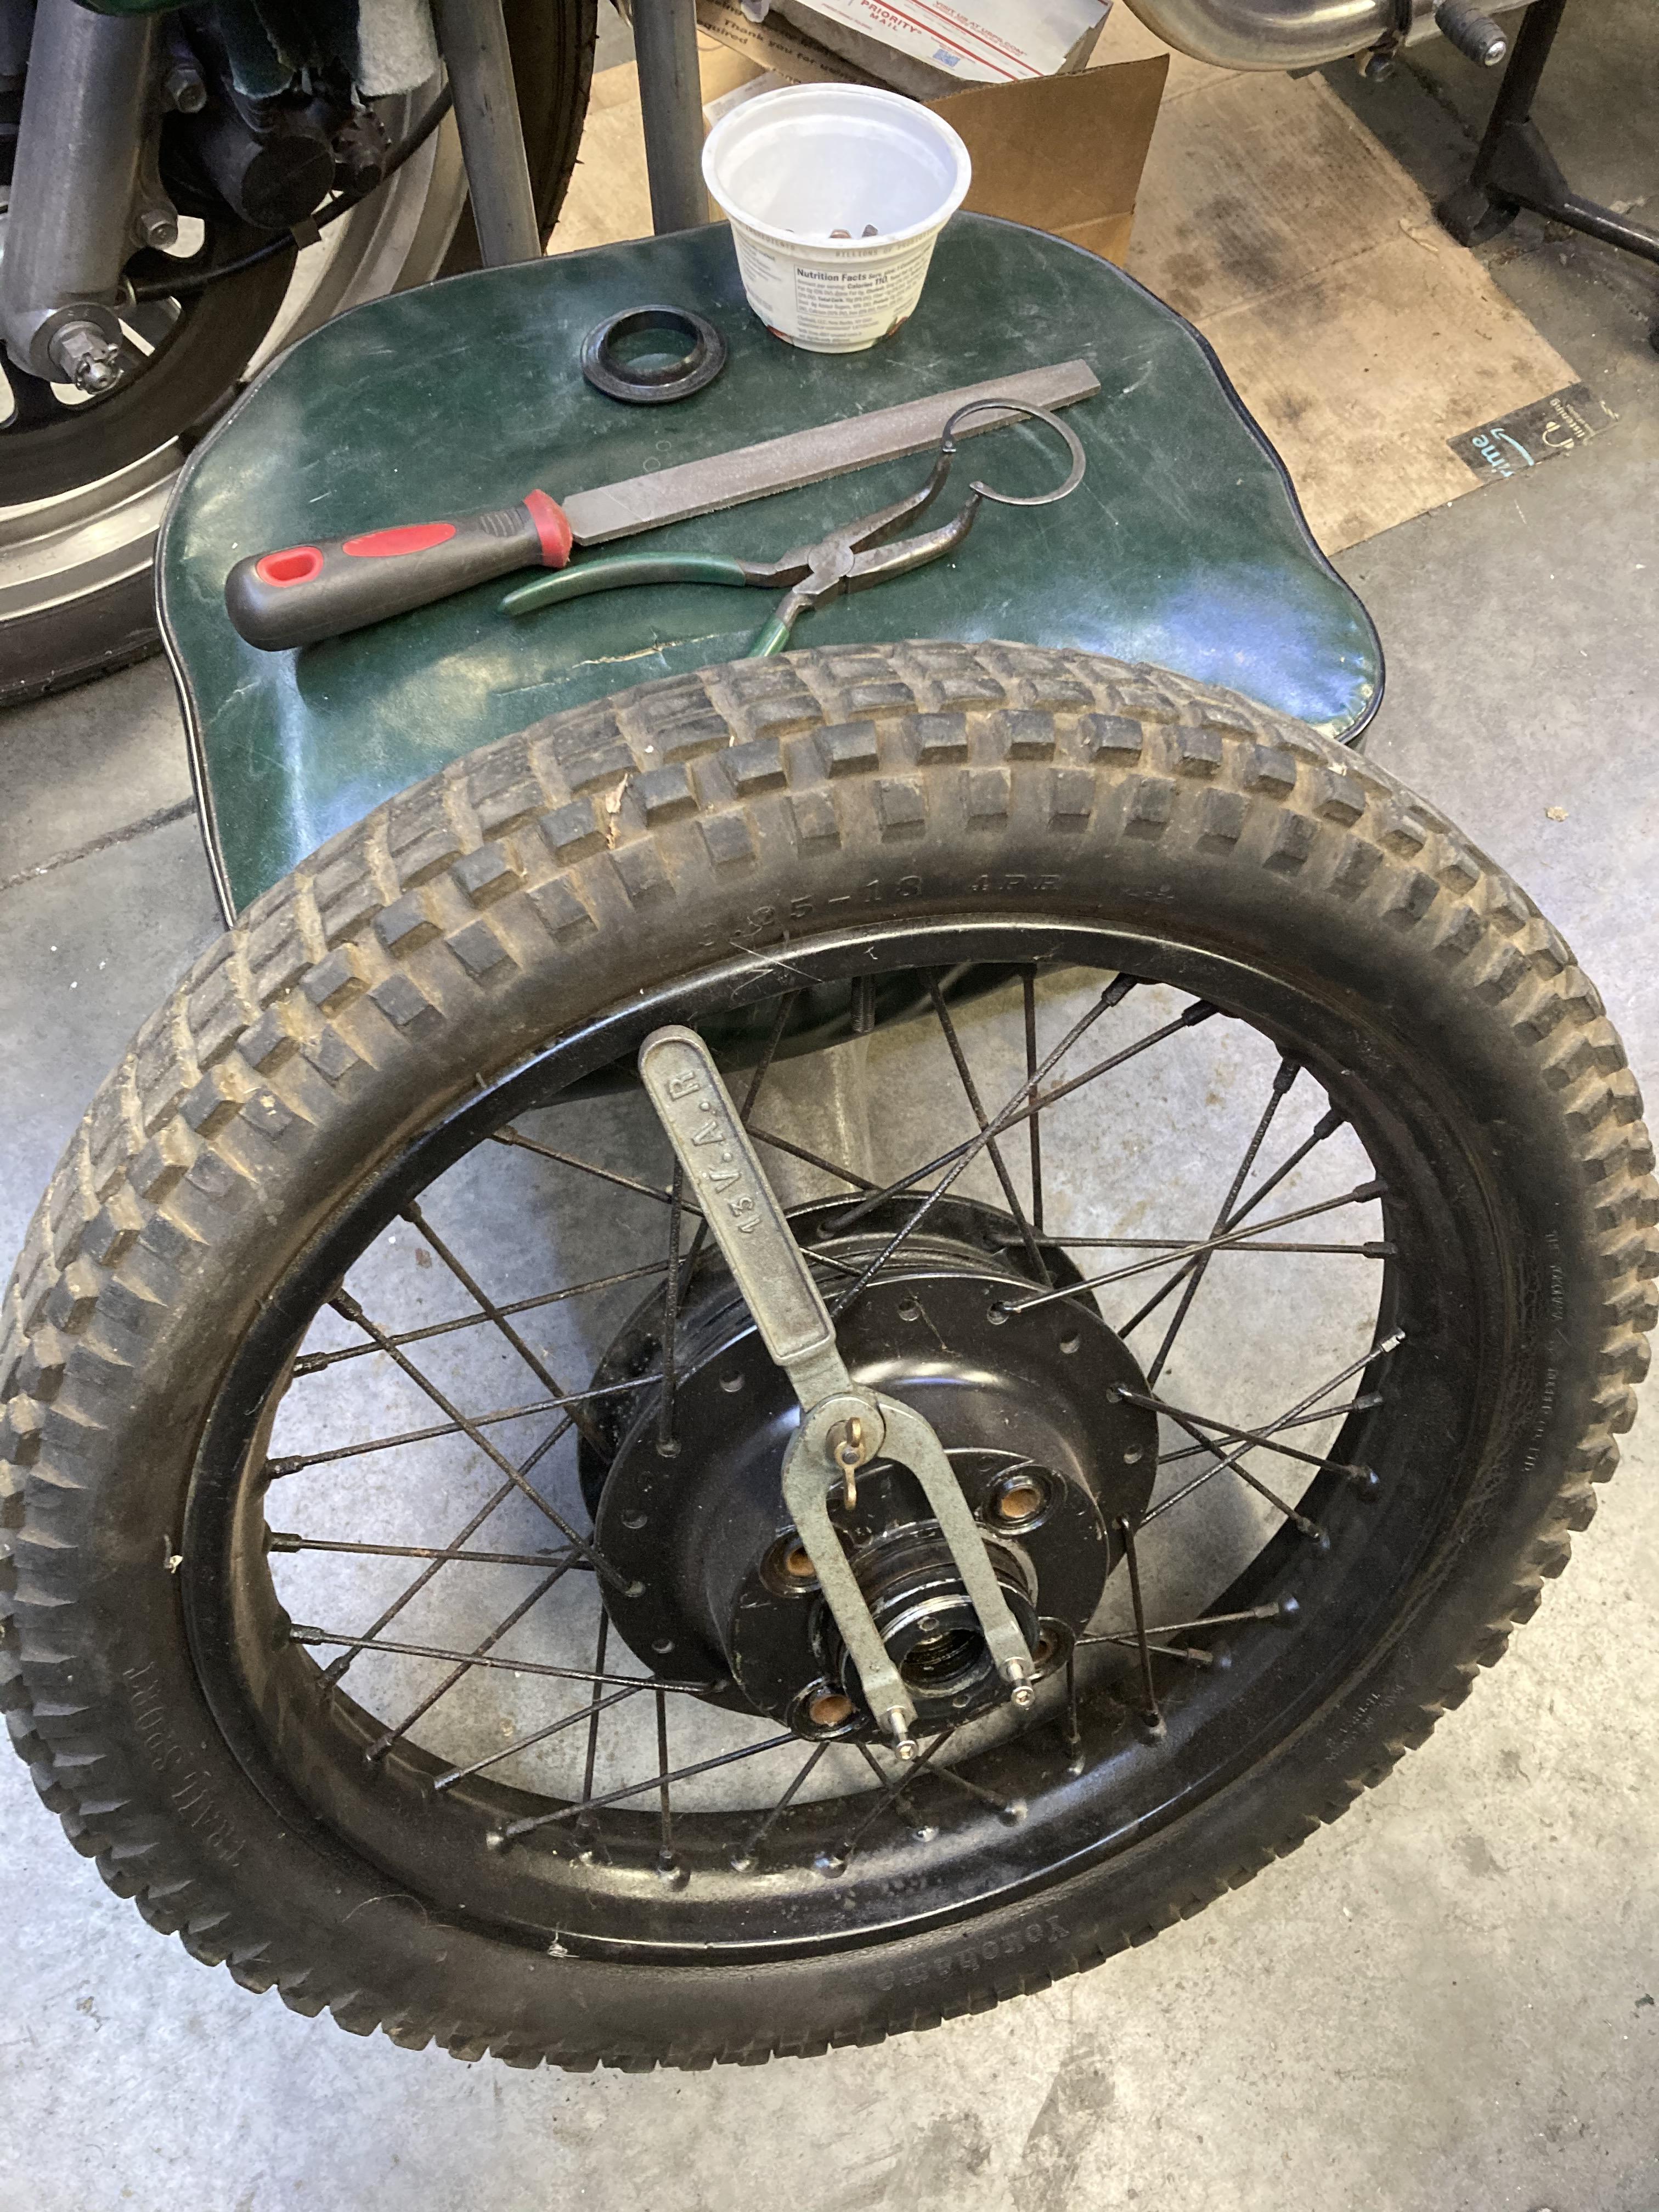
Also getting a temporary wheel ready for use and used my vintage VAR no.13 pin spanner (bicycle tool) on the bearing lock collar.
Here is a question on the forks. There is a hole in the fork tube about 4 inches from the bottom that allows the fluid to move. The tubes are not marked for where this hole is on the tops (but I could mark it) and then orient this hole forward or behind , etc. for optimal fork oil flow but does it make any difference?
Rodent trespassing is punishable by death. 100% effective for repeat offenders.I honestly don't think it matters which way the hole is oriented on the fork tube;I would do it forward,imo.
The small hole is there to lube the movement of the fork tube inside the lower/slider.
I see you(and many others)have a shop W/ tools including a motor driven buffing wheel and I want one;I've been stuck working outside in a parking space for 6+ years on my bike which gets more challenging in the cold.
You're making that bike very nice and I'm sure the mice will appreciate a dressed-up home after you finish it.
Trespassers will be shot. Survivors will be shot again. lol.Rodent trespassing is punishable by death. 100% effective for repeat offenders.
Speaking of that, a couple of months ago I went out to the shop late one night. I flipped on the lights and spotted a mouse crossing the room! It's been about ten years since I had any mice out there.Rodent trespassing is punishable by death. 100% effective for repeat offenders.
I am not to be considered as the standard, and TBH your lower legs (well, actually the bike's because nobody wants to see either of our lower legs) look damn good and plenty shiny. In fact, probably more accurate compared to original finish.Not as nice as ancientdads 450 legs, but passable.
I like to put my specialty stickers on the lower portion of the fender below the tag. Since my father painted the factory satin black CBX sidecovers the color of the bike on my first one, I put a factory CBX sidecover sticker on the lower part of the rear fender on both of my CBXs and on my 450 I had a sticker guy in St. Pete make my TT Racer stickers. Sadly, apparently few remember the bike magazine reference to that phrase in the late '60s and early '70s (tavern to tavern)and it needed the VHT touch
There are many pairs of needlenose pliers in my garage and toolboxes that my father ground and filed for that very reason, including many circlip pliers tips that he also reshaped during his outboard motor refurbish efforts. Unfortunately it often makes then useless for any standard purpose thereafter, so I have a pile of 'specialty' tools now.so I finished filing the tips of a pair of needlenose that had been repurposed many years ago
It doesn't really matter as oil should always be above level of the hole.Here is a question on the forks. There is a hole in the fork tube about 4 inches from the bottom that allows the fluid to move. The tubes are not marked for where this hole is on the tops (but I could mark it) and then orient this hole forward or behind , etc. for optimal fork oil flow but does it make any difference?