
What do you mean by center of swingarm bolt to to center of axle one each side? So that I make sure I get it rightIf you're using the original wheels and axle with spacers in the correct positions, checking the drive chain alignment will tell you if the rear wheel is centered correctly. And as I mentioned previously, by checking the distance from the center of the swingarm bolt to the center of the axle on each side you can verify the rear wheel alignment in the swingarm,
-
Don't overlook our Welcome Package, it contains many links to important and helpful information about functions at VHT like posting pictures and sending PMs (private messages), as well as finding the parts you need.
AD
You are using an out of date browser. It may not display this or other websites correctly.
You should upgrade or use an alternative browser.
You should upgrade or use an alternative browser.
CB350 to cafe' from scratch by a (not so much) teen
- Thread starter Alon
- Start date
Like this on both sides, to be sure the wheel is aligned and pointed straight, as well as it will tell you if the chain adjustment marks on the swingarm are correct too.What do you mean by center of swingarm bolt to to center of axle one each side? So that I make sure I get it right

crazypj
Veteran Member
- Joined
- Jun 5, 2020
- Total Posts
- 1,550
- Total likes
- 997
That looks like it was also run with loose engine bolt for years?
The stainless steel bolt 'problem', stainless on stainless will always gall really bad.
Personally, I've been using Teflon paste from plumbing supplies.
It's way cheaper than buying it as Teflon anti seize.
I'm sure you'll be able to find something similar.
If not, bicycle shops sell something very similar at about twice the price
You need to use it on all the case screws as well or you will get real good at Helicoils in a few years (aluminium loves stainless so much it never lets go, molten aluminium will actually dissolve stainless steel - eventually)
Hey guys, I'm gonna take the frame to a fabricator to try and solve this.
Also, I wanted your opinion on rear shocks since mine are trash. I took one of them apart and the damper is toast.
I thought of these https://www.squaremotorcycleparts.c...-absorbers-honda-cb350-cb-350-1972-1973-317mm
Are they the correct length and what length options do I have?
I put Permatex anti-sieze on all the case bolts.You need to use it on all the case screws as well or you will get real good at Helicoils in a few years (aluminium loves stainless so much it never lets go, molten aluminium will actually dissolve stainless steel - eventually)
Also, I wanted your opinion on rear shocks since mine are trash. I took one of them apart and the damper is toast.
I thought of these https://www.squaremotorcycleparts.c...-absorbers-honda-cb350-cb-350-1972-1973-317mm
Are they the correct length and what length options do I have?


Good solid repair. Note that the inner surfaces of the mounts are a ground path for the engine so be sure to have clean metal there when the engine is installed.
Good solid repair. Note that the inner surfaces of the mounts are a ground path for the engine so be sure to have clean metal there when the engine is installed.
I like to run a dedicated ground wire from one of the rear engine mount bolts to the battery negative.
You can never have too many groundsI like to run a dedicated ground wire from one of the rear engine mount bolts to the battery negative.
Bumping thisAlso, I wanted your opinion on rear shocks since mine are trash. I took one of them apart and the damper is toast.
I thought of these https://www.squaremotorcycleparts.c...-absorbers-honda-cb350-cb-350-1972-1973-317mm
Are they the correct length and what length options do I have?
After a lot of looking around, most shock sellers list by model and don't mention what the original length is. The consensus seems to be 318mm or 12.5" is the stock length. You can go shorter or longer if you want to change the ride height, but if you do you should also adjust the height of the front forks as well to avoid changing the original steering geometry. I lowered my 450 1.5" at both ends and it rides just like original.Also, I wanted your opinion on rear shocks since mine are trash. I took one of them apart and the damper is toast.
I thought of these https://www.squaremotorcycleparts.c...-absorbers-honda-cb350-cb-350-1972-1973-317mm
Are they the correct length and what length options do I have?
Edit:
I thought initially that the connector in the last picture is where I connect the reg/rec.
I got the engine in the frame!
After that, I just started putting anything I could on the bike, so I started routing the wiring harness (I got a new one from Niche Cycles) and wanted to connect Rick's Reg/Rec. I'm using the original stator.
Link to Instructions
Now, it says to replace the round connector from the stator with a provided rectangular one. I just want to make sure before I cut anything.
So I'm supposed to cut here?

And connect the pink, yellow, and white to the three whites on the reg/rec?

And if so, what am I supposed to do with this:

I thought initially that the connector in the last picture is where I connect the reg/rec.
I got the engine in the frame!
After that, I just started putting anything I could on the bike, so I started routing the wiring harness (I got a new one from Niche Cycles) and wanted to connect Rick's Reg/Rec. I'm using the original stator.
Link to Instructions
Now, it says to replace the round connector from the stator with a provided rectangular one. I just want to make sure before I cut anything.
So I'm supposed to cut here?
And connect the pink, yellow, and white to the three whites on the reg/rec?
And if so, what am I supposed to do with this:
Last edited:
RobMan
Veteran Member
As dirty as those wires are and the colors are probably faded I would make sure of the pin out on the round connector before I cut it.
Thanks for the tip! If I strip the cover there are better colored areasAs dirty as those wires are and the colors are probably faded I would make sure of the pin out on the round connector before I cut it.

Really exciting update!
Put on both wheels but I’m having a weird issue with the front wheel. It’s like the right fork tube is sitting to far away.
I'm missing the front oil seal on the spacer side of the hub (waiting on it to arrive)


Put on both wheels but I’m having a weird issue with the front wheel. It’s like the right fork tube is sitting to far away.
I'm missing the front oil seal on the spacer side of the hub (waiting on it to arrive)
Last edited:
Looks like the axle is in backwards. Also, the lower cut side of the clamps on the forks seems to facing the wrong way on at least one side. The shorter side goes to the rear. Edit: maybe not, I noticed the picture is upside down, fork drain bolt is on the same side

Yes, the axle is backwards. But not the cause of the gap.
I suspect one or both fork tubes are bent. Support the bike, loosen the upper and lower clamping bolts on the triples. Rotate on fork tube and see if the gap changes, if not repeat on the other tube. No need to removed the sliders to do this check.
I suspect one or both fork tubes are bent. Support the bike, loosen the upper and lower clamping bolts on the triples. Rotate on fork tube and see if the gap changes, if not repeat on the other tube. No need to removed the sliders to do this check.
I have the axle going in from the right side of the bike to the left with the spacer on the right side and the axle nut on the left side.Looks like the axle is in backwards.
I have the axle going in from the right side of the bike to the left with the spacer on the right side and the axle nut on the left side.
This correct

You where right! They're both a little bent... how bad is that?Yes, the axle is backwards. But not the cause of the gap.
I suspect one or both fork tubes are bent. Support the bike, loosen the upper and lower clamping bolts on the triples. Rotate on fork tube and see if the gap changes, if not repeat on the other tube. No need to removed the sliders to do this check.
Not good, I can tell you that. Upper fork tubes can be straightened by a professional machinist with a press, v-blocks and dial indicator, but you can't ever get the front end right if you don't either replace them with good used or get them straightened.You where right! They're both a little bent... how bad is that?
If used as is the sliders will bind traveling up/down which temporarily locks the suspension, not a good thing.You where right! They're both a little bent... how bad is that?
crazypj
Veteran Member
- Joined
- Jun 5, 2020
- Total Posts
- 1,550
- Total likes
- 997
Back in the day 'we' straightened fork tubes on a very regular basis, no point scrapping slightly curved pieces (insurance companies often wouldn't pay for new tubes unless there was 'major' damage)
It isn't that difficult as 70's bikes had quite thick tubes, 4~5mm wall thickness, plus, they are spring steel so you have to 'over bend', they spring back quite a lot.
Before starting, check area that clamps in yoke.
If you have sharp edge, tubes are scrap although yours are more curved by the look of things (I'm sure you would have noticed a line that wouldn't clean off? )
Use ~2mm alloy sheet on V-blocks and an alloy press head (or just a piece with shallow groove )
You can get them within a few thousandths without a DTI but it does make life a lot easier for the last bit.
It's best to strip forks as sliders can get damaged, but, they won't be bent at lower end as it was supported by slider so bending always happens around 4"~5" away from bottom (basically, don't have fork tube lower end on V-block, make sure it's at least 4" over when checking or pressing.
Pretty much anyone with a manual press can do it (pneumatic or electric needs someone with a lot more experience)
Just make sure everything has radius on edges, sharp corners on steel will cause damage.
Oh, those fork tubes are same as CB360 or CB400F, 33mm dia.
You can also use 1978 CX 500 forks, '79 they were larger diameter
Yep, I've been 125 mph (once to 140) on forks that were straightened by my father and his home-made press many times, on many different bikes including my '75 Gold Wing and my '79 CBX along with a couple of CB750s, no harm in it at all.Back in the day 'we' straightened fork tubes on a very regular basis, no point scrapping slightly curved pieces (insurance companies often wouldn't pay for new tubes unless there was 'major' damage)
It isn't that difficult as 70's bikes had quite thick tubes, 4~5mm wall thickness, plus, they are spring steel so you have to 'over bend', they spring back quite a lot.
Before starting, check area that clamps in yoke.
If you have sharp edge, tubes are scrap although yours are more curved by the look of things (I'm sure you would have noticed a line that wouldn't clean off? )
Use ~2mm alloy sheet on V-blocks and an alloy press head (or just a piece with shallow groove )
You can get them within a few thousandths without a DTI but it does make life a lot easier for the last bit.
It's best to strip forks as sliders can get damaged, but, they won't be bent at lower end as it was supported by slider so bending always happens around 4"~5" away from bottom (basically, don't have fork tube lower end on V-block, make sure it's at least 4" over when checking or pressing.
Pretty much anyone with a manual press can do it (pneumatic or electric needs someone with a lot more experience)
Just make sure everything has radius on edges, sharp corners on steel will cause damage.
Oh, those fork tubes are same as CB360 or CB400F, 33mm dia.
You can also use 1978 CX 500 forks, '79 they were larger diameter
Found out the 4 holes on the frame for the foot pegs bar were stripped. I found a thread where someone tapped them to a M10 bolt and did just that!
I also took the forks off and removed the tubes. Gonna try to straighten them tomorrow with a manual press. Wish me luck!


I also took the forks off and removed the tubes. Gonna try to straighten them tomorrow with a manual press. Wish me luck!
Attachments
Last edited:
I’m preparing the wire for the negative battery terminal to ground and I saw all kinds of references saying 6, 8 or 10 gauge wires. I found this chart and just wanted to make sure I understand. I don’t have the original ground cable. So what would be the diameter of the cable? I got one that’s 5 mm. I do have the original electric starter cable to compare to if that helps.


That looks to be 4AWG or the metric equivalent. Looks perfect for the ground cable and starter, particularly if you're moving the battery. You could probably get away with 6AWG or 8AWG, but the peak amp output of the battery could cook those on a longer run.
I can't find a battery that'll fit the space under the seat cowl, I wanted to slide it in a 45-degree angel as shown in the image below. What options do I have? I currently have Rick's rec/reg that doesn't support lithium-ion batteries. From what I saw the original battery was a 12v 12ah and I can't find an agm/gell/sla battery that'll fit. I measured the max dimensions I can put in which are:
Length: 14.5 cm (5.7")
Width: 7.5 (2.95")
Height: 16.5 cm (6.49")
I'm open to changing to lithium-ion if you guys recommend it. Also, read a little about lifepo4 batteries.


Length: 14.5 cm (5.7")
Width: 7.5 (2.95")
Height: 16.5 cm (6.49")
I'm open to changing to lithium-ion if you guys recommend it. Also, read a little about lifepo4 batteries.
Ran into a hiccup, I got the shocks today and had to put them straight on! I discovered in the process that the PO built the seat hoop without taking into consideration the rear wheel  so I'm gonna have to cut it off, make a seat hoop, and create a new seat.

so I'm gonna have to cut it off, make a seat hoop, and create a new seat.Yeah it was built to fit a complete seat that I got with the bike but I’ll use this opportunity to change to a brat-style seat. The saddest part is that the frame’s already powdered coated so I’ll probably create the seat hoop and paint just that part with a rattle canOuch. Yeah, you're going to need more than 6CM of rear wheel travel. You can probably get away with cutting it off and welding back on at an angle. Sucks if you've already made the seat pan as well.
Hey guys!
I've got to the point where I can start it!
I have spark (I checked both spark plugs on both sides)
I put fuel in the tank, and I think I'm getting fuel in the cylinders (The spark plugs are dry but smell a little like fuel)
I'm trying to kickstart it and it won't start. I also hear this hiss of air blowing from the left side of the engine...
I also think I drained my battery a little, it's showing 8.7 V, but if I'm not mistaken, that's fine if I'm trying to kickstart it. Right?
Attemped start video -> https://vimeo.com/1065600835?share=copy#t=0
Actually, at only 8.7v the coils won't produce string enough spark to run, and the charging system won't bring it back unless it runs above 2500 to 3000 rpm for a while and you can't do that sitting still.
I figured I should charge the battery anyway but good to know! What would be the minimum voltage needed?Actually, at only 8.7v the coils won't produce string enough spark to run, and the charging system won't bring it back unless it runs above 2500 to 3000 rpm for a while and you can't do that sitting still.
Really, the coils perform best with at least 12v and your battery should sit at a minimum of 12.6 when fully charged after resting at least a half hour. They'll spark as low as about 11v but are usually hard to start like that (kickstarter, obviously) so if the bike isn't in good tune, it might not.I figured I should charge the battery anyway but good to know! What would be the minimum voltage needed?
I noticed when you were kicking it over that the kill switch was in the off position.
I must've hit it at the end cause I made sure it was in the on positionI noticed when you were kicking it over that the kill switch was in the off position.
Any other things to check? My choke levers on the mikunis are in the pressed down position so basically pulling the choke up.
I charged the battery now and connected it to the bike, it's having difficulty turning the motor. The battery dropped back to 12v (after I charged it), so charged it again (got to 12.77 V) and I tried just kicking and after a few kicks that nothing changed the kickstarter now has no resistance. I'm able to shift between 1st and neutral.
Video of trying with the electric starter
Last edited:
Even though the battery holds a static charge of 12 volts it may still be bad. You need to have it load tested. You can get a pretty decent idea of the state of the battery by monitoring the voltage as you crank the starter. If the voltage drops below 10 volts or so while cranking it’s probably toast.
I’ll go replace it, I still have a warranty on it.
What should I do with the kickstarter?
Its not engaging…
Video of kickstarter
What should I do with the kickstarter?
Its not engaging…
Video of kickstarter
mike in idaho
Veteran Member
Kinda looks like you need to split the cases to fix it.


Seems like the circlip came off the inner end of it then. Important to note that when you replace the circlip, you should make sure that the squared-edged side goes outward. Because of the manufacturing process, circlips have a rounded-edged side and a squared-edged side and if you put the rounded side outward the clip can come out of the groove under the load of kickstarting.Yeah I just managed to pull out the kickstarter from the side
I held it in my hand was like f***

Thanks so much for all the help I really appreciate it!
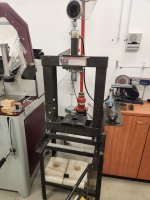
I came ack today to take the engine out of the frame and apart! I'm now trying to split the cases, but it's proving challenging. Last time I sealed them with ThreeBond.
those guys in Houston just released a series of videos taking one of these apart, and they're saying to hit the two ledges in the front and back with a punch. The guy did it in one blow for each side, and mine's not moving after a little more than one. I also tried whacking it with a rubber mallet but still had no luck.
Also, I'd love your guys' opinions on my camshaft and rockers.


I came ack today to take the engine out of the frame and apart! I'm now trying to split the cases, but it's proving challenging. Last time I sealed them with ThreeBond.
those guys in Houston just released a series of videos taking one of these apart, and they're saying to hit the two ledges in the front and back with a punch. The guy did it in one blow for each side, and mine's not moving after a little more than one
. I also tried whacking it with a rubber mallet but still had no luck.Also, I'd love your guys' opinions on my camshaft and rockers.
Cam and rockers all need to be repaired or replaced.
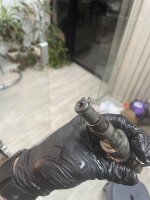
 seems like the circlip is a little bent… no chance it’s going back in
Any recommendations on someone who does this?Cam and rockers all need to be repaired or replaced.