• Don't overlook our Welcome Package, it contains many links to important and helpful information about functions at VHT like posting pictures and sending PMs (private messages), as well as finding the parts you need.

    AD

Rickman CL175…a true Metisse!

Hopefully an improvement, ha!
Have to finish the rear hub, it has 50 yrs of accumulated and hardened yuck. Had to use a file as a scraper on some of it. Once that’s done, I can start lacing and truing. Mama not gonna be happy when I take over the living room on icky weather days. Still, she is used to my ways, sorta, and I’ll pay later. Life’s good.
 
Good Grief, I hadn't realised that those Mutt atrocities had made it across the pond. Assembled in Birmingham UK from Chinese parts, selling 125cc bikes on Chinese knobbly tyres to inexperienced youngsters, recipe for disaster on cold wet UK tarmac. Thoroughly nasty things, again just IMHO.
I was going to comment on the stupid tyre size fitted but I see your already on it
:cool:
 
@crazypj Yeah, I am so not a fan of the Fatboy look, ugh. The rims are wm1-21 x wm2-18. Also, I tried fitting the Mutt gas tank on the Metisse framd and it's a no-go. Will figure out something else, eventually.
 
Laying out the spokes for the rear wheel. Inner/outer and right/left (or short and long for an asymmetrical hub)
IMG_2457.jpeg
 
Well, both rims are from Thailand as is the rear spoke set - they’re plated steel and fit well.
The front spokes are from Sweden and are stainless steel. Cross-center.com

Quality of it all is very good.

Each wheel weighs 8.5lbs, bare as shown (without rubber, brakes, axles).
 
Well, both rims are from Thailand as is the rear spoke set - they’re plated steel and fit well.
The front spokes are from Sweden and are stainless steel. Cross-center.com

Quality of it all is very good.

Each wheel weighs 8.5lbs, bare as shown (without rubber, brakes, axles).
Nice. I want to get building on my alloys for the 160. Good winter project inside.
 
IMG_2483.jpeg
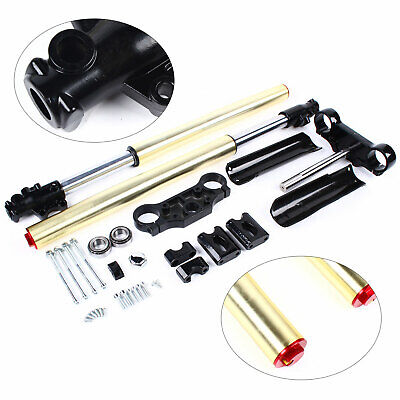
Some progress, head bearings in and triples mounted. Some adjustment still needed but the heavy work is done.
 
The forks are sourced from China, through a US importer…I think.

I mentioned in an earlier post that finding a nice, useable (I.e. good chrome) set of used forks was stupid money. Found these on eBay, along with shock absorbers and here we are. Forks and shocks (fully adjustable I might add) for less than a bad set of mini Ceriani MX.
 
I am not familiar with the frame name and this is my first time hearing about the material and design parameters. With your title Jay I thought it was an "Old Masters" piece of artwork. Once your finished, I see it will be that and more with the new forks and rims your already adding! I will assume the pistons and rings are for this build? Hopefully they will work for you and looking forward to your the progress on the bike.
 
I thought that I was reasonably well informed, but that 'Adelaide' engine is one I'd never heard or read about, amazed that I've not seen it mentioned in the classic bike magazines.

Reminds me of a Honda design !

metisse.JPG
 
Happy New Year ya bunch’a knuckleheads! I’m glad to know ya.

Had time over the holidays to find a way to spend more money. So, I bought a wheel truing stand. To true my wheels I’m approaching this legitimately - something I’ve never done, always making do with an axle clamped in a vice and some shaky pointer, indicator mount or some such. I embarrass myself and my profession.

I put together this low cost item (how bad can it be?) thinking I can “true” my wheels 36 ways in 3 dimensions to arrive with wheels that spin true and accommodate any errors of pitch, roll and yaw. It turns out after two hours of fiddling per wheel that 1/16” (1.5mm) runout is the best these rims can deliver.

The fixture axle shaft has .015” runout which doesn’t help anything either. The good thing is the whole thing is rigid enough that manhandling the wheels/spokes doesn’t adversely affect my indicator mounting. Really I had the spokes tight and within the 1/16” in 30 minutes but chased my tail and other adjustments to marginally improve.

My take away is it’s a dirt bike for crying out loud, sheesh. Don’t get yer knickers in a knot is my self talk.

IMG_2562.jpeg
 
Happy New Year ya bunch’a knuckleheads! I’m glad to know ya.
And Happy New Year to you too, we're knucklehead brothers. :)

My take away is it’s a dirt bike for crying out loud, sheesh.
Exactly. While it's unlikely you'd ever feel that on a street bike, it's a guarantee you won't on a dirt bike. Even one with a heavy twin cylinder 4 stroke 175 engine.
 
An eBay purchase, I was looking for a low cost better way to support the wheel. My indicator stands are all magnetic so it also had to be steel. Cost was $45 with shipping included and I’m generally happy with it. I dont build wheels all that often any more but when it is needed, the stand is a much nicer tool.
 
There is another thread on wheel building where they talked about symmetric and asymmetric or offset wheels. For this build I won’t have that problem as I have not fit or aligned the wheels into the frame. That is, the wheel spacers.

To be sure, perfect alignment isn’t required, it’d be nice, but not required. Some years ago frame designer/builder Rob North built factory race Triumph Trident frames with what I was told some 1/2” offset in the wheel track. (This was from Aussie racer and frame builder Kelvin Franks at his shop in Anaheim) The result was the bikes turned ever so slightly better one way over the other and the riders adapted accordingly, and still won races.
 
Last edited:
Has anyone used a combo tach/speedo gauge from AliExpress?

Looking at this: https://www.aliexpress.us/item/3256...hpYiLLdE&utparam-url=scene:search|query_from:

The original Metisse Micro used a speedometer/odometer for enduro's and street use. I'm vascillating between the above, and this one:

As you can tell, my requirements revolve mostly around cost as building a bike from scratch is kinda really spendy. Still, found a useable gas tank for a really good price, should arrive next week (it was so good I used Craigslist out of my area).
 
Still brazing motor mounts. I have a TIG welder but as this frame was brazed, I resurrected an old BernzOmatic rig. It uses Mapp gas and Oxygen cylinders. The oxy cylinders are low, low pressure and don't last long so I've had to re-order at the 1/2 way point.

My other dilemma is finding a vapor blaster or building one. the local services do good work but they're horribly expensive.....over $150 for just engine cases. Of course I need every surface blasted so thats a no-go right off the bat. The aluminum is pretty gross and the sheer acerage needed to do by hand is daunting, also a no-go. what to do? are there total loss soda blasters?
 
Wish I could offer some usable suggestions. I've never spent the dollars for any blasting, it's all expensive. I got some quotes to get my drag bike frame just sandblasted and it was outrageous, so I did the best I could with various drill attachments. But when it comes to corroded aluminum I know what you mean.
 
Back
Top Bottom