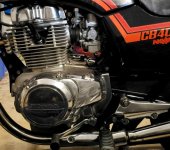
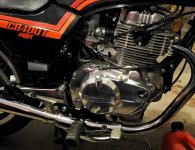
If it wasn't mentioned yet, and/or if you're not as familiar, you should put a box fan on the engine while dong the carbs with vacuum gauges or adjusting mixtures, to help keep even temperature as it affects adjustments. Plus the engine is air-cooled of course, so also to avoid overheating. Since you're in Canada, depending on the ambient temp you might not need one though... and, in case you weren't aware, valve adjustments should be made when the engine is stone cold, like overnight cold.I now have an inline filter in place that works and doesn't leak, should be fine for vibration, and not rubbing on things.
the idle mixture is adjusted also, (a few times).
and I also set the vacuum between the 2 carbs to synchronize them.
it is running pretty good now.
next............
set and check the valves.
bob
-
Don't overlook our Welcome Package, it contains many links to important and helpful information about functions at VHT like posting pictures and sending PMs (private messages), as well as finding the parts you need.
AD
You are using an out of date browser. It may not display this or other websites correctly.
You should upgrade or use an alternative browser.
You should upgrade or use an alternative browser.
Carb repair CB400T
- Thread starter Bobs twin
- Start date
If you decide you want to clean the tank you might read thru this thread https://www.vintagehondatwins.com/forums/index.php?threads/bilt-hamber-deox-c.7893/
Maraakate
Veteran Member
When you do the valves it's better to set them slightly looser than tighter. Do the "go-no-go" method. For example if a 0.006" fits but a 0.007" doesn't then it's set at 0.006". Check it again after you tighten you may see that it ends up being tighter. Similar to tightening a drive chain.
Make sure you get a new valve cover gasket and valve cover bolt grommets. Otherwise you will get leaks. Don't bother with the aftermarket ones, they all seem to leak. When putting the new gasket on use some wheel bearing grease or some oil on the gasket to help it stay in place but also to help it from burning up. I do the same for the grommets, though that tends to be a little overboard... however won't hurt anything.
Honda OEM Part Numbers for you:
12328-413-000 - Valve Cover Gasket (1 needed)
90441-413-830 - Valve Cover Bolt Grommets (2 needed)
You can order these from your local dealer or from Partszilla.com. Either are good choices. Will cost about $35-$40.
Bobs twin
Veteran Member
Thanks for the excellent information!When you do the valves it's better to set them slightly looser than tighter. Do the "go-no-go" method. For example if a 0.006" fits but a 0.007" doesn't then it's set at 0.006". Check it again after you tighten you may see that it ends up being tighter. Similar to tightening a drive chain.
Make sure you get a new valve cover gasket and valve cover bolt grommets. Otherwise you will get leaks. Don't bother with the aftermarket ones, they all seem to leak. When putting the new gasket on use some wheel bearing grease or some oil on the gasket to help it stay in place but also to help it from burning up. I do the same for the grommets, though that tends to be a little overboard... however won't hurt anything.
Honda OEM Part Numbers for you:
12328-413-000 - Valve Cover Gasket (1 needed)
90441-413-830 - Valve Cover Bolt Grommets (2 needed)
You can order these from your local dealer or from Partszilla.com. Either are good choices. Will cost about $35-$40.
I ordered a valve cover gasket from Parts N More and it should be hear in a few days. I've just sent a request to Partszilla asking about their projected shipping costs to where I am in Canada.
Bob
Bobs twin
Veteran Member
Thanks for the thread Jim, and excellent read for sure. For now I am going to try using the petcock fine screen and the additional inline filter that I now have in place. When I get it on the road I will ride it and check a few times to see how much sediment is being trapped.If you decide you want to clean the tank you might read thru this thread https://www.vintagehondatwins.com/forums/index.php?threads/bilt-hamber-deox-c.7893/
Bob
Great work so far on the project and getting the carbs sorted. The tune up of valves and points set etc should occur first and the carb sync should be the last function done in the sequence for future reference.
It sounds like your well on your way to having a great running bike when the weather improves and riding season begins again
It sounds like your well on your way to having a great running bike when the weather improves and riding season begins again
Bobs twin
Veteran Member
Thanks, I am looking forward to riding this summer.Great work so far on the project and getting the carbs sorted. The tune up of valves and points set etc should occur first and the carb sync should be the last function done in the sequence for future reference.
It sounds like your well on your way to having a great running bike when the weather improves and riding season begins again
Bob
Bobs twin
Veteran Member
I just called our local Honda dealer and he has the grommets.When you do the valves it's better to set them slightly looser than tighter. Do the "go-no-go" method. For example if a 0.006" fits but a 0.007" doesn't then it's set at 0.006". Check it again after you tighten you may see that it ends up being tighter. Similar to tightening a drive chain.
Make sure you get a new valve cover gasket and valve cover bolt grommets. Otherwise you will get leaks. Don't bother with the aftermarket ones, they all seem to leak. When putting the new gasket on use some wheel bearing grease or some oil on the gasket to help it stay in place but also to help it from burning up. I do the same for the grommets, though that tends to be a little overboard... however won't hurt anything.
Honda OEM Part Numbers for you:
12328-413-000 - Valve Cover Gasket (1 needed)
90441-413-830 - Valve Cover Bolt Grommets (2 needed)
You can order these from your local dealer or from Partszilla.com. Either are good choices. Will cost about $35-$40.
the cover gasket should be here this week.
moving forward!
bob
Maraakate
Veteran Member
If you're doing the whole tuneup and heading to the dealer they will have genuine ngk d8ea spark plugs and they'll be cheaper than ordering online.I just called our local Honda dealer and he has the grommets.
the cover gasket should be here this week.
moving forward!
bob
Bobs twin
Veteran Member
I replaced the plugs a few months back, I did that before the carbs were attempted.If you're doing the whole tuneup and heading to the dealer they will have genuine ngk d8ea spark plugs and they'll be cheaper than ordering online.
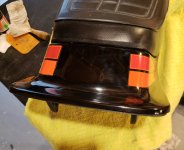
I also repaired the split in the wing the other day and touched up the missing bit of decal while I was at it.
Valve lash is in my near future.
Bob
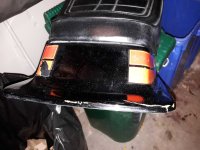
Bobs twin
Veteran Member
I replaced the plugs a few months back, I did that before the carbs were attempted.
I also repaired the split in the wing the other day and touched up the missing bit of decal while I was at it.
Valve lash is in my near future.
BobView attachment 29608View attachment 29609
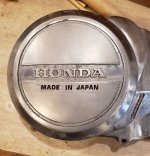 I've started to try to clean up the engine cases and I'm finding that they do not clean up in a way that I am used to. I've used the same process that I've used in the past on cases but I am not getting the same result? I've watched a few videos online and they seem to use wire wheels, which I've never used before. Any suggestions?
Bob
ballbearian
Veteran Member
I use wire wheels with a very light touch but never a new wheel. When the bristles lay over at an angle (get broken in) they gouge a whole lot less. In the end you'll end up sanding with 1000grit.
I really like these.
Either way, getting under the clear coat (stripper or sanding) to get rid of the dark stains is work.
I really like these.
Either way, getting under the clear coat (stripper or sanding) to get rid of the dark stains is work.
Boosted
Veteran Member
THE clear coat - yeah, aaaargh!... if only I knew about it before trying to restore the shine to my carb tops, which I gave up trying to do after over an hour with 3-5 polishes and still barely getting thru the clear coating... ..But, the next time I remove the rack...I use wire wheels with a very light touch but never a new wheel. When the bristles lay over at an angle (get broken in) they gouge a whole lot less. In the end you'll end up sanding with 1000grit.
Either way, getting under the clear coat (stripper or sanding) to get rid of the dark stains is work.
Bobs twin
Veteran Member
yes, I have been having fun removing the clear coat.THE clear coat - yeah, aaaargh!... if only I knew about it before trying to restore the shine to my carb tops, which I gave up trying to do after over an hour with 3-5 polishes and still barely getting thru the clear coating... ..But, the next time I remove the rack...
I have half of the stator side cover done.
I found that the wire brush approach was far too course.
I've been using 320-400-600-1000 grit wet paper.
takin a break.............
bob
Yeah, I think the clear coat is some sort of epoxy paint since it's so hard to get rid of it.yes, I have been having fun removing the clear coat.
I have half of the stator side cover done.
I found that the wire brush approach was far too course.
I've been using 320-400-600-1000 grit wet paper.
takin a break.............
bob
Bobs twin
Veteran Member
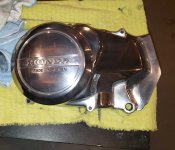
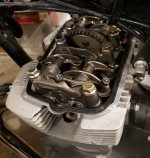
The valves are now set, they were all a few thou loose. I used the go-nogo approach, thanks for the guidance!Yeah, I think the clear coat is some sort of epoxy paint since it's so hard to get rid of it.
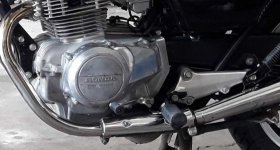
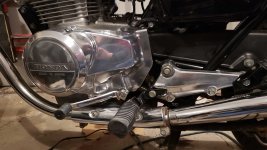
The case is now as polished as it is going to get, I will put it back on and polish it on the bike from time to time.
I tried many buffing approaches and found that 1000 grit worked best before you start using compound. I purchased some aircraft grade paint remover from our local auto paint supply and will try this, when the temp gets a bit higher, on the remaining covers.
Makin progress!
Bob
Bobs twin
Veteran Member
I am calling this done.The valves are now set, they were all a few thou loose. I used the go-nogo approach, thanks for the guidance!
The case is now as polished as it is going to get, I will put it back on and polish it on the bike from time to time.
I tried many buffing approaches and found that 1000 grit worked best before you start using compound. I purchased some aircraft grade paint remover from our local auto paint supply and will try this, when the temp gets a bit higher, on the remaining covers.
Makin progress!
BobView attachment 29900View attachment 29901
the more I look the more I find areas that would just take forever to get polished.
inside those fins is real bad..............
movin on!
bob
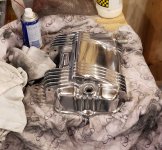
Well that's the shiniest valve cover I've ever seen, so I'd call it done too. Don't worry, the glare will distract most from seeing the little areas you're obsessing over. 
Bobs twin
Veteran Member
Check your mail, I'll be sending a load of parts for polishing. 
Boosted
Veteran Member
+1 on that opinion, and I'll add that it now looks chromed - WoW !Well that's the shiniest valve cover I've ever seen - Don't worry, the glare will distract most from seeing the little areas you're obsessing over.
Bobs twin
Veteran Member
Thanks guys!Check your mail, I'll be sending a load of parts for polishing.
I am now on the hunt for a muffler or two.
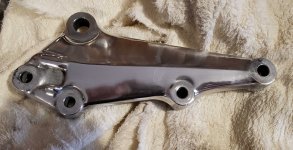
When I removed the brake side muffler/footpeg/brake pedal bracket I noticed that the bottom bend on the slip-on is rusted from the inside. Probably from sitting for so many years, and condensation. Any ideas on where I could find mufflers or a complete system for this 1981 Honda CB400T?
Bobs twin
Veteran Member
Bobs twin
Veteran Member
Congrats!She's alive!
now the real cleanup begins.
Bob
But, what exactly needs cleaning?? Oh yeah, maybe the garage after all that work. I mean, the bike looks fabulous.
Bobs twin
Veteran Member
Well, now that it's running I want to take some time to repair some paint scratches, clean the frame in areas hard to reach.Congrats!
But, what exactly needs cleaning?? Oh yeah, maybe the garage after all that work. I mean, the bike looks fabulous.
I have a lead on mufflers that the fellow says should fit this bike also, I am just waiting for more info.
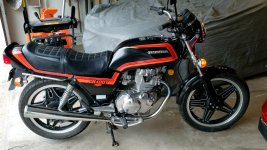
This was a screen shot from a short video where it is running.
Yes, I am a happy camper
bob
Bob to keep those shiny bits shiny try Autosol a German polishing compound in a tube from Cdn Tire. It will provide some protection against the elements if done on a semi regular basis.
Great results for a non buffing machine setup that normally uses buffing machines for those kind of results.
Great results for a non buffing machine setup that normally uses buffing machines for those kind of results.
Bobs twin
Veteran Member
Thanks for the tip, I head to CTC tpday to pick some up.Bob to keep those shiny bits shiny try Autosol a German polishing compound in a tube from Cdn Tire. It will provide some protection against the elements if done on a semi regular basis.
Great results for a non buffing machine setup that normally uses buffing machines for those kind of results.
I did pick up some Mothers aluminum polish, but the Autosol sounds like what I need.
bob
crazypj
Veteran Member
- Joined
- Jun 5, 2020
- Total Posts
- 1,015
- Total likes
- 405
Solvol Autosol may be better than Mothers?
If you can find it, there is a 'discount'(?) metal polish which is even finer from MET-ALL Industries.
Very corny package 'High Performance Racing Polish' which is actually very very good.
I bought 5~6 tubes in a dollar store years ago, gave some away and down to last one now.
The web site is terrible though
Boosted
Veteran Member
All this polish chatter got me to recall one of the products in my horde of metal polishes.
It's a creamy blue liquid in a squeezable bottle : BLUE MAGIC
My tubed pastes are pink and one's also from Deutscheland
It's a creamy blue liquid in a squeezable bottle : BLUE MAGIC
My tubed pastes are pink and one's also from Deutscheland
Bobs twin
Veteran Member
I managed to pick up some Autosol yesterday at CTC, I'll be a polishing again today!Solvol Autosol may be better than Mothers?
If you can find it, there is a 'discount'(?) metal polish which is even finer from MET-ALL Industries.
Very corny package 'High Performance Racing Polish' which is actually very very good.
I bought 5~6 tubes in a dollar store years ago, gave some away and down to last one now.
The web site is terrible though
Thanks again!
Bob
Bobs twin
Veteran Member
Bobs twin
Veteran Member
Time to pull the rear wheel and check the brakes. I will be taking it for a safety soon.well...........
the autosol treatment seems to have helped.
it seems to bring out the lustre and deepen the shine.
nice, and thanks!
bobView attachment 30379View attachment 30380
I've also ordered the exhaust gaskets for the mufflers, a friend gave me a set of Sportster slip-ons, and I am going to see if I can get the local muffler shop to make me a pair of swaged connectors to compensate for the different diameters.
bob
Bobs twin
Veteran Member
The bike is now safetied, insured, plated and on the road!
but............
I am getting sediment through the two filters that I have on the fuel line.
so...........
It looks like it's time to pull the tank and use the vinegar treatment, and pull the carbs one more time and clean them.
the left carb is showing that the idle adjustment is partially blocked, but this is my own fault!
I am getting close though, I can feel it!
bob
esh21167
Veteran Member
Were engine cases, side covers, other aluminum parts that shiny/glossy when factory new? I thought they were more of a matte finish. And the castings were never really that smooth in the cooling fins anyway.
I'm getting my 400A rear brake panel vapor honed this weekend to see what that looks like. I polished out the major road nicks/scrapes up to 400 grit, then up to fine Scotch-Brite. Didn't want high polish as I thought that was not the factory finish look. The vapor hone is my attempt to get a more uniform look without the directional marks of previous media.
I've had decent luck removing clear with Scotch-Brite and Citristrip, but it still takes a little elbow grease.
Bobs twin
Veteran Member
I don't think the original finish was a polish, when I was removing the epoxy it seemed like the original finish was a very fine brush, but it was bright. I polished them because I like the look, I am used to opld British bikes and they were a high polish. I also like the polish because it is easy to maintain, after three weeks of polishing that is. One member recommended Autosol, and this stuff is great! Anyway, I hope that your vapour honing works for you!Were engine cases, side covers, other aluminum parts that shiny/glossy when factory new? I thought they were more of a matte finish. And the castings were never really that smooth in the cooling fins anyway.
I'm getting my 400A rear brake panel vapor honed this weekend to see what that looks like. I polished out the major road nicks/scrapes up to 400 grit, then up to fine Scotch-Brite. Didn't want high polish as I thought that was not the factory finish look. The vapor hone is my attempt to get a more uniform look without the directional marks of previous media.
I've had decent luck removing clear with Scotch-Brite and Citristrip, but it still takes a little elbow grease.
Bob
Bobs twin
Veteran Member
I have a question?
I will be removing the carb set again to clean the idle circuits, using Jims approach to remove the pressed in metering jet. My question is, the last carb kits that I bought came with jets, they were from Sirius, but the idle jets were a bit larger. Now, the question, should I use the larger jets? The original jet was around .029" and the ones in the kits were a few thou larger, I'll have the measure them to see what they are. Any suggestions?
Bob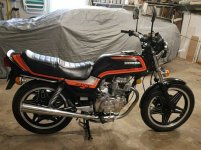

Bobs twin
Veteran Member
Bobs twin
Veteran Member
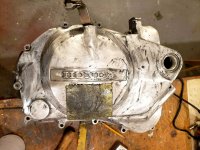
This was a pic of the sanding stage after I finished with the 220 wet paper, I was using 400 here. I then used 600, 1000, 1500, and 2000. After that I used a cotton buffing wheel with the green compound, dry. After that I used car paint rubbing compound, then Mothers aluminum polish. I finished with a hand polish using the Autosol, which brought out a deeper luster.I don't think the original finish was a polish, when I was removing the epoxy it seemed like the original finish was a very fine brush, but it was bright. I polished them because I like the look, I am used to opld British bikes and they were a high polish. I also like the polish because it is easy to maintain, after three weeks of polishing that is. One member recommended Autosol, and this stuff is great! Anyway, I hope that your vapour honing works for you!
Bob
I took many breaks!
Bob
Bobs twin
Veteran Member
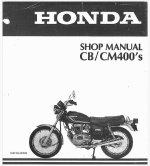
I found a 78-81 CB/CM400 service manual online. Is it something that may be useful to anyone?
Only problem is that I don't know how to add an attachment to this message?
Bob
Only problem is that I don't know how to add an attachment to this message?
Bob
We may well have the version you found in our library already (if it's a FSM [factory service manual] not aftermarket). You can't attach anything other than pictures to posts, but you can offer to email it to someone and get their information through PM (private message). If you post the title or a picture of the manual we can tell you if it's in the library, or you can go here to check.I found a 78-81 CB/CM400 service manual online. Is it something that may be useful to anyone?
Only problem is that I don't know how to add an attachment to this message?
Bob
Bobs twin
Veteran Member
I will attach two pics of the manual that I found.We may well have the version you found in our library already (if it's a FSM [factory service manual] not aftermarket). You can't attach anything other than pictures to posts, but you can offer to email it to someone and get their information through PM (private message). If you post the title or a picture of the manual we can tell you if it's in the library, or you can go here to check.
Bob
esh21167
Veteran Member
Same one referenced earlier: https://www.powermanuals.com/honda-cb400-cm400-1978-1981-service-manual-free-download/
Bobs twin
Veteran Member
OH, ok, thanks!Same one referenced earlier: https://www.powermanuals.com/honda-cb400-cm400-1978-1981-service-manual-free-download/
bob
I'm running the VB22 carbs on the road bike with a 75/118 jet combination. Power is good and fuel mileage is excellent.
Bobs twin
Veteran Member
Thanks, when I get them apart again I'll check what is installed.I'm running the VB22 carbs on the road bike with a 75/118 jet combination. Power is good and fuel mileage is excellent.
Bob
esh21167
Veteran Member
No worries!OH, ok, thanks!
bob
Bobs twin
Veteran Member
looks like the snow came back for a visit, maybe tomorrow will be a better day for vinegar and carb work.No worries!
Bob
Bobs twin
Veteran Member
OK, I will apologize up from for being an ol guy, and a Canadian, and a tradesman that only thinks in Imperial measure.
But..............
I believe when the jet size is given as a "75", does this mean that it is .75 millimeters in diameter, or .0295"?
and.........
A 118 jet would be 1.18 millimeters which would be .0465"?
Again, I apologize, I'm not familiar with these jet sizes, I am more familiar with Holley jets, and they are straight forward, well at least they were 40 years ago.......
Bob
Bobs twin
Veteran Member
I just did some checking and my jets are 70 and 110, which is probably the stock sizes.
The dealership is open tomorrow so I will call and order 75 and 118 jets, as I do not have a .029" drill.
I have confirmed that 70 means .7 millimeters, so I oppologise again for my confusion here, ol guy......
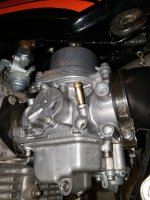
Also, I am assuming, as I haven't seen any info on jet placement, and as they both have the same thread, that the primary is 75 and the secondary is 118, is this correct?
Still trying to figure out a decent filter system to put on the bike.
I am going to make 2 small 90deg fittings, this may help.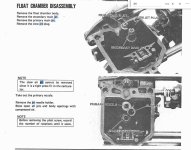
Bob
The dealership is open tomorrow so I will call and order 75 and 118 jets, as I do not have a .029" drill.
I have confirmed that 70 means .7 millimeters, so I oppologise again for my confusion here, ol guy......
Also, I am assuming, as I haven't seen any info on jet placement, and as they both have the same thread, that the primary is 75 and the secondary is 118, is this correct?
Still trying to figure out a decent filter system to put on the bike.
I am going to make 2 small 90deg fittings, this may help.


Bob


