Steering stem removal

teebo

Veteran Member
Joined
Dec 5, 2021
Total Posts
2,302
Total likes
762
Location
Oklahoma City
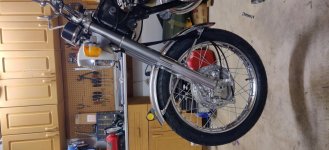
What is the magic trick on removal? Specifically the damper knob and nut? The FSM gives little instruction.

I can't even turn the damper knob. Like at all. I don't want to apply too much torque because maybe it's just jammed or rusted.
 
You want to be careful with the knob, if you force it to turn it may well come loose from the shaft (rod) holding it all together and since it's of the old school bakelite variety it could well also crumble at the area of attachment. There's a cotter pin or hitch pin clip through the rod at the bottom and then the "nut" unscrews from it, but holding the rod will be the challenge. I've never disassembled one but this is the fiche showing the assembly of parts. I'd spray it liberally with penetrant and let it soak as long as possible before attempting, that will give you time to think of a creative way to hold the rod from turning so the knob doesn't have to do that job under high risk.

honda-cb350k0-super-sport-1968-usa-steering-stem_bigma000103f05_db9e.jpg
 
Never mind. The PB Blaster and some heat broke it loose. Screwed right out. Fair amount of surface rust on the lower bits.
 
Thanks ancientdad. I didn't even know what that did until just now since it hasn't turned since I got it. Lol
 
Are the friction disks on the lower end intended to run dry or should they be lubricated? I removed the rust with steel wool.
 
Is there anything particular to look for with the 1/4" stem bearings? Stainless 304 ok?

Asking for a friend.
 
Are the friction disks on the lower end intended to run dry or should they be lubricated? I removed the rust with steel wool.

Dry as far as I know

Is there anything particular to look for with the 1/4" stem bearings? Stainless 304 ok?

Asking for a friend.

Look for dimples in the bearing races and/or flat spots on the balls. Personally I'd replace with modern tapered bearings, AllBalls Racing sells kits to convert it and you'll never touch them again as well as never suffer "notchy" steering again. If you've ever ridden a vintage bike that used individual balls and races with any issues, you'd know exactly what I mean... makes low speed turning difficult and riding slow in a straight line challenging if bad enough
 
As a note to future people reading this...

The combined effort to get the steering stem apart is not trivial. The entire front of the bike is off. Individually each step isn't bad. Just not something you'd likely want to repeat often.

Just cleaning up the races and bearings took a chunk of time. And... While I didn't feel it before the rebuild, there were some small dimples in the lower race. I could feel a slight "grit" as I turned the stem. It was also tedious to repack the bearings.

I did it just for the experience. Had I known, I would have just ordered the newer style bearings to begin with.
 
You probably didn't feel it because the adjustment was on the loose side, properly adjusted put slight tension on the balls so it would be more noticeable
 
Makes sense. I figured that since this is likely the first time since the factory it's been apart, and what passed for "grease" was hiding it. I mean the grease was more like chewing gum.
 
Thanks. Fingers crossed it goes easier.

Got the 3 old races off easy though.
 
Before you toss the old bearing races put them back together with the balls between them to compare them to the height of the new ones. You may need to add or subtract a spacer to get the new bearing stack to match the thickness of the old one.
 
This isn't easily done but slop some grease on the races and it'll go much easier.


I'm curious, 3 old races? Not 4?

An easy trick for getting the race off the steering stem is to notch it with a Dremmel cutting wheel, tap a screwdriver into the cut, and twist until you hear it break. It'll then slip off but will be in good enough shape to reconstruct with the balls and upper race to measure and decide which spacer to use.
 
Would you believe they already arrived? Amazon is the bomb.

Yes. According to the instructions and the previous posts pics, I use the thinner spacer on the bottom. It's about .5mm-ish difference.

So according to all appearances this will work. Instructions are never wrong, right?
 
Would you believe they already arrived? Amazon is the bomb.

Yes. According to the instructions and the previous posts pics, I use the thinner spacer on the bottom. It's about .5mm-ish difference.

So according to all appearances this will work. Instructions are never wrong, right?

And if it's on the internet it must be true too. :dizzy: Just take note of what Jim had to do, it doesn't always go according to plan and that's why I posted the link for you.
 
And if it's on the internet it must be true too. :dizzy: Just take note of what Jim had to do, it doesn't always go according to plan and that's why I posted the link for you.

Yes, thank you. I read through that last night.
 
OK. Same thing as Jim. However, I did end up thinning up the bottom washer a bit. As well as grinding the tabs on the top nut. Didn't use the top washer at all.
 
This was a ton of work, but it's finally back together.

New tapered bearings, new brake shoes (and arced), polished drum panel, painted fork covers and headlight bucket, replaced all four stretched fork studs, new tire and tube.

And the steering damper works again!

After the other major parts are done, next pass will be updated fork springs and rear shocks. Now that I've done this, that will be a breeze. Wouldn't you know the FSM is of no help in figuring out how to get the forks back on because of those upper covers.

IMG_20211228_205956.jpg
 

Attachments

  • IMG_20211228_205956.jpg
    IMG_20211228_205956.jpg
    113 KB · Views: 4
Looks great, nice work there.
You're missing a cotter pin. See that small hole in the front brake cable clevis? That's for a cotter pin to lock the cable end in place.
 
Oh wow. Thanks. Didn't realize that.

Yep, this is a closer look at what and why. Also, did you adjust the two brake cams to pull at the exact same time? Double leading shoe brakes work great when both cams move simultaneously.

front brake cotter1.jpg front brake cotter2.jpg
 
Back
Top Bottom