911hillclimber
Veteran Member
Started this thread on the "other forum" as I was not aware of this site:
Rebuild of my English cb175K6, 1972
Rebuild of my English cb175K6, 1972
Last edited by a moderator:


")


Yes, but that's my mudguard, can't see them on Grahams ..
My rear fender is off a 71 USA bike, prob a CL not a UK CB, might answer the question?
Realy hadto ge a decet fender in theUKnow
Why does this forum mess with the typing after the first line every time? I have to keep on correcting almost every word.
I've had this once before several years ago on another forum, and it went away one day and never came back!
As a trial, I'm typing this on the thread on VHT but opened on Chrome, and this sentence is PERFECT!
Bad news for all is I'll write far far more...
Seems the prob is solved.
Note this line that appears above the Reply box.
NOTICE: We have detected you are using Chrome web browser. If the space bar does not work when entering text below press the Enter key first and the space bar should work again.


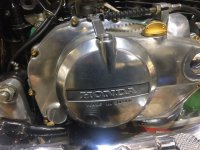
What would any of you do, cos 911’s engine looks great.

I used the allen head screws because they are stainless and I can get an even torque on them
but why did I sell it!


As to the cable brass block on the front brake? Goodness knows!
I just thought the 1972 bike might be different to my gold '76. All works so left it tbh.