1979 Honda CM400A tune up

AmiraliM

Member
Joined
May 23, 2023
Total Posts
25
Total likes
0
Location
Chicago, Illinois, USA
Hi guys,

I am going to use this thread to document my tune up of my CM400A.

I am hoping to do the following

1. Replace the chain
2. Replace both tires (they are from 1999)
3. Polish the chrome
4. Clean the brakes
5. Lube everything that needs to be lubed
6. Replace the front brake handle (it's bent)
7. Bleed the brake fluid and replace it
8. replace the fuel lines

Here is my shopping list. NB: I am hoping to buy everything from Amazon (even if it's more expensive) because I have Amazon gift cards from Xmas.


1. For the chain, I am considering the following

chain
or
chain
What do you guys think? One comes with the sprockets as well...
chain tool

2. For the tires, I am thinking tubeless tires will be easier to replace with only tire irons, and my bare hands. I am currently thinking this set is good - however, I am very much open to suggestions and tubes would not be a deal breaker.

3. For polishing metal and generally cleaning the bike, I am considering the following products
metal polisher
polishing pads
general motorcycle cleaner

4. Not really even sure I need to do this but I am considering this
brake cleaner

5. For lubing, I am probably just going to rely on WD40

6. Front brake handle

7. DOT4 brake fluid (or shall I buy DOT3 - what is the difference anyways?)

8. Fuel lines (1/4")

I am open to any and all suggestions.
 
So, I have to assume that you have had this bike for sometime and that it runs but is in need of some maintenance. While I understand buying from Amazon is convenient, I think you would be better off consulting vendors that specialize in motorcycle parts. Regarding the chain if you plan to replace it, you may want to replace the front and rear sprockets as well. Finding chains that are an exact fit for your bike can be tricky. I have found it easier to buy a chain and then cut it to length. Find a nearby NAPA store and go look at the polishing products they have. The brake cleaner you listed is also used for general parts cleaning. I would not use WD-40 for lubricating anything on the bike. You can use it to remove grime or clean things but buy the proper lubricants for your chain, your cables, etc. If there is a motorcycle shop near you, go there and look at their products. I bought a lot of parts and products from my local Honda shop. As for tires, bag the idea of doing the work yourself. Take if from me, " a cheap man always pays twice." You do not want to screw up those vintage wheels using hand tire tools. Determine what tires you want to buy, talk to a motorcycle shop and let them take off the old tires and put on the new. Also, don't be afraid to get tubed tires; that's what came on the bike. A motorcycle shop will have the fuel line you need and you can buy just what you need.
 
I would go with the D.I.D. chain plus this master link rather than the supplied rivet link https://www.amazon.com/D-I-D-Standa...fix=DID+530+master+link,automotive,216&sr=1-3
You will have to shorten that 110 link chain to fit, 102 links.
You may need sprockets, I'll suggest JT or SunStar brands, Bike Master and Parts Unlimited are good also
The Shinko 712 tires have a good reputation.
You need 5.5mm fuel hose, this stuff https://www.amazon.com/Genuine-Hond...e&qid=1686863494&sprefix=5.5mm,aps,313&sr=8-6 1/4" fuel line will require hose clamps and doesn't work well with the tight space.
 
Thanks for starting a project thread!

I agree with Denny, WD-40 is not a great lube. It is mostly Stoddard Fluid, aka deodorized kerosene, and as such makes a great chain cleaner- but it migrates and leaves dry patches, so not a great chain lube.

1/4" is not the right size fuel line, it should be 5.5mm, like this: https://4into1.com/genuine-honda-black-fuel-line-5-5mm-5-feet/

Valvoline makes a DOT4 that is DOT3 compatible. It's really the same stuff, to tighter specs.
 
I would recommend replacing the brake pads and shoes. They get old just like tires.
 
With pads I'd suspect just simple wearout, but with shoes there is the potential for the lining to become delaminated from the aluminum frame due to long-term corrosion. It's a hard thing to judge visually unless really obvious, so typically the recommendation is to replace them if they're original no matter what they look like.
 
You might also want to check out the condition of your front brake hose. If it's the original and you plan to upgrade the brake fluid, replacing the hose might be the wise thing to do. When you take the wheels off to get new tires, replacing the rear brake shoes is fairly easy. New tires, brakes, brake hose, chain and sprockets will make the bike a safer ride. Good luck!
 
You might also want to check out the condition of your front brake hose. If it's the original and you plan to upgrade the brake fluid, replacing the hose might be the wise thing to do. When you take the wheels off to get new tires, replacing the rear brake shoes is fairly easy. New tires, brakes, brake hose, chain and sprockets will make the bike a safer ride. Good luck!

Yep, I've had old ones (on a car) swell shut so you can apply the brakes but they won't release.
 
mines an 81 but if you replace the chain, you might as well do the sprockets too. my front brakes i bled with just gravity and time, had not bubbles on low end so just let it sit with the cover on by not air tight. air moved up and bled.
 
Hi guys!

The bike is finally running again and ready for its tune up.

First order of business is fixing the spaghetti mess of wires behind the headlight. Any tips? suggestions?

Also, do you guys know where this goes? It seems like it needs to be grounded to enable the front indicators to flash brightly.
IMG_6660.jpg


Here is picture of the bike before tune up

70916388402__ACF3BC34-7A43-4FFF-9B1E-BE4536DF45A1.jpg
 
Not sure what that is. It's not original. Are you able to trace it back to where it goes?

For lube the Maxima Chain Wax works pretty well. I just keep it next to where I park and put the bike on the centerstand and lube it every time. You can never oil the chain too much. For the control cables I use the PJ-1 Cable Lube.

When the bike is running there is a 10mm nut you loosen at the bottom of the cylinder. The bike will make noise, let it run like that for a second or two then retighten. This is the automatic adjuster for the cam chain. Do this every so often.

When the bike is stone cold from sitting over night take the valve cover off and the stator cover and do the valve clearances. It really matters a lot with the somewhat soft valves on these older bikes or they will wear rapidly. It's not hard to do, but you must do it. I do the valves at the oil change interval. For the Hondamatics just use Honda GN4 10W40. Some guys like Shell Rotella 15W40. That's fine too. Just don't use regular car oil in it. I've tried synthetic motorcycle oil in it before and had no benefit. You really have to change this oil every 1000-2000 miles because the oil is shared with the engine and transmission.

At the bottom of the bike there are two tubes that run to the airbox. Pull these plugs, likely some nasty stuff will come out so catch it with a mason jar or oil drain pan. Technically you should put the plugs back in and "purge" this every so often. Really, you can leave the plugs out. It was some late 70's EPA stuff to catch the blowby and have it get absorbed back into the system to burn off a second time. This doesn't work that well, ends up making your air filter get dirtier faster and puts a slime on the CV pistons in the carb. So just leave the plugs out and let it drain to the atmosphere. It won't affect running in a negative way.

Get new NGK plugs. I believe it's D8EA's on this bike, but double check your manual. Replace them every year.

Get a trickle charger and when the season is over keep it hooked up to the battery. Check it every so often to top off the liquid with distilled water (if using a wet acid battery).

It's easier just to put Sta-bil fuel stabilizer in it year round. If you just get into the habit of doing it at every fill up it will prevent you from the infinite amounts of pain you'll have to deal with cleaning the carbs. Drain the fuel out of the bowls at the end of the season. Empty the fuel tank as well. Put that gas in your car. Don't just run the bike until it runs out of gas. That won't help.

A good thing to do is change the brake fluid out every year. Because the brake system is so small and there's mostly rubber hoses it really absorbs that moisture and gets dark quick. If you let it go for 3+ years you might start getting leaks at the master cylinder. Usually the plunger. Or the brakes drag or squeal because there's a bunch of crud behind the piston in the caliper.

If you get very bored sometime pop the side covers off and clean each canon plug with electrical contact cleaner. Insert and remove the mating connectors a few times. Wait a minute or two for it to evaporate then put dielectric grease on the female connector. Do the same for the fuses and the plugs inside the headlight. This will help prevent unexpected wiring issues later. Pay extra close attention to the canon plug that has a red wire on it with fibreglass sheathing. This wire leads over to the right side cover and is under the rubber boot above the battery. If an old battery was sitting in it for a long time it likes to corrode this wire. Make sure you check this one because I've personally had it go bad about 10 years ago and all the lights went out. If it's badly corroded you will have to trim back until it's good and recrimp with the proper connectors, but if funds are low and you just want to get it running get 12 gauge wire and solder from one side, run it over the airbox, to the other side. That's what I had to do years ago when I was in my 20s and didn't have the proper tools.

There's a ground eyelet that's on the right mounting bolt of the CDI. I believe it leads to the killswitch, light switch or the headlamp. I can't recall which exactly, but make sure you scuff up where the eyelet meets the frame and that bolt. Smear a little bit of antiseize there as this stuff is made of aluminum and promotes electrical flow.

Take your turn signal lenses off. Look inside there make sure they're not corroded. Sometimes the gaskets fail and let water in there. Clean it up as best you can, smear dielectric grease on the bulbs and reinsert them. Below the bulbs there's a screw with a little square-like plate. Make sure it's in good shape, it completes the circuit for the turn signals. If it's corroded/rusty clean it up as best as you can and use antiseize to complete the circuit.


Whew, I knew that was a lot, but I think that's most of the pitfalls I've found over the years from a "new to me" vintage bike! :lol:
 
I've never used the Shinkos, just the Kenda Challengers because they're cheap and seem to hold up just fine. You have a 79 like me so you'll need to get new tubes with them as well. Just FYI if the tubes have two nuts make sure both nuts are on the OUTSIDE and the dished washer goes on the INSIDE. I actually paid a shop to do tires and tubes on a machine for me a couple of years ago and they left one nut on the inside and it eventually ruined the tube. Luckily I was 2 miles from the house so I just lugged it back home, but just make sure that doesn't happen to you.

I believe the Kenda Challengers are out of stock in most places now, so the Shinkos are one of the only options right now. For sprockets and chain, highly recommend you get a DID natural chain. It's 102 links and there's a couple of vendors on Amazon that have it already cut to length: https://www.amazon.com/chain-520-Did-102-Links-Standard-Open/dp/B000XY4SYM/. Don't get an O-Ring/X-Ring chain; it's a waste of money and they won't fit these older bikes. Don't get any cheap Amazon sprockets. Instead, Sunstar does have sprockets. They are pricey, but they are worth the expense. For some reason, their rear sprocket has been out of stock for quite some time. Another option is Sprocket Specialists. It's 16 teeth in the Front, 38 teeth in the rear: https://sprocketspecialists.com/product/front-sprocket/ and https://sprocketspecialists.com/product/rear-sprocket/.

Front Tube is: 120/80-18 - https://www.amazon.com/IRC-T20064-Standard-Tube-5-10-18/dp/B00230OFXS
Rear Tube is: 120/90-16 - https://www.amazon.com/Standard-Motorcycle-Inner-Tube-Kawasaki/dp/B073W2388S

If you must do the tire yourself make sure you get these tire irons, they're cheap and they work fine if you are careful: https://www.amazon.com/Motion-Pro-Tire-Iron-Piece/dp/B001DDD8E8. I highly recommend you just put the bike on the centerstand and put something under the front forks (like a cinder block with a blanket) so it doesn't fall over and just take the rims to a shop. They'll change the tire quickly and cheaply if you just bring them the rims, tubes, and tires. I only change mine myself in an emergency because it just takes too long without a machine and the chance of tube puncture goes up if you don't have a nice machine to do the work of removing the tire for you.

When you put the rear back on, get the chain aligned to the marks on the swingarm as best you can. Err a bit on the looser side, then snug tighten and check and see what you have. You'll find that most times the chain has tightened a bit. So going a bit looser will compensate for that and get you where you need to be. It's good to check alignment with a straight piece of metal like a long brass rod, but motion pro sells a tool just for this purpose that works well: https://www.amazon.com/Motion-Pro-08-0048-Chain-Alignment/dp/B000GTVOJQ. Once the chain slack and alignment is correct, spin the rear wheel and lock the rear brake. Then finish the tightening sequence. This will align the rear brakes better to the hub which helps with braking.

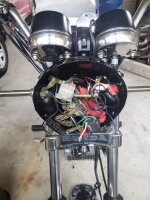
Forgot to mention, when you clean the fuse box spray the fuse ends and the their holders with contact cleaner then insert/remove multiple times and spin them around to clean it. Put some dielectric grease on the fuse ends. You just need a thin layer. Put them in the fuse holder and spin them around to distribute the grease. As long as the fuse holder isn't too dirty this should help prevent excessive resistance build up in the fuse box that will leave you stranded. Your bike looks very clean, so most of this should just be preventative maintenance for you.

Another thing to mention, check the oil weekly on the centerstand. Find out how much you lose. These bikes, especially the Hondamatics, are sensitive to low oil. You'll probably be losing some oil. This is normal, especially considering the bikes age with seals and gaskets, but make sure you keep it topped off. Running low on oil with the 400 twins will cause damage. It's not unusual to start putting miles on it and finding the shifter seal and kickstart seal start weeping some oil. You can replace these seals on the bike without having to open the engine if you are careful. Expect the valve cover mounting bolt grommets to start leaking oil at some point since they are old. The valve cover gasket itself may start leaking. If either of them do, get the OEM parts. Don't use RTV, it will ball up and get in the oil supply and ruin the bike.

Fork seals may eventually start leaking after a few months. You can do it yourself, but you will need a vice, a breaker bar, a pry bar or very long flathead screwdriver and the correct allen socket to do it. If you don't want to invest in all those tools, just take the tubes off and buy the seals and bring them to a shop to have them swap them out. Will be cheap if you just bring them the tubes ready to go. I recommend you DON'T use All Balls seals. They're just rebranded cheap Chinese seals. It seems hit or miss if they start leaking or not. You can still get the seals OEM, or take the seal size to a bearing supplier and get something decent. Fork Oil I just Honda SS7 from the dealer, but really you can use any brand of ~10W fork oil and it should work fine.

I know it's a lot of info to take in, but if you do all of these things most of it you really only have to do once. After that it's regular oil changes, valve clearance, chain slack, lubing, and cam chain tension from here on out and you can go many years with no problems.
 
As Frank said, the spade terminal you pictures is not original, someone either spliced that onto an OEM wire or it's on the end of some wire they added to the bike for whatever reason and you should track it down to a source before making a decision on what to do with it.

I can speak to Shinko tires, they're on my 450 at both ends and I've also run a Shinko rear tire on my previous VF110S Sabre, both great experiences with them. My 450 handles so much better than with the previous period-correct tires on it.

And to one other point of agreement with all above, these air cooled engines will consume a little oil even under normal riding so it's important to check the oil before every ride. As mentioned either while held vertically or on the centerstand, and with the dipstick simply set on the hole in the crankcase, not screwed in.
 
if you say that wire makes the turn signals work, it might be the ground that usually attaches to the inner headlight clamps. On mine, those U clamps hold the wiring harnesses in place and are held in place by the signal stems. I broke mine off to make more room in that area just grounded it to the stem.
 
turn signals

First order of business is fixing the spaghetti mess of wires behind the headlight. Any tips? suggestions?

Also, do you guys know where this goes? It seems like it needs to be grounded to enable the front indicators to flash brightly.

As AD said, that's not an OEM connector, it should be a metric bullet with a 2 stage open barrel crimp. I guess it is off of the turn signal light? Are those lights OEM or aftermarket?

The OEM turn signal lights have 3 wires. One ground, one for each filament (low/constant, high/blink).

I'm sorry, I only have a fuzzy CM400T FSM wiring diagram, and no text or wire colors are readable on it.

On my bike ('82 CM450E), the ground wire comes off of the bracket to the metal stem on either side, and both go to a double bullet female connector on a green wire. (My original headlight bucket is plastic.)

The other two wires from each turn signal, unhelpfully both black but with color marker rings on them, run into light-blue and light-blue/white on one side (Right) and orange and orange/white on the other (Left), which provide the positives for constant and blink. The dimmer filament is constant and the bright filament is blinker.
 
Made a small boo-boo. I keep thinking it's a 520 chain. It's not, it's 530. Here's a link to a 530 DID chain cut to 102 links with the master link clip you need: https://www.amazon.com/530-102-Standard-Chain-Connecting-Link/dp/B006O84RMO

Be mindful of the orientation of the master link clip. Make sure the closed end of the clip is pointing the direction the chain travels.
 
Don't get an O-Ring/X-Ring chain; it's a waste of money and they won't fit these older bikes. Don't get any cheap Amazon sprockets. Instead, Sunstar does have sprockets. They are pricey, but they are worth the expense.

Just curious, are these CM400A's really so different from my CM450E? I have an x-ring chain on mine, unknown previous owner miles but I've put over 3300 miles on it with 2 cleanings and perfect satisfaction, and it has yet to stretch enough for me to adjust the tension.
 
Just curious, are these CM400A's really so different from my CM450E? I have an x-ring chain on mine, unknown previous owner miles but I've put over 3300 miles on it with 2 cleanings and perfect satisfaction, and it has yet to stretch enough for me to adjust the tension.
I have only been using an O-ring chain on the roadbike but that's because of what I expect of it, ride anywhere under any conditions. The other bikes have conventional chains because they don't go thru bad weather conditions.
Chain life and mileage are really subject to maintenance, dirty unlubed chain last a short time. Well maintained chains last a long time.
 
Also, these bikes were made before o-ring and x-rimg chains were really a thing. So its somewhat common that they are a bit too wide and can saw on the side of the case. However, there are some expensive brands out there that can fit. I dont know which ones do. But either way you must maintain the chain even if it has an o-ring. So personally I feel it is wasted expense. If you have one and it works for you without clearance problems then cheers!
 
Also, these bikes were made before o-ring and x-rimg chains were really a thing. So its somewhat common that they are a bit too wide and can saw on the side of the case.

Yeah, the 175, 350 and 450 are susceptible to the width of an o-ring or x-ring chain, grinds up the clutch lifter arm. But I'm sure there are other models where that wouldn't be an issue, different clutch actuator design being the obvious one.
 
Yeah, the 175, 350 and 450 are susceptible to the width of an o-ring or x-ring chain, grinds up the clutch lifter arm. But I'm sure there are other models where that wouldn't be an issue, different clutch actuator design being the obvious one.

I don't know specifically if the 400/450s have the issue with commonly available o-ring/x-ring chains. But, to simplify things it's just easier to avoid them unless someone out there can name specific brands and how it fits. I'd imagine that there may be some where it barely fits and could rely on exact alignment and staying on top of it, otherwise it could be harmful. Therefore I just avoid recommending them. Plus, we talked in another thread about how chain maintenance is much more important than using a more exotic chain.

Honestly, before I started using the chain wax aerosols I just had a huge bottle of 90W gear oil and slathered that on. It works very well, the only issue is that it flings on the rear wheel. You can wipe it off of course, but it's always going to do it. Even if you just lay a towel down over night to let the oil drip. If funds are low and you don't mind it I think it's a good thing to use. A bottle of that stuff will last a long time. I have two bottles and for one of them I grabbed a small two-stroke oil/lawn-mower 4oz container and kept one of the tops from the bottles and kept that in my backpack so I could lube the chain while out on long rides. I got about 10K on a DID natural chain by doing that. Never got rusty, and that was with the bike being (unfortunately) stored outside under a cover for years.
 
As I re-read what I wrote, I did not mention to Amirali that the 79 year requires tubes. There's a part number change for the rims in 1981 that allow you to run tubeless. They're probably the same rims, but may have a better tolerance to run tubeless. I've never tried running it tubeless on my 79 comstar rims. There's nothing stopping you (or more specifically the shop) from trying to mount it tubeless on pre-1981 rims but I haven't heard about anyone doing it and I've never tried it myself.

If you attempt to run tubeless you really must get a spray bottle with soap and water and spray the rim and watch for soap bubbles. If there's any then you need tubes. I have seen some people get the spoked rims for the SOHC4's to run tubeless but it involved some kind of epoxy in order to get a proper seal. That would worry me about being able to balance the wheel properly which may or may not be a big deal. You'd have to ride it and see. Unfortunately, the application of the epoxy would make it mostly permanent so if it didn't work out wheel you've ruined the rim. And you'd need to check it every year to make sure the epoxy is reacting with the rim by corroding it.

If you're dead set on having tubeless I'd recommend just getting used rims from a 1981, they're kind of cheap on eBay if you look around. Then replace the wheel bearings. They mount up exactly the same as far as I know.
 
I don't know specifically if the 400/450s have the issue with commonly available o-ring/x-ring chains.

Since the clutch actuating arm is on the outside of the right crankcase cover on most if not all of the SOHC 400/450 models, it wouldn't be part of the reason an o-ring or x-ring chain wouldn't work and Jim said he has one on his road bike so I'd assume the clearance is there for safe use on them. I was just pointing out older models with the earlier style clutch lifter arm inside the front sprocket cover and the limited side clearance those have as a result of the design. And of course, in that era there were no o-ring or x-ring chains, only better or worse brands of standard chain.
 
I don't know specifically if the 400/450s have the issue with commonly available o-ring/x-ring chains. But, to simplify things it's just easier to avoid them unless someone out there can name specific brands and how it fits

OK, the EK SRX series (X-Ring) fits on my '82 CM450's, and Jim has some kind of O-Ring chain on his 1979 CM400T. Maybe there are more out there that can chime in. IIRC LDR said the difference between 400A's and 450's is 1mm of offset on the front cam.

Honestly, the risk can be reduced by calling the support of a reputable dealer like Dennis Kirk. If they says it fits, confirm their return policy and write the support person's name down. Buy it and test fit it before cutting and splicing chain, comparing to the old chain, especially on the front sprocket (which is a bit "loose" by design). It should be obvious if it interferes, then it can be returned in new, unused condition for a refund.

Sure, one can be cautious and only use what came with the bike. I for one am not returning to 70's-80's technology tires, and I ride too much (3200 miles this year so far) to be cleaning/oiling a roller chain every 300 miles. I support everyone running what they want on their own bikes, but I seem to have had good luck with many cheaper parts here that are not OEM. I don't always bring it up to avoid conflict, but I think chains are one area, like tires, where significant advancement has occurred, and can be enjoyed.
 
I for one am not returning to 70's-80's technology tires, and I ride too much (3200 miles this year so far) to be cleaning/oiling a roller chain every 300 miles.

Not sure I'd call a brand new DID or RK chain '70s-'80s technology, chains have been around a lot longer than that and I'm quite sure they've improved the materials and manufacturing methods over the decades but I get what you meant. As far as cleaning every 300 miles, not sure why you feel the need though I know you are a maintenance-oriented guy based on your threads and posts and of course, that's a good thing. I simply lube my DID chain as needed, I might clean it if it has to be removed from the bike for other maintenance but typically I just keep it lubed until the end of its life span and clean the rear rim of lube as needed.

I support everyone running what they want on their own bikes, but I seem to have had good luck with many cheaper parts here that are not OEM. I don't always bring it up to avoid conflict, but I think chains are one area, like tires, where significant advancement has occurred, and can be enjoyed.

I have a few little habits that some here might not agree with as well, I think we all tend to utilize some things we learned early in our mechanical lives (for me, it's usually stuff I learned from my father who didn't always go by the book but his results always spoke for itself) and I've learned many things since being associated with the core group of longtime HT and VHT members here as well. That has allowed me to find a good mix of old school technology and modern advancements which absolutely includes tires as well as AGM batteries and a few other things I can't think of at the moment, and I'm better off for it. While I respect what Honda did when these bikes were designed and built, I also understand the limits of their knowledge and technology at that time and I try to embrace new methods or ideas that improve upon the bikes we enjoy so much.
 
If you really want to get down to it, it's just like audiophile stuff. Whatever you get that's not some cheap crap will work fine if you maintain it. The biggest thing is maintenance no matter what chain type. Just oil it, not WD40, but either chain lube or some gear oil. However, there was some tests done by Project Farm that shows that used motor oil (and probably gear oil) aren't the best thing to use at they are more likely to attract dirt. This makes sense when you consider oiled air filters, the foam or mesh elements are just a skeleton to hold the oil. The oil does the actual filtering.

If anyone is curious on the chain lube debate (and really, just use something meant for chains and just make sure your chain is clean periodically no matter what product or chain you use) check this out:

 
Almost all ComStar wheels can be run tubeless, the deciding factor is IF there is a bead retention band inside the rim. That's a small raised bead inboard of the outer vertical rim section, 1/2"-3/4" inboard. Couple of quick web pictures edited w/Red for where the bead retention band is or isn't in the case of all spoke rims
dohc rs1000 rcb 1976 original rear comstar with bolt-up cush-drive AWESOME - 10897035_3813773787.jpg CRURTTR18__90023.jpg

About chains, I've run DID, EK, RK and others not worth mentioning. These 3 named have been great, all of them in O-ring. The SOHC 400/450 models don't have any clearance issues with the chains. I do lube my chains every 2nd tank of fuel which is @300 miles or more, might be overkill but it's quick and easy to do and gives the opportunity to check everything including free play/slack. Truth is I've never cleaned a chain. Longest life I've gotten was a DID at 16K, shortest was @5K on a cheapo chain.
I have been using PJ1Blue religiously forever as chain lube, Black is for conventional chains.
The offset mentioned by Ken has to do with the CB450SC countershaft being 4.1mm's longer than all the other CB/CM 400/450 models. Really only encountered with engine swaps or transmission changes.
 
Update:

I decided to go with a standard DID 530 chain, precut to 102 links. I bought a chain wax spray, as I don't want to get oil anywhere and do no want to replace chain anytime soon (low funds).

I was really hoping that I could get away with tubeless tires, since I wanted to do the tire job myself and didn't want to fiddle with tubes. However, I spoke with my grandpa who has been a heavy machinery engineer for 40 years and he told me it's not worth the hassle. So, my plan is to take off the wheels, then go to a tire shop and have them change it. Alternatively, a local motorcycle mechanic quoted me $180 to replace everything himself but I rather not pay that. With all this in mind, I went with tubes since I won't be changing them myself either way.

I also bought new oil filter, new spark plugs, brake fluid master cylinder diaphragm, dot3 fluid, Honda motorcycle oil, brake cleaner and pj1 cable lube. I have tried to avoid buying specialty tools that won't be very helpful to me generally like, a spark plug gap measurer and chain breaking tool - hopefully I can find someone who has them.

At the bottom of the bike there are two tubes that run to the airbox. Pull these plugs, likely some nasty stuff will come out so catch it with a mason jar or oil drain pan. Technically you should put the plugs back in and "purge" this every so often. Really, you can leave the plugs out. It was some late 70's EPA stuff to catch the blowby and have it get absorbed back into the system to burn off a second time. This doesn't work that well, ends up making your air filter get dirtier faster and puts a slime on the CV pistons in the carb. So just leave the plugs out and let it drain to the atmosphere. It won't affect running in a negative way.
I did this and got rid of all the smelly water and left the caps off.

I also repurposed my Apple AirTag and hid it in the bike in case someone decides to steal my motorcycle.

Now for my questions? Sorry for being a noob...

1. Unfortunately the black rubber bag that hold all the wires behind the lamp is basically ripped. Any suggestions for alternatives to prevent water contact?

2. Frank, what does this do exactly?
When the bike is running there is a 10mm nut you loosen at the bottom of the cylinder. The bike will make noise, let it run like that for a second or two then retighten. This is the automatic adjuster for the cam chain. Do this every so often.

3. What is valve clearance? Not sure what this means at all
When the bike is stone cold from sitting over night take the valve cover off and the stator cover and do the valve clearances. It really matters a lot with the somewhat soft valves on these older bikes or they will wear rapidly. It's not hard to do, but you must do it. I do the valves at the oil change interval

4. How can I make sure the forks have enough oil/air? How to check integrity of fork seals?

5. The brake disk has no holes for a disc lock. What to do about this?

6. All the lights work except the dash light for high beam. Any idea which color wire is responsible?

7. Has there been an improvement in lamp technology since 1979, which means that I could buy a better lamp and swap them all out hassle-free? Is it worth it? Are LEDs better?


Will keep you guys updated soon.
 
Hi Amirali,

1) Not sure what you mean, can you provide a picture?

2) The 10mm nut for adjusting the cam chain is what it says... adjusts the cam chain tension. Modern cars and bikes have automatic tensioners. Think of it the same as a "timing belt" or "timing chain" as they call it in the automotive world. This is exactly what it is. All you do is start the bike, and while it's idling loosen this 10mm nut, you will hear the chain moving in the engine very loudly once loosened. Let it run like this for a couple of second then tighten the nut. And that's it. If you neglect to this do eventually it will start getting loose enough that it could start sawing through the engine putting metal filings in the oil and possibly damaging other parts. It's easy to do and really you only have to do it once a season or so. Just do it during your oil change/annual tune-up.

3) The valves are what makes the engine work. They open and close at precise moments for the intake and exhaust. Modern cars and bikes have hydraulic lifters were the clearance is set automatically. On these bikes you must set it yourself. It's not hard to do, but basically you remove the flywheel cover and rotate the flywheel until the 'T' on the flywheel matches with the triangle mark on the engine case. Feel the valve lifters. One side will have all 3 lifters loose. This is the side you check and adjust the clearance. You insert a feeler gauge between the adjuster for each valve and then loosen the 10mm nut and there's a flatheat adjuster you spin in or out to get the right clearance. It's better (and beneficial) to adjust on the looser side of the spec as this promotes better compression and there's some other reasons. Once you're satisfied with that side, then spin the flywheel one more revolution to line the 'T' again. Now the other side will be loose.

Here is the procedure from the FSM. It says CB400T, but it's the same for all CB400 and CM400 series bikes:
Untitled-1.jpg

You'll need feeler gauges, these ones recommended by Bill should do the job just fine: https://www.ebay.com/itm/233538544957. The ones at the auto parts store aren't thin enough. Insert the feeler gauge to judge clearance. You can do the "go, no-go" way to find out the clearance. For example, if a 0.004 inch fits, but a 0.006 inch does not fit then the clearance is somewhere around 0.004-0.005 inch which is within spec.

4) Unless you have caps on the fork bolts for air pressure, these are not air assisted. Later years had it and you can convert it, but I've never done it. There is a small bolt on each fork leg to drain the oil. Remove to the top bolt, slowly, put a rag or something over the bolt because it may be under spring pressure and you don't want it coming back and hitting you in the chin. Once it's out then grab a funnel or something and remove the drain bolt. It's likely never been done so the oil will look almost black and probably smell bad. Then push up and down on the front end to drain the last bits out. Leave the drain bolt out, then pour a small amount of the new fork fluid in until it comes out the drain the correct colour. Put the drain bolt back in and then fill in the correct amount. I use a graduated cylinder that can handle up to 200cc, but you can use a digital scale with plastic mixing cups. The correct amount is 137-143cc or 4.8-5.0 fl oz. Once you have the correct amount, put the top bolt back in and you're good to go.

Over time as you start putting more miles on it you may see fork fluid working it's way up and down the fork tubes. Especially as you go over some bumps. That's kind of the only real way to tell. You can try to force the suspension up and down on the bike to see. If it does it then, the seals are totally trashed. If the seals are a bit weepy, it's not a huge deal and you can get away with it for a while if you don't mind wiping it off every so often.

5) Not sure what you mean?

6) Have you pulled the high beam indicator bulb and swapped it with one of the other bulbs? It may be the bulb is burned out. Honda still has them.

7) There are LED bulbs out there. They don't mount the same. I believe Jim/LDR knows of a direct fit halogen bulb from a modern 250 rebel that fits, but he'd have to come back with a part number.
 
Bit of research for you, but the headlight with replaceable halogen bulb is from an 01-07 CB250 Nighthawk. The headlight bucket is exactly the same part number as the CM400s so you just need the bulb assembly, bulb, rubber cover, the chrome rim and it's adjusters.

https://www.partzilla.com/catalog/honda/motorcycle/2003/cb250-a-nighthawk/headlight-cb250-01-07

You'd need every component that's encircled in '1'. It looks like the whole unit with the small parts is NLA. You may have better luck searching for a used unit on ebay. Just search for CB250 Nighthawk and look around. Or if you have a motorcycle junkyard near you I'd bet you could find it and at a great price.

I will say, that the newer replacements that are sealed units are indeed halogen. They seem to hold up OK. I've had it on my bike for about 10 years and have put over 15K miles on it. https://www.partzilla.com/product/honda/33120-333-670

I'm unsure if they were always halogen. Just take a look inside, it should be obvious. If not, send us some pics. I'd say if it's halogen and sealed and working then don't mess with it until you have to. It's kind of pricey. I recommend you don't change to something aftermarket if you're just trying to get riding and need it for reliability. Do the LED switch later at the end of the season or something so you don't get screwed and have to redo your work, if that's what you want.

I know this will likely lead into an LED bulb conversation. Yes, you can do it. If you really want to do it then get a proper turn signal relay that can work with it. This relay says it's for incandescent but it will work with LEDs just fine. I use this is anything that needs a replacement relay and haven't had one fail on me: https://www.amazon.com/CEC-Industries-EF32-Electronic-Flasher/dp/B0031GYS6W. However, the charging system is quite adequate. It's not really necessary to switch to LEDs. The bike can handle a USB charger or something like that if you really want it.

Your bike is original, and in great condition. So you have a choice to make if you want to keep it mostly original or start doing a build. I'm biased in that I try to keep it original as much as possible if it is already mostly original. But, it's your bike. Just make sure you wait until winter or something to start doing mods if you really want to. That way if things don't work out you're not screwed in the summer while trying to ride.
 
Ah I see what he means now. I have never owned or rode a modern bike so I don't know anything about that. But, yes just using the parking brake on the left side. It should already be on there. If not, check eBay. It's the same across CB400A, CM400A, CM450A.

There's also a front fork lock down by the steering stem and a seat lock as well. If nothing has been replaced the key should fit all of these.
 
Plus one on using the '01-'07 CB250 headlight, makes a very simple fix for better lighting.
I like the original incandescent bulbs, simple and effective. The charging system is more than sufficient to handle a 55/60w headlight(OEM is 35/35w) plus charge a phone and computer while riding. I see no need for the LED's and not using them means you won't be starting a new thread about problems with them:lol:

I haven't really found a need for LED replacement. I've had to replace a turn signal bulb and tail lamp bulb before, but it's because water got in both of them and corroded things. More resistance == more heat == more stress on the bulbs == burn out. Just get LL ("Long Life") bulbs and should work well for a long time. Changing the instrument cluster bulbs to LED could be worthwhile, but the bulbs are still available from Honda and elsewhere so I kind of fail to see a point.
 
I haven't really found a need for LED replacement. I've had to replace a turn signal bulb and tail lamp bulb before, but it's because water got in both of them and corroded things. More resistance == more heat == more stress on the bulbs == burn out. Just get LL ("Long Life") bulbs and should work well for a long time. Changing the instrument cluster bulbs to LED could be worthwhile, but the bulbs are still available from Honda and elsewhere so I kind of fail to see a point.
LED in the Hi beam indicator is a good distraction on the road at night, it's way too bright.
 
Now if you want a brighter brake light with some work, welding and fabrication, you can use the CB450SC taillight ass'y. It's a dual bulb unit.
Original vs. CB450SC
100_0652.jpg 201_5710 (2).JPG
 
Hi everyone!

UPDATE 28 June:

1. Even though the bike was in good conditions with only 7k miles, when I bought it 2 months ago, it was clearly in need of some deep cleaning.
I spent around 5 hours yesterday cleaning the bike, and polishing all the metal parts with Chemical Guy's Heavy Metal Polish. This thing is absolutely amazing and eats rust like nothing else.
After going through 2 drill batteries (with polishing pads), I went at it by hand.

Here are the before pictures.
IMG_6687.jpg IMG_6688.jpg IMG_6689.jpg IMG_6690.jpg IMG_6691.jpg

Here are the after pictures

IMG_6700.jpg IMG_6701.jpg IMG_6703.jpg IMG_6704.jpg IMG_6705.jpg IMG_6699.jpg

2. I adjusted the cam chain using the picture that Frank sent. I loosened it, it made a noise, and retightened after 5 seconds.

Questions:
1. This is the black bag I was talking about
IMG_6696.jpg IMG_6697.jpg
Is this OEM? If not, what is it suppose to look like?

2. This is a picture of the front brake indicator. Is it in good shape?

IMG_6695_2.jpg


3. Today, I'm going to change the chain. Are there instructions on how to do this specifically for this bike? I am very good at following written instructions...

4. How do I lube the cables? I tried one and the lube doesn't seem to want to go in where it needs to go. How many cables are there? Do I lube both ends?

5. What are your thoughts on taking wheels off myself and having tire shop change tires (circa $40) vs. local motorcycle mechanic doing it all himself (circa $180). Also I don't have a jack.

6. Can somebody please comment on the condition of the fork seal based on the pictures? I haven't noticed any leaks.

Thank you guys for all your support so far. I will keep the updates coming.
 
Last edited by a moderator:
brace yourself,, my '81 bucket insides:
 

Attachments

  • buck.jpg
    buck.jpg
    157.2 KB · Views: 12
Hi Amirali,

If the brakes look even wear on both sides then yes, it's OK. I recommend you flush the fluid out and use fresh DOT3 or DOT4 (doesn't matter which) now, or experience infinite amounts of pain and rebuilding later. Dansmc.com has an article on how to do so: http://www.dansmc.com/hydraulics.htm. But basically you can get a length of tubing and put it over the bleeder and run the other end to an old mason jar. Turn the bleeder screw open about 1/4 turn or so and pump the lever. You will see fluid come out. Keep topping off with fresh fluid in the reservoir until you see fresh fluid come out the end of the hose you attached to the bleeder. Make sure there are no air bubbles. Put an old towel over the gas tank and the instrument cluster. I find it's best to leave the reservoir cap on, but not screwed in. This will prevent the brake fluid from shooting up in the air and ruining the paint as you pump the lever. Be careful to not let the reservoir run out or you will get air in the system.

You can replace the chain and tires entirely on the bike if you still have the center stand. If you do, put the bike on the centerstand. VHT hosts the FSMs here on a google drive, but I've also been hosting them myself for years for the CM400 series. Here is the CM400 FSM: https://maraakate.org/CM400A/Honda_-_Shop_Manual_1978-1981_CB400T_CM400T.pdf. For CM400A specific things (you shouldn't really need this) it's here: https://maraakate.org/CM400A/Honda_-_Shop_Manual_1978_CB400A_CM400A.pdf. The CM400A specific book is supplements related to the torque converter, CDI, and a few other misc things.

The front wheel removal procedure is located on page 143 (relative to the PDF). Installation is page 148.
The rear wheel removal procedure is located on page 162. Installation is page 166.

Chain removal is pretty simple, did you get new sprockets? If yes, then lock the rear wheel with the parking brake and remove the front sprocket first. Unlock the parking brake and loosen the chain adjuster so they're all the forward so the chain has a lot of slack. Remove the master link clip and it's off. If you don't have a master link, from here you can remove the entire rear wheel and slide it enough to the side with the axle out to slip the rear chain off one of the sprockets.

Fork seals will just start leaking soon enough. Every single vintage Honda I've owned... they always start leaking after 6-12 months because the rubbers are not in a sealed environment and they live a tough life without fork gaiters. They aren't leaking now, but they will soon. If funds are tight you can get away with it.
 
Just FYI, besides the headlight bucket the horn is also not original. This indicates to me it's quite possible the bike was dropped at some point. Check if the steering is straight. If it's not too far off you can fix it quite easily by loosening the fork clamp bolts a little bit on the triple tree and push it up against a wall to get it straight. See here for more info: http://www.dansmc.com/aline_wheel.htm
 
Just FYI, besides the headlight bucket the horn is also not original. This indicates to me it's quite possible the bike was dropped at some point. Check if the steering is straight. If it's not too far off you can fix it quite easily by loosening the fork clamp bolts a little bit on the triple tree and push it up against a wall to get it straight. See here for more info: http://www.dansmc.com/aline_wheel.htm

True, but if the handlebars got bent in a fall then you don't want to twist the forks to line up to bent bars.
 
Hi guys time for an update:

1. I installed a USB phone charger that connects directly to the battery. I bought it off Amazon and so far it works great. Even though it doesn't have a switch, the circuit only closes when phone is plugged in.

2. I took the bike to the local motorcycle mechanic to change the tires for me. It was definitely a mixed experience.
I had booked an appointment with him and showed up at the exact time, with the bike and the the two tires strapped to the bike. As I was rolling the bike to his shop according to his instructions, one of his two German Sheppards ran towards me and slightly bit my leg. I was holding the bike and it happened super fast. Luckily, it was only a small bite but I moved my leg too fast and touched the curvy bit of the exhaust pipe. Long story short, I didn't drop the bike even with a burnt, bleeding leg.

I gave the bike to the mechanic and told him that I want the tires replaced and also gave him the tubes. He told me that the bike will be ready on the 5th. I Ubered back home and 2 hours later, he called me and told me the bike was ready. I went to his shop and he informed me that he didn't install the tubes because the old tires didn't have them and apparently these rims don't need tubes :confused:.

I got the bike and was riding back home when I heard a terrible scraping noise and turned right around. He told me that the back tire was scraping against something, likely the frame or the chain guard. He adjusted it for about 30 min, but the issue was not fixed. He told me that the reason for this is because the tires are too large, but according to 4into1 website, they are the right kind. TIRES.

At the end, I decided to leave the bike with him until the 5th in the hope that he can figure out how to make it work. I am not very happy with the services and I don't think it was wroth $150.

Do you guys have any ideas whether it is possible to adjust the rear tire in a way so it doesn't not scrape against anything? Any instructions I could send him would be greatly appreciated.
 
You bought a 130/90/16 rear tire didn't you?
The problem will be the the rear brake stay is rubbing on the right side of the tire. The solution is unbolt the front and move the stay outboard of it's bracket. Insert washers into the gap of the U bracket to fill it and use a longer bolt so the stay is tight on the outside of the bracket.
Now he'll be able to center the wheel in the swingarm with just a little clearance on both sides.
The chain guard may need to be bent outwards in front a little.
 
Back
Top Bottom