• Don't overlook our Welcome Package, it contains many links to important and helpful information about functions at VHT like posting pictures and sending PMs (private messages), as well as finding the parts you need.

    AD

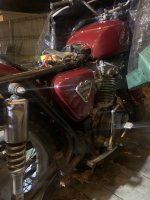
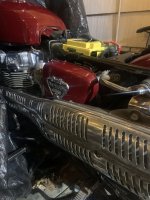
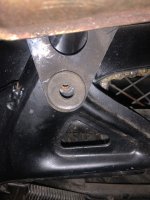
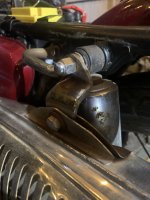
1971 CL450 that sat for 40 years.

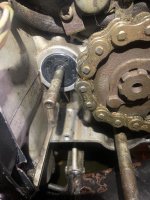
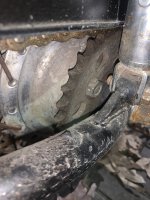
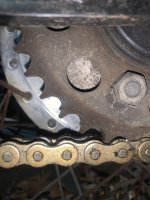
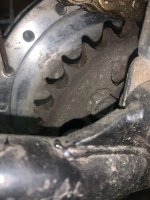
Also, the side view of your rear sprocket is mostly of the sprocket with the chain on it, useless to see how the teeth look and the frontal view is not close enough. Need one closer to the swingarm directly from the side but showing the forward portion of the rear sprocket below the swingarm. And up close please, because your pictures do not enlarge much for whatever reason (I'm guessing iPhone). It looks like the rear sprocket is usable (mine is still original with 17,000 miles on it) but since you'll be replacing the chain and front sprocket together, you don't want to do that on a worn rear sprocket or the chain won't last as long.

And yes, Hondabond is fine for the seal outer body. Didn't expect you to have it because if the surfaces were clean enough for the cam bearing gaskets you wouldn't have needed any sealer, and if you used it on the gasket replacement (with few pictures during that process so I can't say) I certainly hope you didn't use a lot of it, those are critical areas for oil flow. I realize you probably don't know for sure what to show us and what isn't important, and please don't take this the wrong way, but since your experience is limited you should really show us everything that is happening so we can help you catch a problem before one happens.

I have not been able to post pictures using the textbox for quite some time. One day all icons turned blank. I’m curious if Imgur has a more restricted zoom. But yes, you are correct. iPhone! I’ll go take some more pics of the rear sprocket.

I have always stuck with your original advice about gasket sealant. Avoid using, unless completely necessary. I bought it for one purpose, to help get an extra seal on the intake manifolds. I applied a light ring on the metal around the intakes to help with the chirping and squeaking. All is good now! I was also guilty of overtightening them, causing a slight bow in the middle.
 
I have not been able to post pictures using the textbox for quite some time. One day all icons turned blank.
Curious - are you using mobile or a computer? If a computer, are you using Chrome as your browser? If you're using a Mac and the Safari browser you should add Chrome to your machine, it works best with our new forum software. If you're using the iPhone, Safari could be the problem. Add Chrome to your phone and use it.
 
Mobile & Safari. Chrome has fixed it!

Seal is in, with Honda bond.

26179F8F-2A48-42E8-91EA-EA89F53FCB02.jpeg

Hope these pictures do more justice

F5FE7B5A-96D3-4D7B-92D7-8B2701AA60AF.jpeg
34237B0C-E692-4080-83E2-5F194B074E9C.jpeg
8D1DCAB3-CC25-4D7A-AE1C-CAF3959B0EFC.jpeg
 
Last edited:
What’s the best website to order sprockets from? Upon searching the web, I have only really found results for CMC & eBay. It would be nice to have a different option.

I did find a front sprocket from David Silver


Is there any reasonable benefit to changing the sprocket sizes? I’ll just be putting around town. Won’t be doing that much highway riding. I am fine with going stock on the sprocket sizes.
 
Finally got the idle settled down with the choke fully open.. I made a lot of adjustments and kept count of the amount of turns. I believe the mixture screws are 1-3/4 turns out, and the idle screw is maybe at 3/4 turns in. I am dialed in at approximately 1200rpms.

I checked under the bike for any more oil leaks, and found two. I have already fixed about three leaks.

The two leaks are coming out of the bottom of the clutch/front sprocket cover. Any recommendations on how to proceed?

I do remember AD mentioning a certain wire connection/grommet that sits in between the left covers, and needs to be sealed.
The 14 H bodied carbs set the mixture screws at 3/4 turns out (adjust plus or minus 1/4 turn).....
The 751 A carbs set at 1 1/2 (plus or minus 1/4).....
WHICH ARE YOU RUNNING?
 
Stick with stock sizes for best all round riding.
I like JT and Sun Star sprockets. I find their part number and run a Google search to see who has them for the best price.
 
The 14 H bodied carbs set the mixture screws at 3/4 turns out (adjust plus or minus 1/4 turn).....
The 751 A carbs set at 1 1/2 (plus or minus 1/4).....
WHICH ARE YOU RUNNING?

I am currently running the 14H carbs with #125 main jets. I made the adjustments with just the air filters on. I didn’t have the black housing or side covers over the filters. Maybe that affected air flow.
 
I am currently running the 14H carbs with #125 main jets. I made the adjustments with just the air filters on. I didn’t have the black housing or side covers over the filters. Maybe that affected air flow.
Not much, particularly at idle which is the only reason for those adjustments.

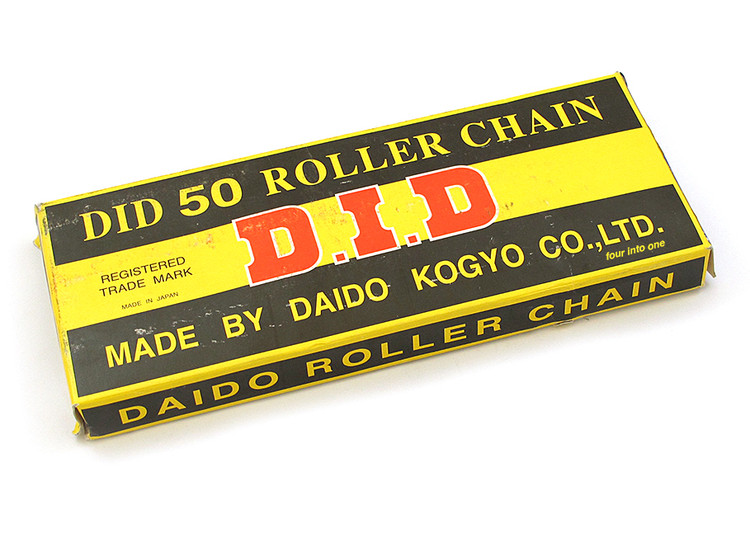
I meant to comment on the rear sprockets this morning. Though it is a bit rusty, the teeth look decent enough to avoid the PITA of dealing with the mounting stud/bolts that often don't want to come out of the original sprocket and sometimes don't work properly with the aftermarket sprocket. Pick up a DID non o-ring (530 size, 92 links long) chain from Amazon and a 15 tooth front sprocket from one of Jim's suggestions.
 
Looks like Amazon is out of them in 92 links, so if you have to buy a longer chain and cut it you have Amazon and 4into1 to choose from


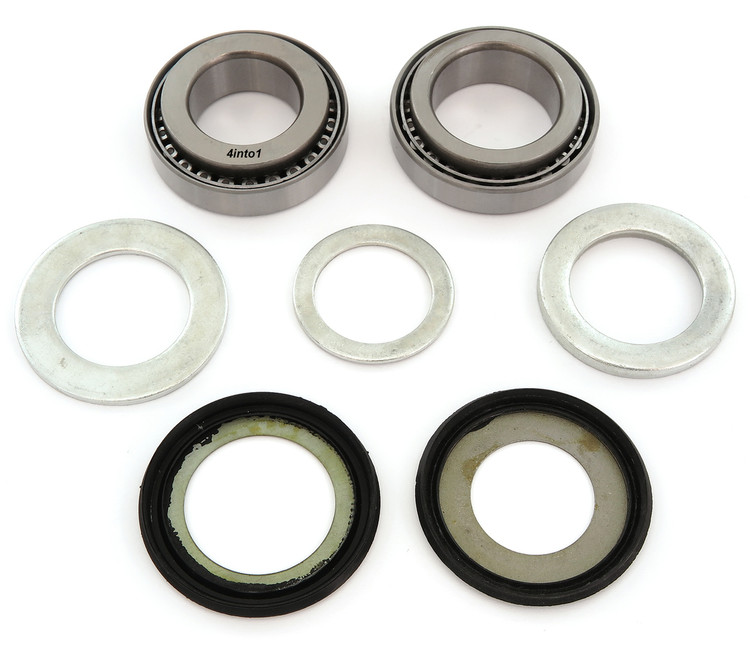
I will be working on a list of parts to order for the suspension/top bridge. First I am looking at bearings. For steering, I have seen tapered, or original style. Here are the tapered. These good to order?


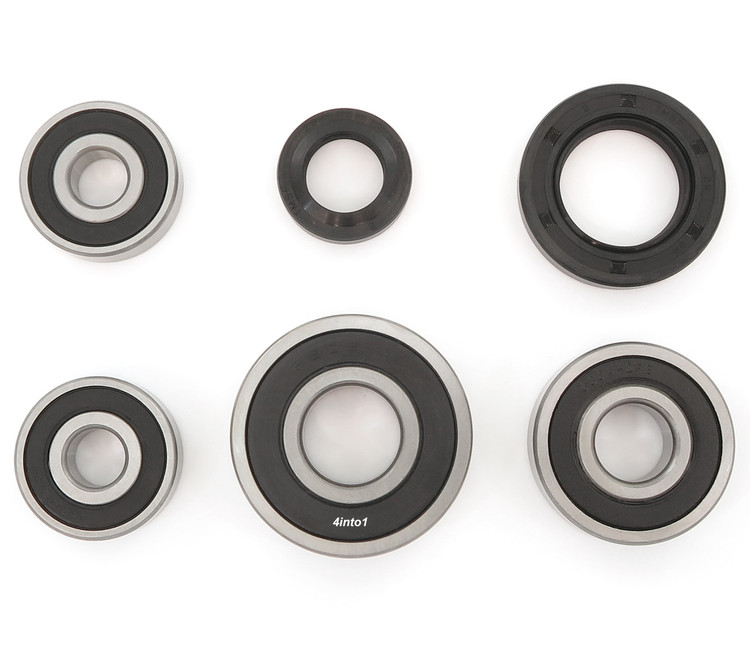
Wheel bearings

 
I have no personal experience with either set. I bought my tapered steering bearings from All Balls but they are about twice the price of those from Rising Sun
 
Looks like Amazon is out of them in 92 links, so if you have to buy a longer chain and cut it you have Amazon and 4into1 to choose from


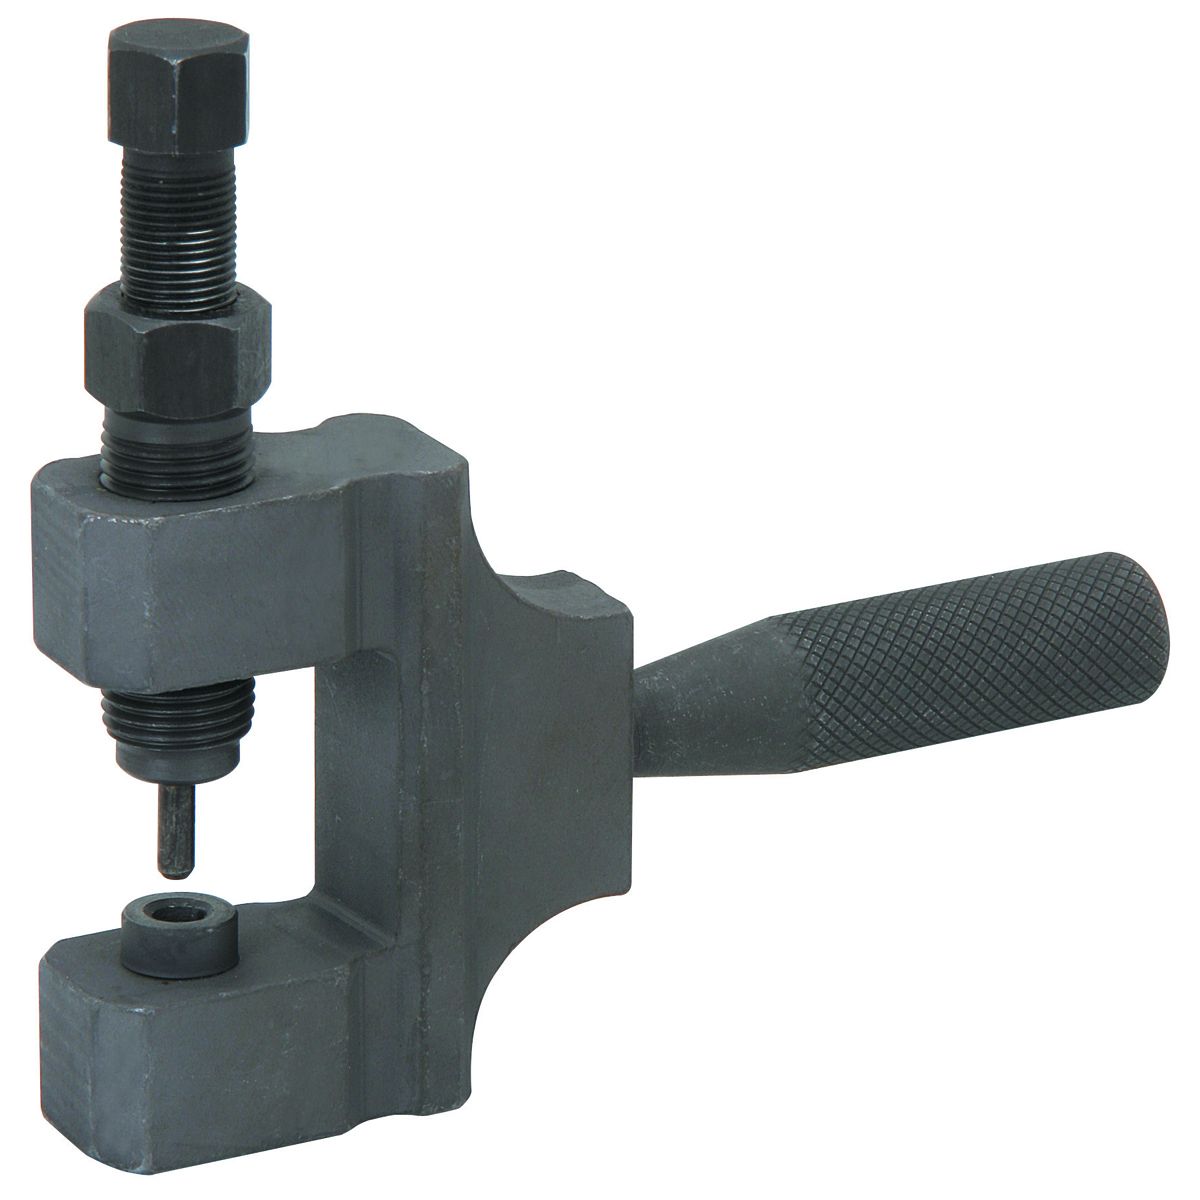
This chain will come with a clip type master link correct? I am curious as to what tool I will need to cut the chain. Here’s these two:


This chain will come with a clip type master link correct? I am curious as to what tool I will need to cut the chain. Here’s these two:


Actually, just file or grind the flared head of the pin and use a nail or small punch to drive it through. You don't really need the tool but they are just a bit handy.
 
This chain will come with a clip type master link correct? I am curious as to what tool I will need to cut the chain.
Yes, it will have a standard clip type master. As Tom mentioned, you can cut the chain yourself easily if you have a bench grinder available. Count the number of links you need to an even number (92), then grind off the head of the link pins on the 93rd link, drive the pin out of it and remove the excess. As with anything else you've encountered so far, if you aren't completely sure how to do it then post pictures and ask questions so you don't waste the money on a chain you can't use after you cut it.
 
Yes, it will have a standard clip type master. As Tom mentioned, you can cut the chain yourself easily if you have a bench grinder available. Count the number of links you need to an even number (92), then grind off the head of the link pins on the 93rd link, drive the pin out of it and remove the excess. As with anything else you've encountered so far, if you aren't completely sure how to do it then post pictures and ask questions so you don't waste the money on a chain you can't use after you cut it.
I should have added: Don't knick your 92nd link, so pad your vice to hold the chain for grinding and use a hole in something for an anvil to drive the pin through straight.
 
Thanks for the help everyone.

I have found out that the CL450K5 air cleaners and black covers, work perfectly on a Cl450K4. No modification required. This is my first time putting them on. The bike was originally missing both black covers, the right air cleaner, and the long through bolt for the right side. $38 plus shipping for that bolt on eBay. Lol. Worth every penny!

CEC136DE-020E-4594-8A46-8C749754AC5A.jpeg
2D143CEC-735E-4F9E-8398-308CE07AA0C9.jpeg


I received the bolt in the mail for the bottom of the muffler. Having trouble lining up the muffler with the frame. Can’t get the muffler any further up.

EABD65C6-35DE-4A22-B1ED-254F3E6CC732.jpeg
2E94527A-F0C3-4C3E-A070-A7ACADD75AFD.jpeg
B414E1B3-454E-4AA3-84CB-C790F2F6B54B.jpeg
68C6756C-08A1-46F6-A8E8-7B37D8C97022.jpeg
 
Loosen all the nuts and bolts in the exhaust system so you can wiggle it around more, then the bolt should go into the bottom support bracket.

Also, spin that chrome cover over the right shock around so the dent is in the back.
 
Loosen all the exhaust fasters just some, until you can start them all a few threads with your fingers. If you have to elongated any holes with a rat-tail file, it will be minimal this way.
 
Loosen all the nuts and bolts in the exhaust system so you can wiggle it around more, then the bolt should go into the bottom support bracket.

Also, spin that chrome cover over the right shock around so the dent is in the back.
It is very comforting to see you post the same plus more. You run a great class Teach.
 
Loosen all the nuts and bolts in the exhaust system so you can wiggle it around more, then the bolt should go into the bottom support bracket.

Also, spin that chrome cover over the right shock around so the dent is in the back.

Thanks for the presentation tip lol. Good eye. Speaking of, what’s the life expectancy of those rear shocks? I can add them to the list as well.
 
Speaking of, what’s the life expectancy of those rear shocks? I can add them to the list as well.
LOL, most at this point are severely diminished in function though not all. They are sealed and if they show no signs of leakage, then they typically still have some damping functionality left but how much won't be known until you ride it. I replaced the rear shocks on my 450 because I wanted to lower the bike 1.5" so I never really rode it (except for the very brief test ride on the seller's street at low speed), so I can't speak to what my K5 shocks were like after 47 years. that's something easily done later, even after the bike is finished, so it can wait until you ride it and evaluate how they feel.
 
Last night when firing up the bike, the fuel line to the right carburetor stopped flowing again. I called my dad, who has always been very knowledgeable with carburetors. He suggested the float needle is stuck or float is not adjusted to the correct height. Same that was suggested here. He told me to very lightly tap the float bowl with the back end of a screwdriver to see what would happen. While doing this, the fuel very slowly started to flow. Then the right cylinder started to fire. The carb was cleaned very thoroughly before reassembly.

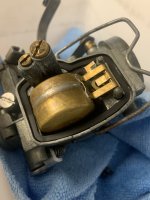
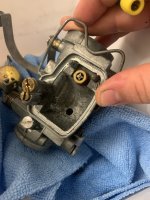
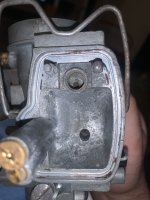
Here’s some pics of the float bowl.

9910D43E-C09B-4206-847E-F94BC5938DE3.jpeg
B08E1586-70B5-4827-B7EF-97D7AE07D9C5.jpeg
8EC91F16-1FD8-4F7E-A807-6EECD6649B17.jpeg
6F07F76A-0DD5-439E-917F-4028A1430BCA.jpeg

I know the bowl looks dirty, but that surface is actually smooth. When I first pulled the carb, that area was thick with white encrusted powder. 40 year old gas.

I’m also thinking the aftermarket gasket could be rubbing against the float. The float needle does seem a little stiff. I have an extra one I can exchange it with. I probably did not set the float bowl height correctly either.
 
I have currently not had any luck getting fuel to flow consistently to the right carb.

So far I have:
-Made a float gauge out of a credit card to correctly measure the float height to 20mm.
-Double checked that the float height was correct by running fuel through the carb with the bowl off. The fuel shuts off when the gauge touches the carb body.
-Checked that the float needle is not getting hung up or stuck.

I did get the right cylinder to fire up for about 10 mins, by taking the bowl off then repositioning the gasket. I have been using the temperature of the right pipe, to determine if the right cylinder is firing or not. Once I feel the right pipe is scalding hot, it’s not long until I fire it up again that it stays cold and I’m back to square one.

When I had the right cylinder firing momentarily, I turned the throttle very slowly and the RPMs shot upwards of 3,000-3,500 once tension hit the cable.
This same response happens if the right cylinder is not firing.

My throttle cable is starting to show a frayed wire and it’s on my list of parts to order. Both carbs are opening at the same time.

Also, when I am trying to troubleshoot the bike and it’s just the left cylinder firing, sometimes the RPMs will slowly creep upwards of 1,800-2,000rpm and I’ll cut it off.

I recently read that these carbs have felt seals that need to be oiled. Would that be an issue here?

The bike was running fine for about 2-3 days, until this fiasco randomly started. I am unsure of what pictures/videos to provide, or where to start. Thanks
 
Last edited:
I've had lots of fun with bowl gaskets that rubbed just enough to cause level or filling problems. Once gaskets get wet with gas, they expand a bit and get floppy, making it a bear to reposition until they totally dried out and shrink back. There are red traces of aviator type gasket compound in the groove of your carb body. A very tiny amount to help stick that gasket in place until the bowl gets clamped on, can help sometimes.
 
Update on getting the fuel to flow correctly, to fire the right cylinder.

I took the right carb off and swapped out the idle/slow jet with a cleaner one. Then I swapped the float needle out with one that was stiffer on the spring end. Both of these parts came out of my 723A carb. Upon firing it up again, still no result from the right cylinder. But something interesting and possibly bad happened.

While the bike was idling on the left cylinder, and I was scoping out the right fuel line, I rested my hand on the throttle. The throttle just slightly moved. I’m talking about maybe 1/8in or less, and the RPM’s shot up to 3,000. I immediately hit the kill switch. A white billow of smoke exited the tailpipes. And it smelt very bad. Like very burnt popcorn. I took off the valve cover breather tube and very faint white smoke was leaving it as well. There was also a slight kink in the tube, I have checked this multiple times and have freed that kink before.

I figured I had messed something up so I did a compression test. When spark plugs were out, the right one was jet black and wet. The left one was faintly brown and sticky. Right side was 150psi and the left side is at 135psi.

I’m not sure how to connect the dots with all of this, this project seems to be moving backwards now, when all was good and well a week ago.

I am also not sure what it does to these engines to have it at idle with one cylinder. Along with my fuel mixture screws being turned out 1-3/4 turns, maybe this was a very “rich” response from the engine.
 
Last edited:
I once limped on 1 cylinder to my garage over a distance of 60 miles, it won't harm the engine. I took out the spark plug and blocked the fuel line of the left carb.

The way you describes your issue, reminds me on something. When an engine is ready to build in, I put a wad of paper / cotton in the inlet and exhaust flanges. I once forgot to take out the wad of paper out of the exhaust. The engine wouldn't run good on both cylinders, and once it was running, it started to smoke, like something was burning. switched off the engine, but the smoke still came out of the exhaust. Then I realized my fault....
 
Update on getting the fuel to flow correctly, to fire the right cylinder.

I took the right carb off and swapped out the idle/slow jet with a cleaner one. Then I swapped the float needle out with one that was stiffer on the spring end. Both of these parts came out of my 723A carb. Upon firing it up again, still no result from the right cylinder. But something interesting and possibly bad happened.

While the bike was idling on the left cylinder, and I was scoping out the right fuel line, I rested my hand on the throttle. The throttle just slightly moved. I’m talking about maybe 1/8in or less, and the RPM’s shot up to 3,000. I immediately hit the kill switch. A white billow of smoke exited the tailpipes. And it smelt very bad. Like very burnt popcorn. I took off the valve cover breather tube and very faint white smoke was leaving it as well. There was also a slight kink in the tube, I have checked this multiple times and have freed that kink before.

I figured I had messed something up so I did a compression test. When spark plugs were out, the right one was jet black and wet. The left one was faintly brown and sticky. Right side was 150psi and the left side is at 135psi.

I’m not sure how to connect the dots with all of this, this project seems to be moving backwards now, when all was good and well a week ago.

I am also not sure what it does to these engines to have it at idle with one cylinder. Along with my fuel mixture screws being turned out 1-3/4 turns, maybe this was a very “rich” response from the engine.
Don't despair. You've fixed a lot of things that did need it. The universe of "stuff that is wrong" is not unlimited.
I would remove the right carb bowl drain screw. Open petcock. Is it draining gas? If not, then pull the fuel hose off the carb and see if it's somehow a petcock issue (probably not). If it still isn't, then your float needle or the float itself is not dropping (gasket rub), or the bowl air vent (tiny hole in carb top) shown in your bottom pic in post #573, is plugged. Did you blow that clear when cleaning?
 
Looks like Amazon is out of them in 92 links, so if you have to buy a longer chain and cut it you have Amazon and 4into1 to choose from


More on the way. Better deal. Had 96 link w/ master for $36.78
 
Don't despair. You've fixed a lot of things that did need it. The universe of "stuff that is wrong" is not unlimited.
I would remove the right carb bowl drain screw. Open petcock. Is it draining gas? If not, then pull the fuel hose off the carb and see if it's somehow a petcock issue (probably not). If it still isn't, then your float needle or the float itself is not dropping (gasket rub), or the bowl air vent (tiny hole in carb top) shown in your bottom pic in post #573, is plugged. Did you blow that clear when cleaning?

I have done the petcock test probably 25x now, but when I did it last night, I did get a different result. I took the fuel line off of the carb and turned the fuel on. Nothing. My eyebrow raised as high as it could go. Moments later I heard gurgling/bubbling from inside the tank, then the fuel started to flow.
 
I have done the petcock test probably 25x now, but when I did it last night, I did get a different result. I took the fuel line off of the carb and turned the fuel on. Nothing. My eyebrow raised as high as it could go. Moments later I heard gurgling/bubbling from inside the tank, then the fuel started to flow.
You might want to pull the petcock off the tank and check it internally, along with the insides of the petcock if you haven't already. Sounds like it could be an intermittent flow problem, and I wonder about the vent in the gas cap too.
 
I have done the petcock test probably 25x now, but when I did it last night, I did get a different result. I took the fuel line off of the carb and turned the fuel on. Nothing. My eyebrow raised as high as it could go. Moments later I heard gurgling/bubbling from inside the tank, then the fuel started to flow.
"My eyebrow raised as high as it could go". Lol.

Couldn't be prostate problems.
 
You might want to pull the petcock off the tank and check it internally, along with the insides of the petcock if you haven't already. Sounds like it could be an intermittent flow problem, and I wonder about the vent in the gas cap too.

I’ll check both of those out tonight
 
Update on getting the right cylinder to fire:

I figured that I would go back to the drawing board and think as simple as possible. When I first put everything back together and both cylinders were firing up, I set both carb mixture screws at one full turn out. This was per FSM instructions give or take a 1/4 turn difference. While doing so, the idle was so high it reached around 3,000RPM. I could only damper this high idle to 1,200RPM by turning the choke to fully closed.

I messed with the idle screws here and there, and nothing was working. I turned the mixture screws out further to 1-3/4 turns each, and finally the idle settled to a perfect 1200RPM without using the choke. I believe this was causing the right cylinder to be too rich and not fire.

Tonight I set the mixture screws back to one full turn out, and the right cylinder started firing again. But now I’m back to 3,000RPM and having to fully close the choke to get it down to 1200RPM.

I’m happy I’m feeling a hot pipe on the right cylinder. Now I have to figure out how to tune this high idle down without using the choke
 
Do the carb slides move freely ? Can they reach the bottom ? The (super) free movement of the slides are mandatory, most idle issue's you describe are connected to this problem (when the carbs are clean).
 
Last edited:
Do the carb slides move freely ? Can they reach the bottom ? The (super) free movement of the slides are mandatory, most idle issue's you describe are connected to this problem (when the carbs are clean).

Yes they are smooth. I took some high grit sandpaper to the slides to kind of polish them. They move about with no effort
 
Last edited:
Since you had issues with the throttle plate, shaft and idle screw, I'd figure that wasn't completely fixed yet. A crappy cable isn't going to make correct adjustment possible.
 
Since nothing is accomplished by using the choke to lower the idle speed, it seems you still need to get all the carb parts properly aligned and adjusted so the throttle plates close completely and correctly, so the idle speed can be adjusted correctly at the idle speed screws.
 
If the throttle plates aren't closing completely then this can happen. I've found small burrs on the plates for the 3D carbs as well as the VB carbs. Usually around the throttle shaft area.
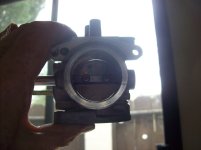
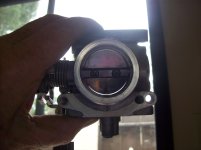
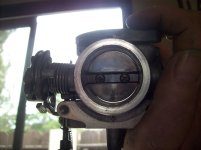
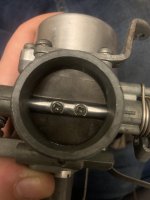
Also the throttle plate has to be centered, off center will cause the plate to bind against the body at times. Using a flashlight from one side look for a smile of the plate to body like this

201_4712.jpg

201_4714.jpg


NOT like this
201_4713.jpg
 
One of those plates is in upside down. See the K (logo)130 marking? Seems they should seal a lot closer, with less daylight coming through. They may be backwards too. Check the plate edges for a bevel that should match the throat surface fairly precisely. Someone who is very familiar with these carbs could verify.
Are these the plates that came in these carb bodies? I know you did some parts swapping.
With the idle screws backed fully out (as the lower pic shows) they should fit tighter.

I checked both bevels on the plates and they are facing the correct direction.

The bottom carb, with the carbon stained plate, has never been out of the carb body. That was the original correct 14H that came with the bike.

The top 14H carb that I ordered, that’s cleaner, came with that throttle plate.

I have the 723A carb throttle plate next to me. It has a “K100” marking on it.
 
One of those plates is in upside down. See the K (logo)130 marking? Seems they should seal a lot closer, with less daylight coming through. They may be backwards too. Check the plate edges for a bevel that should match the throat surface fairly precisely. Someone who is very familiar with these carbs could verify.
Are these the plates that came in these carb bodies? I know you did some parts swapping.
With the idle screws backed fully out (as the lower pic shows) they should fit tighter.

You know what.. I just took the plate out to flip it, and it very well might be in backwards. Let me verify this
 
Good suggestion ballbearian… those bevels played tricks on my eyes..

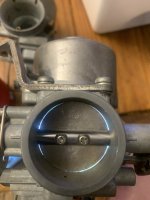
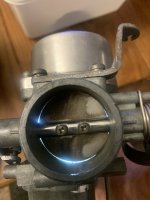
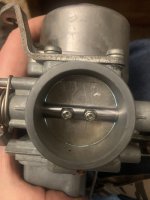
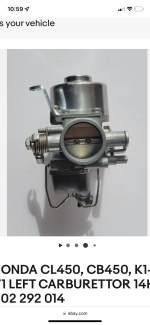
I turned the plate right side up, and then flipped it. They were in backwards… Here’s a NOS 14H carb on ebay that I look at sometimes to make sure everything matches. Now the throttle plate matches. Also here’s another light test.

4A6DC7A0-224D-4614-B957-3FB1BD471812.jpeg
D86C2A2B-8379-445C-B3B4-9E074F24001E.png
 
Light test on the other carb now that I’ve flipped it… Battery on my rechargeable headlamp was getting low at this point.

BAB369D6-F981-4C90-AE74-2F5D52A8BCA6.jpeg
 
Back
Top Bottom