‘72 CL350 won’t shift into second or higher, starter clutch issues too

amper27

Member
Joined
Jun 6, 2023
Total Posts
18
Total likes
0
Location
China, Maine, United States
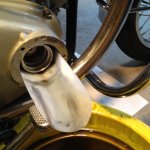
A little background: I just purchased this bike a couple of weeks ago. I bought it from a guy that had acquired it the year before. He had done some work on it, touched up some paint, cleaned up the carbs, put some new gaskets on it and had tried to fix up the rusty gas tank. It was pretty gnarly and he got frustrated trying to fix the tank up and saw how much it would be to buy a recondisioned one, gave up on getting the bike going (he didn’t even try to start it because he didn’t want to foul the carbs) and he put it up for sale. The transmission would click through the gears and the engine would turn over, it seemed like a safe bet. The electric start spins but doesn’t engage, but the kick start was solid and all of the parts were there. It did look like it went down on the left side, some scratches in the muffler covers, the left grip cut through to the bar, the shift pedal a bit bent; but it is a fifty year old bike with not too many (11,000) miles on it.

We got the bike home and my son and I cleaned up the tank pretty well. After this season we will run it through the process again just in case there were spots we missed that we couldn’t see with the borescope. It was mostly elbow grease and time to clean it up. Once we had the tank on we adjusted the carbs, timed it, adjusted valves and it fired right up. It idles right at 1100 and is easy to start. So I took it down the road and back (maybe 4 miles) and everything worked fine. I rode it another couple miles and it ran well again. The next day I rode my bike and my son took the CL down to the end of the road. He said everything was fine except it was hard to get it to downshift. We took it out again and at the end of the road, two miles down, it got stuck in first gear and we couldn’t get it to neutral. I rode home to get the trailer but by the time I started heading down the road my son had gotten the bike in neutral, started it and headed home in first gear.

The bike was shifting fine and now it will only go into first and I can find neutral most of the time but not always. When I try to shift up the clutch pedal stops like it hits a wall. I thought maybe it is the clutch cable so I pulled off the clutch plate (as a side note the neutral indicator wasn’t working, I wanted to fix that and it’s under there also) and a bunch of eaten seeds and mouse excrement fell out. The plates on it were from 2012 so it has sat for at least a decade and I knew there were mice problems because they had gone through the holes in the seat pan and cleaned out a nice hole in the seat foam for nest. I cleaned the clutch cover, checked for the ball bearing, everything worked and looked well lubed. When I was fixing/cleaning the neutral indicator the roller cam would click through the gears. I put it all back together and adjusted the clutch following “some guy named Steve’s instructions” and tried to shift. I also made sure that the shift pedal and linkage are as close to parallel as I could get them. No change in shifting, but the clutch seems fine….

I had read in more than one place that some bikes need to be ridden a bit after sitting for a long time to get the grease/oil flowing. On that advice I took the bike out and rode down the road and back to get it nice and warm. When I got within sight of my driveway I tried to shift and there was no difference; I can shift to first and neutral but that is it.

My thoughts and hopes: Since the bike shifted well at first, both while riding and on the center stand, maybe some gunk went where it wasn’t supposed to go, or something worked loose after sitting for so long? Or a mouse got in somewhere and packed it full of seeds? So it should be an easy fix! Right? I can’t believe anything catastrophic happened on those very short rides.

I am out of ideas short of pulling off the right case cover. Any suggestions? And if I do need to pull off the cover, what special tools do I need to get in there (I have an impact JIS driver). I think you need a special tool to take off the oil filter? Anything else? What should I look for in there? (I have watched videos on the transmission and clutch basket to see how they work) but I don’t know if I can diagnose a part that isn’t working correctly. If I pull the cover do I drain all of the oil first or will most stay in?

Thanks in advance for any help!
 
As long as you have the shift linkage correctly installed and adjusted (and pictures always help us be sure you're doing what you describe correctly), then it sounds like the next step is to pull the right crankcase cover, clutch and oil pump. The shift mechanisms on the 350 are a little more complex than its bigger brother the 450 and we've seen some of the detent parts come loose and cause binding before. Yes, the oil has to be drained to do the job and you'll still have some trapped oil in the right side of the engine, after draining you can use the sidestand to help a little bit when the cover comes off. You will need the special socket to remove the oil filter nut, and the nut has a lock tab under it with tangs to bend into one of the 4 notches in the nut to help keep it from coming loose so remember to find and bend the one down that is being used (or more if someone bent more than one into the nut). Do you have the FSM? If not, go to the FSM library here and follow the instructions to get a download of it.
 
Last edited:
The cover comes right off, just remove the screws, drain the oil first. Check out the return spring and its anchor bolt on the lower end of the shifter arm, it needs to center the arm ,between shifts ,to position the upper end to pull the shift drum either direction to change gears. Check out the upper end of that arm to make sure it can engage the pins in the end of the shift drum as needed.
"the clutch pedal stops like it hits a wall. ", not sure what that means, if you can't pull the lever all the way back to the grip you need to re-adjust the clutch release mechanism.
 
Transmission won't shift through the gears unless it is turning either with the engine running or the rear wheel spinning the chain etc.

Go to the K5 style of shift lever and delete the multi link set up.

11,000 miles is, in my experience, a lot of miles on the timing chain, rollers etc but the transmissions are robust.

An engine laid up has a good chance of rusting the shift drum shaft, there were also issues with the screw on the end of the shift drum loosening particularly on the K5 but something I always check.

If you do decide to pull the rhs be aware the gasket for the oil pump is hard to find, you will need the tool to take off the nut the end of the crankshaft holding the oil filter in place and I strongly suggest replacing the 3 o-rings, one for the oil filter cover, 2 in the side cover. The circlip holding the cover on is also one I would consider replacing. Honda has the o-rings and circlip last time I checked.
Also do not reuse the gasket.
 
AD, I do have the FSM, I got it yesterday from LDR and I had found an earlier version a few weeks ago, it wasn't as in depth. I will order the filter removal tool today!

Mike in ID, I meant the shift pedal stops like it hits a wall when trying to shift up, meaning it doesn't shift up as much as it should.

at rest.jpgHere is the pedal at rest

Downshift limit.jpg Here is the play when shifting into first

Up shift limit.jpg
and this is how far it will move when trying to shift into second (with wheel turning, w/o wheel turning, with clutch in and wheel turning, it is all the same).

Let me know you see anything in the pictures or if you need a different angle, the foot post is right in the way!

I will drain the oil, pull the cover and check what I can while I am waiting for the tool.

Thank you both for the quick responses!
 
Last edited by a moderator:
I'd be inclined to try a straight shift lever with no linkage before I'd open up the right crankcase cover, that linkage looks pretty sloppy.
 
Boomer, I ordered the o-rings. The gasket and circlip aren't available from Honda any more! They hooked me up with a dealer in Utah that still has some of the gaskets. I called and he has them and now he is figuring out how much to charge me to send them to Maine! They have been on his shelf since 1995. The circlips are also available at many dealerships but it seems it is going to be harder to get these parts in the future.

Thanks for the information
 
It's probably picture angle but on the shifter mechanism both short lever sections have to be parallel to one another, that's why there's the adjuster bar between them.
RIMG0504.jpg
 
‘72 CL350 won’t shift into second or higher

I'd be inclined to try a straight shift lever with no linkage before I'd open up the right crankcase cover, that linkage looks pretty sloppy.

I second this and also going to a direct link shifter instead of the multi-linkage one that came stock.

4into1 has the emgo version for $25 I think. Changed it on mine and have no issues.

Edit: to be clear I though AD was referring to the fact that the linkage piece between the pedal and adjuster is bent - try bending it straight to see if that gets rid of “the wall”. See LDR’s post for reference.

Sent from my iPhone using Tapatalk
 
Well not to be a downer - but there is another possibility.
If the cases have ever been split and the Right Side Bearing cap was not correctly installed with the locating Pin in the Hole on the Cap.
It can/will push thru the case and for me after about 3-4 miles of riding it pushed out and allowed the shift shaft to move to a position where it would not do anything but 1st & Neutral.
Removal of the Ride Side Clutch basket cover will tell the tale.
 
I tried to go get a straight shift lever locally, I found one that looked like it might work (off an old Harley) Got it home and it didn't fit (oh well, just 10 bucks and a nice paper weight). So I pulled my linkage apart and just put the spline part on and used a wrench to try to shift it and it felt the same. I don't know if the cases have been split but I have the sinking suspicion the previous owner opened up the right side because it looks like the gasket is new. I don't know why he opened it but maybe to clean it all up? Looks like I will be opening up the case and seeing if anything is misplaced.

direct shift.jpg

20230712_143314.jpg
New Gasket?
 
Last edited by a moderator:
And you were rotating the rear wheel while trying the shift shaft with the wrench? Hard to be sure of course, but it does look like at least the right crankcase cover has been off before.
 
Rotating wheel, not rotating, clutch handle in, clutch out...

With the engine off, clutch engaged or disengaged isn't important - rotating the rear wheel is required so the engagement dogs on the gears will align to move between shifts. If you've never seen the inside of a constant-mesh transmission, this should help

 
AD, I do have the FSM, I got it yesterday from LDR and I had found an earlier version a few weeks ago, it wasn't as in depth. I will order the filter removal tool today!

Mike in ID, I meant the shift pedal stops like it hits a wall when trying to shift up, meaning it doesn't shift up as much as it should.

View attachment 23122Here is the pedal at rest

View attachment 23123 Here is the play when shifting into first

View attachment 23124
and this is how far it will move when trying to shift into second (with wheel turning, w/o wheel turning, with clutch in and wheel turning, it is all the same).

Let me know you see anything in the pictures or if you need a different angle, the foot post is right in the way!

I will drain the oil, pull the cover and check what I can while I am waiting for the tool.

Thank you both for the quick responses!
You don't need the special socket just to clean out the oil filter, pull the end off, scrape out what you can reach with a small screwdriver, and rinse out the rest with a spray can of electric motor cleaner. Put a paper plate or a shallow pan underneath the filter body to catch the crud as it runs out.
 
Ok, so I drained the oil and pulled off the right case. As I was pulling the case off (which had absolutely been off recently, all the bolts came off with ease and the gasket looked new) a washer fell out.....
18 mm washer.jpg
it is an 18 mm washer. When I get the case entirely off I find this...

crack1.jpg

and here is the chunk in place (I removed the kick starter spring)

crack2.jpg

It appears this was was left in the case somehow, got jammed and broke off a chunk of the engine case and then that piece got jammed so I couldn't shift. Now with the washer out and the chunk out I can shift to all gears....

I think the washer was supposed to be on the outside of the case between the kick start pedal and the right case cover but somehow ended up loose in the case. I don't think the guy who had the bike apart did anything with the transmission or clutch, I think he just changed the gasket and cleaned up the outside.

Are there any other 18mm washers that should be on the spindles inside the case? In the parts catalog I can't find any other 18mm washers, the closest is the 20mm thrust washer on the main shaft.

So, if it is the washer from outside the case on the kick starter, that's great, I don't have to pull apart the clutch basket, oil pump, etc. But what about the broken chunk, should I just leave it out? Do you think the integrity of the lower end case has been compromised? Should I jb weld it back in place? Will the kick starter not work with out it?
Here is a picture of the spring on starter before I pulled it off.

spring on starter.jpg

The kick starter has been working fine since this occurred... Thoughts???
 
That’s definitely washer for the Kickstarter - I always thought it went inside the case between the circlip and the case itself:

2d642389af165947d6a6050d982df82b.png


Part 26 in that fiche.

It’s sort of a how much are you willing to risk thing… if it were me I’d either leave it off entirely and be *very* gentle with the Kickstarter - or more likely just rely on the electric start - or have it welded back on.

JB weld doesn’t seem right for something that’s going to see a heck of a lot of force.


Sent from my iPhone using Tapatalk
 
That washer absolutely goes inside the right crankcase cover between the circlip and the cover, not on the outside. I'd be wary of using the kickstarter with the reduced leverage the return spring would have with that chunk removed. I'd be inclined to think JB Weld would hold the piece IF the absolutely proper prep was given to the surfaces to ensure it's oil free. Possibly drilling a small hole through both parts clamped together for a reinforcement, but it would have to be done very carefully in order to stay properly aligned together. Actual aluminum welding the chunk back on would be better.
 
well the old good news bad news typical with these bikes.

I would run it as is rather than risk that piece coming off again and doing worse damage.

Check the oil pump screen and make sure the oil passages are free of debris ... oil follows a convoluted path through the side cover and cases.

post a photo of the mating surfaces of the oil cover and filter cover, there are a couple modifications that improve oil flow.
 
I don't know a lot about aluminum welding. If it could be done in the frame that would be ideal. If it were my bike, I would consider purchasing another the lower engine case and using the electric start until I have time to swap the case out and reinstall the kick starter return spring.

In my experience that washer often sticks to the cover due to oil between the washer and cover, which is why it can seem to appear from nowhere when removing the cover.
 
I have called an aluminum welder in my area and sent him pictures, he is going to let me know if he thinks it can be welded. I don't think I will try JB weld. In the meantime I am going to button it up and see how it shifts. I will go easy on kick start but my electric start isn't engaging and I am waiting on the tool to pull the stator apart so I will have to use the kick start.

Boomer, I can't show you a picture of the mating surfaces because I can't pull the filter off, I am also waiting for that tool. Hopefully I will have it by the end of the week, along with all of the o-rings and gaskets I now need to replace. There were a few flecks on the screen, but nothing too big. I am glad I opened it up before I drove it more, hopefully the damage done was minimal.

Thank you all so much for the input. I will update you all when I hear back from the welder and receive the tools I need to go further.
 
You do *not* need to remove anything more to clean the filter.

The nut and washer ADD mentioned above can be left in place and the cup can be cleaned as it is.

I believe boomer was referring to the transfer piece - it’s the part that’s held in by 3 notoriously difficult to remove screws to the right side crankcase cover that you’ve already removed.

Part numbers 3 and 4 in the below fiche, specifically - just show us the inside of the right crankcase cover you removed:

4f78ef92878702921eecf687bd17c140.jpg


Sent from my iPhone using Tapatalk
 
DSC03644.jpg

These two mating surfaces, note the transfer piece on the cover does not have the clip holding the piece in place so it will look different than yours.

Having welded on oil impregnated cast aluminum cases I would suggest saving your money for a new case or simply running it the way it is. Your experience may vary and your welder better ....vbg.
 
The surface look reasonable and smooth. All the oil for your engine passes through these parts as one of them is spinning so having them mate up is important.
 
Another option is to push start it (always park near a slight hill (y)) and get some miles on it to see what else and it's compression for a fall/winter job of engine drop, flip and remove bottom case. By then you might have scored another lower case for a good price or found a good TIG welder who'll do it cheap. Either way, the bottom case should come off.

I'm pretty confident you'll have the starter clutch and starter going soon.
 
That sounds like a good plan Ballbearian! I will put it back together this morning and start looking for a case or maybe even a parts bike (just don't tell my wife, garage space is at a premium).

And Thanks Boomer343, I saw some nicks in the edges so I was afraid there was going to be an issue.
 
That sounds like a good plan Ballbearian! I will put it back together this morning and start looking for a case or maybe even a parts bike (just don't tell my wife, garage space is at a premium).

And Thanks Boomer343, I saw some nicks in the edges so I was afraid there was going to be an issue.

Mums, the word. Just don't get too good of one, or you'll want to fix it too.
 
Quick Question. When I put the spring back on the kick starter do I need to have it under tension? and if so, what is the procedure? I looked in the manual and it just says put it back together in the same order.
 
I’ve also cut open an aluminum can and used that. Then just blast brakleen in to your hearts desire, wipe with a paper towel a few times and you’re good


Sent from my iPhone using Tapatalk
 
Quick Question. When I put the spring back on the kick starter do I need to have it under tension? and if so, what is the procedure? I looked in the manual and it just says put it back together in the same order.

I haven't done a 350 bottom end in a very long time but you probably need to wind the spring around one turn before hooking the end over what's left of the spot on the lower case where it broke. My concern for the kickstart operation is the stop, which I believe is part of that area and if the kickstart lever is allowed to fly up without your foot on it there could be further damage. As others have said, if you plan to leave the lower case like it is I'd get the electric start repaired very soon. It's typically an easy fix, the springs, caps and rollers should be replaced (#2, 3 and 13 below) and the integrity of the outer housing (#1) should be checked to be sure there are no cracks in it, then assembled with loctite on the screws and get them as tight as you can get them. You'll need a rotor puller (essentially a 16mm bolt, 1.5 pitch). Here is what it looks like

sRrF1Oe.png
 
AD, I have ordered a rotor puller after trying to find an 16m bolt with the 1.5 pitch locally. I could only find 2.0 pitch, I went to about 5 stores and then gave up and ordered one. When it comes I will replace the springs, etc. The starter is spinning, it's just not engaging so hopefully that will fix it.
 
AD, I have ordered a rotor puller after trying to find an 16m bolt with the 1.5 pitch locally. I could only find 2.0 pitch, I went to about 5 stores and then gave up and ordered one. When it comes I will replace the springs, etc. The starter is spinning, it's just not engaging so hopefully that will fix it.

If it's not even trying to engage, it could have a cracked outer housing. Typically they will at least try to grab a little while slipping, making the sound of shaking a bunch of nuts and bolts in a can. If the 3 screws came loose the screw holes in the back of the rotor could be wobbled out as well. Hopefully none of that is true, but you'll know once you take it apart.
 
So I got the starter clutch/rotor pulled off and I found a mess. The two bolts I found were completely worn and loose, one missing. Of the three springs, caps and rollers on the starter clutch on only 2 springs and caps and one roller. Here is a picture of the rotor:
rotor.jpg
The bolt holes are demolished.
Here is the clutch:
starter clutch.jpg
Holes are worn but serviceable, I think.. Until you look at the side.
starter clutch hole.jpg
There is a hole all the way through, I put the spring and cap on and they fell through.... So how did this happen? What would cause this? All I can think of is they previous owner drilled it for some reason? Anyway, I got a replacement from ebay, rotor, gear, clutch, springs, caps and rollers bolted it on and the bike started on first push of the button! Starter is working great.


So now my son and I have ridden around and put maybe 100 miles on the bike. It burns some oil, we did change the oil before we started riding and the oil was low, bottom of dipstick. and now we have a new issue. Engine knock. I am afraid it is major....

[video]https://drive.google.com/file/d/1Zbizxz_38ixxE7bBb__7sra02fyMVaAX/view?usp=sharing[/video]

Anyone know this sound (you can really hear it at the end just before I shut it off)? Is it the sound of a rebuild? The sound appears to be coming from the left/lower side as far as I can tell. What am I in for? If I ride it at all will I destroy it? We set points, set cam shaft tension, set valve clearance, synced carbs.

Thank you
 
It's really hard to be sure, but since you didn't have this knocking sound before (I'm assuming) despite the incredibly loose parts of the starter clutch, I'd have to guess that the 'new' starter clutch parts aren't tight enough, or the rotor isn't as tight as it should be on the crankshaft. Since you moved well past where you were on your last post, I didn't get the opportunity to tell you how important it is to not only get the 3 screws holding the starter clutch housing to the rotor as tight as you can get them, but also to either use loctite on the screws or stake the screw heads after tightening so they do not come loose again and cause what happened previously. How did you tighten the rotor bolt? If the rotor bolt isn't tight enough to seat the rotor on the crankshaft taper fully, the rotor will move back and forth against the key in the crankshaft and eventually wobble out the keyway slot, effectively ruining the crankshaft.

I'd suggest pulling that side apart again to ensure it isn't where the noise is coming from, and tightening everything up if it is. And don't ride it until you do.
 
Well, then the screws on the starter clutch might not have been as tight as they should be, something in that general area is loose and I'd find out what it is before running it any further.
 
I have called an aluminum welder in my area
How did this all play out? I'm suddenly having trouble shifting into second and above. I'll take the engine apart tomorrow to see what's up, but I wanted to know how this all played out for you.
 
It would also be helpful to post pictures of all the parts you used to rebuild the starter clutch before you reassemble it, especially the "starting clutch outer" housing, 3 screws that hold the outer housing to the rotor, locator "knock pin" and starter sprocket teeth and roller engagement surface.

I'm assuming the ebay parts are used and therefore may be worn and the outer have cracks or chips since that is very common.

Lots of missing parts when you opened it up. Did you find the missing two rollers, missing cap and spring and missing "bolt" (? 6x25 flat head screw)?

Any damage while they were running around loose in there?
All valid points to ask, but the OP hasn't been here since the day of his last post on August 25th. Member @icandothat ran across this and was simply getting some clarification while wondering how things worked out for the OP.
 
'Staking' a screw is a method of locking it from loosening that was used before thread lockers like Loctite, typically on starter clutch screws in the alternator rotor
The stuff you learn. :unsure:
That's pretty cool, never heard of it.
 
Mostly because it's an old practice that was used by the bikes of that era, before products like Loctite were commonly used.
It is still common practice in certain applications. For example, u-joint caps on steering shafts are usually staked in place
 
Back
Top Bottom