• Don't overlook our Welcome Package, it contains many links to important and helpful information about functions at VHT like posting pictures and sending PMs (private messages), as well as finding the parts you need.

    AD

1979 Honda CM400A - no spark

AmiraliM

Member
Joined
May 23, 2023
Total Posts
25
Total likes
0
Location
Chicago, Illinois, USA
Hi everyone!

Hope all is well.

I recently purchased a 1979 Honda CM400A and it rode perfect on Thursday but wouldn't start on Saturday with nothing happening to the bike in between (it was under a tarp, dry, sunny conditions).

A very nice user on Reddit (and here I'm guessing) by the name of Ancientdad, recommended that I post the issue here. He also mentioned that a user by the name of LDR is an expert, so I would greatly appreciate your input.

I have been scrambling to find the issue. I checked the kill switch , by disconnecting it but that didn't help. I tested the resistance of the coil and it seems to be well within spec.
What boggles my mind is that I tested the wired from the CDI box that feed into the coil and they produce a voltage when I press the start but somehow this is not translating to a spark.
I tested the resistances according to this post "1978 CB400A Hondamatic No Spark Faulty CDI Conversion" and from what I could tell, it was all okay.
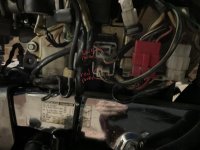
This is a picture of the electrical https://imgur.com/a/jtvyTl4
If somebody is knowledgeable about this bike, I would really appreciate your help.

Appendix:
I am a new rider, recently turned 21 and I use this bike as my daily commute to college.
 
Last edited by a moderator:
BFCC94B3-1034-4075-8D07-C1346BB5284E.jpg BFCC94B3-1034-4075-8D07-C1346BB5284E.jpg BFCC94B3-1034-4075-8D07-C1346BB5284E.jpg BFCC94B3-1034-4075-8D07-C1346BB5284E.jpg BFCC94B3-1034-4075-8D07-C1346BB5284E.jpg BFCC94B3-1034-4075-8D07-C1346BB5284E.jpg BFCC94B3-1034-4075-8D07-C1346BB5284E.jpg BFCC94B3-1034-4075-8D07-C1346BB5284E.jpg

Thank you guys for the reply.

The only issue I found with the tests was this one

“In Neutral the voltage should be about 0.7V for OEM. It will be much lower than this if you built one with a MOSFET or have ordered one from me.”
I found that the voltage is 10.35 at neutral. Since the engine only cranks at neutral, could this be the issue?
 
Last edited by a moderator:
10V is very high. Like very close to battery voltage. What is your battery voltage at by the way?

The real purpose of the change relay is to protect you from bumping the starter in gear and to change the timing when in gear.

Are you able to run through the dynamic stator tests with an analog meter? It must absolutely be analog for that test. A digital will give false or even no readings.

I got my CM400A when I was about your age and funds were tight. My wife rode around in a barely running 92 T-Bird with a slippy transmission and I rode the CM400A year round so I know the pain. In any case, I could send you a CDI prototype, Change Relay prototype and a spare coil to test. Are you able to pay for round trip shipping via UPS or FedEx ground?
 
Also, I took a closer look and went outside re-verified my tests. So for some reason the wire colours look different (but may just be the photo) and your change relay is mounted upside down. On the 3-pin connector the black probe should be on the terminal that has only one wire going out of it, not two. When I moved it to the terminal that had two wires coming out and did the test then I was getting about 10V so it appears your relay is functioning normally assuming you redo the test on the single wire terminal on the 3-pin connector.

Re-do that test, if it comes up about 0.7V then the problem is very likely the CDI or stator. The CDI requires an analog meter to test, digital works on some connectors but not others and I cannot recall which ones off the top of my head.

Another thing to try is disconnect the black w/ white tracer bullet connector from the CDI. It will be mounted under the tank by the coil. This is the killswitch wire. Sometimes they short out internally in the CDI from a bad solder joint or it's a problem in the switch. If the bike starts then pull the blue and white 2-pin connector under the left sidecover to shut the bike off. You'll see a few sparks, but this is OK. Just don't do it too often.

Since it's unlikely in this day and age for you to have an analog meter or an oscilloscope the easiest way is for me to ship you a CDI and coil to test swapping out. If it is the CDI no fear, I have helped a few college students with CM400As with CDI replacements already. I'm empathetic to the cause and offer some options. One option is you buy the soldering kit outright from me, or pay a bit more for one I have soldered and tested. If you go these routes it is up to you to figure out a case to mount it in. If you have access to a 3D printer I can make STL files of the case and you can do it this way as a temporary solution until you come up with a better solution. Another alternative is to send me your broken CDI and I MIGHT be able to reuse the case. Really depends on if I can get it out without destroying the grommet. However, I do charge for that process as it's time consuming and the potting compound used.

Thank you very much for your kind reply!

I will redo the test and let you know if I get 0.7 V.

I have already tried disconnecting the black and white bullet connector, but no avail (the switch seems to be working fine, according to the restate test).

I will try my best to find an Analog VM, but I would really appreciate it if you could ship me the prototype CDI, COIL (and possible change relay). I will of course ship these back to you as soon as possible. I do not mind at all paying for your CDI. I do have access to a 3D printer and we can definitely discuss that if the CDI turns out to be faulty. Would I be able to pay you through Zelle? I would also be happy to send you a deposit since you are shipping your components to me. I have PM'd you my address.
 
Almost forgot! Disconnect the green w/ white wire from sidestand switch to CDI. There's a green w/ black wire that goes to the change relay. Disconnect that too. If the sidestand switch is funny it will kill the spark.
 
Thank you for the new suggestion. I tried it but it didn’t make a difference.

Then something interesting happened….

With all wires back to original, and the kickstand up, I turned the key on and off 10 times very fast. Then I kept it on on.
I then pressed the start button and flicked the kill switch from on to off very fast and saw a beautiful blue spark on the spark plug which was rested on the crankcase. I was able to recreate this one more time.

I then quickly disconnected the black and white bullet connector under the gas tank and…. nothing.
No more spark, the trick stopped working. I thought that by bypassing the kill switch, the problem would be resolved but somehow it didn’t work. Can someone please explain this?

Does this mean that the cdi and coil are fine? since I got 2 sparks? Or could they still be faulty

Very likely CDI. This was how my CDI was going out a decade ago. My old man found out by accident grounding part of a wire from the killswitch very quickly and rapidly would eventually get it to spark and run. I got away with this for a year until it finally back fired because spark cut out and stopped running. I think, but cannot prove, that doing that causes the large film cap to discharge and recharge, sort of reforming it, but this only works for so long.

My guess in your case is the rapid on/off movement of the switch has a momentary lapse where the two connections inside the switch touch and does the same thing my old man found out by accident.

Per our PM I'll get a quote on sending you a loaner prototype CDI, Coil, and Change Relay on Saturday. I might /maybe/ have a killswitch assembly. I have to dig around. No guarantees, but if I do I'll throw that in there as a loaner as well. The only spare part I do not have is a rotor and stator :).
 
Wow that’s really interesting. Could you please tell me how you managed to use the grounding trick to start your bike for a year? I am hoping to be able to start the bike at least while awaiting the loaner components.

Also I discovered something interesting. When I put the DVM on voltage and stick the two probes in the two spark plug wires, I see a voltage change as I press the start button. Somehow this voltage is not transforming to a spark. Does this mean anything? Is it still likely the CDI?

I tried artificially jumping the coil by connecting 12v to it and rapidly disconnecting the negative to mimic AC voltage, and see a spark but nothing was observed (perhaps my frequency was just too low).

I can’t imagine how much more complicated modern bikes are with microprocessors and everything - my skills can’t even crack 1979 technology :(
 
Sorry, I've been busy. The 12V to Coil trick doesn't work unless you have a large capacitor to work with. You have to solder up a lug on the spark plug as well to do it. Don't leave raw 12V connected to it for too long or you will burn the coil out.

Regarding the trick, it was either the Black w/ White or the Dark Green coming out of the kill switch. He basically took one of these cut them and then whacked it against the handle bars while cranking. It makes me think it was PROBABLY the Black w/ White going TO the CDI. So you'd leave it disconnected on the kill switch side, but connected to the CDI. This probably did enough to force a rapid discharge to the capacitor in the CDI. He would crank and smack the wire against the handlebar quickly. You'll see a bit of sparks, not many, but a few, while you try to do this. If this trick ends up working for you, realize it's borrowed time. When the trick worked for me as long as I rode it daily then the trick was unnecessary, but after a week I'd have to do it again and sometimes I'd be screwing around for 5 minutes before it would finally start.
 
Amirali got the package last night, but sent me a PM. Unfortunately the parts did not help his problem.

At this point I would have to assume the stator is bad and maybe he took the measurements incorrectly. Another possibility is one of the parts I sent got damaged in transit. I hope not as I paid extra money to have it shipped fragile with fragile packaging. I bubble wrapped the components as well.

Another final thought is that maybe the ground from CDI to stator is not completing. It's possible that the ground eyelet that's in the stator is bad. I recommended he check the ground from green at the coil all the way to the green on the 6-pin coming out of the stator. Then also check green on the 6-pin to somewhere on the frame.

Other then that, I'm at a loss. The only real test after that besides doing the measurements again is a dynamic cranking test with an analog meter and/or oscilloscope. Unless there's something I'm missing?

Amirali, I highly recommend you get an analog meter at this stage. Otherwise, we're just going to chase our tail trying to figure things out. eBay has this brand new one at a cheap price: https://www.ebay.com/itm/250977580013. I have not used this particular model, but I'm sure it's fine. This should be able to tell us what is happening when you spin the starter. Just because the ohm readings come up good doesn't necessarily mean the coils in the stator are working. Once real voltage is being applied or generated it may not be outputting anything or it may be very weak and out of spec. This tool will tell us if the low and high RPM coil are generating anything at crank and if the pickup coil is generating a voltage. If you're missing any of these the CDI is getting no information and doesn't know when to fire.

PS: Sorry for multiple edits. Thinking out loud. Have you done the basic magnetic test on the alternator? You should be able to hold a paperclip near the flywheel cover and turn the ignition switch to the ON position. The paper clip should be drawn to the flywheel cover by a magnetic force. If that's not happening then something is up with your charging circuit and likely something in you stator/alternator.
 
Frank very kindly sent me a CDI, coil, relay switch and kill switch to test. I connected all of his components together and bypassed each of the original components on my bike.

I then attempted to start the bike, but unfortunately no spark still.

My plan for today is to determine whether there is a wire being grounded somewhere in the stator by following's Frank's method. I will then go over the electrical diagnostics test again and take picture of every test and upload here just to make sure I am doing it right. Meanwhile, I am buying an AVM and a rotor device because it seems impossible to get it off otherwise. Hopefully we can crack this mystery soon.

Thank you Frank for being so patient and helpful

By grounded, I mean that you want the ground to be complete in the circuit. If the ground is floating in the stator it's never going to work. I've seen this before. Usually because someone tried to take it apart at some point and didn't put the ground eyelet in the right place and it gets loose eventually.

While you wait for the AVM you can redo the measurements on the stator. Make sure the CDI is disconnected from it or you will get false readings. Make certain that green on the 6-pin from the stator is completing the ground to the frame.

Just out of curiosity... have you modified the bike? I.e. LED lights, things like that? If yes, it's possible something is floating around and goofing things up.

And don't forget the obvious, the spark plugs themselves. Are they new? What kind are they? If they are new, where did you buy them? There are counterfeit NGK products on the internet. Your best bet is to go to a powersports dealer and get NGK D8EA plugs from them. If you must order it online get it from Partzilla or David Silver Spares. I should have sent some spare plugs with you, but slipped my mind.
 
Hi guys,

Hope everyone is doing well.

UPDATE: I ordered an AVM which hasn’t arrived yet. In a desperate attempt to find the issue, I went over the electrical diagnostic tests one more time and noticed something peculiar:
Measure the resistance of the White and Green wires in the large 6 pin connector. The resistance should be between 200 to 500 Ohms.

For some reason, this is reading offline for me and I’m not getting any resistance. Not sure how I had missed this last times.

Is this an easy fix Frank?
 
This is the low RPM excitor coil. This explains why you have no spark as no real voltage is going to the CDI.

You can try and twist the wire around and continue to measure. If you're very very lucky it may be a break in the wire that leads to the stator and you can solder and repair yourself.

Order the flywheel puller, you'll need a clutch basket holding tool as well to get the stator off. You may get incredibly lucky and a solder joint has broken loose and you can repair it. However, if not you will need to get the stator rewound. Custom Rewind in Alabama can do it for you at a fair price and a better job than other places. Price will probably be around $200-$300. Your other option is to source a used one, which is getting difficult. There's a few on ebay right now but almost cost as much as getting it rewound thanks to parts scalpers.

Here's a link to a cheap clutch basket holder tool that I use. Works fine for this purpose: https://www.amazon.com/gp/product/B0963XXXRF

Send us pictures when you get it off. As you wait for these parts I'd recommend spraying some penetrating fluid (NOT WD-40) on the flywheel nut. They can be hard to get off if they haven't been removed in a long time. Just give it a spray once a day until the parts show up.
 
More tools you'll need for this...

* A 1/2" breaker bar as that nut may be on there incredibly tight: https://www.amazon.com/ABN-Extension-Drive-18in-Spring-Loaded/dp/B01MCT6M1N
* T-Handle JIS bit screwdriver, you'll need this so you don't mangle up the screws on the stator: https://www.amazon.com/Handle-Screwdriver-Japanese-Standard-Screws/dp/B07V571J15
* Flywheel puller: https://www.motionpro.com/product/08-0086 (You can find this one on Amazon or elsewhere)

I like to put a little bit of blue loctite on the screws when they go back in because this is a heavy heat/vibration area and you don't want them backing out. Not sure if it's necessary, but it makes me feel better and it's cheap. You can get this at Autozone or Harbor Freight, etc.

You'll need a torque wrench to get that nut back on. The ones from Harbor Freight will work or if you can find an old antique one that has the needle at a yard sale they work fine too. Don't try to get it as tight as you can and think it's good. Tried that, I wasn't even close.

I forget the size of the nut on the flywheel. My guess is 17mm, but I'd have to check the book. You'll need a 1/2" socket of the right size for the flywheel.
 
Hi guys,

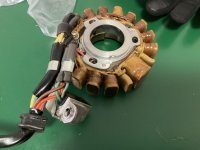
I was finally able to pull off the rotor and stator.

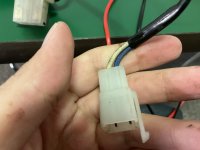
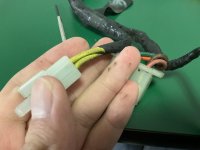
I am a little confused about the green and white wire ‘in the 6 pin connector” according to the test. This is my 6 pin connector
E61CB15E-0561-4DC5-ABDC-C5C1785A68F2.jpg

1DDB9C3E-3174-46DB-90D4-2F19D0963DE5.jpg 8CE14FE3-5170-4B15-9B42-DBA39C9CFB01.jpg F7DB917D-7871-4AB2-8417-6EBC5296963F.jpg

which two wires should read 200-500 ohms?
 
Last edited by a moderator:
Sorry, what I really mean to say in those instructions is measure the green wire from the 6-pin and the white wire from the 2-pin.
 
ok that’s great. It is definitely registering no connection.

I am sending it to custom rewinds tomorrow. Thank you Frank for your help
 
Good luck. Just make sure when you get it back to check the torque on the nut for the flywheel. Use a torque wrench. I thought I was close, but wasn't even anywhere near the torque value. If you gotta buy a crappy harbor freight one then do so and just get it at ~90ft/lbs. It may not be dead accurate, but should be within 80-90ft/lbs which is the spec.
 
I will be sure to get a torque wrench and hopefully will find other uses for it as well.

I have sent the stator to Kirk at Custom Rewinds and it should be with him by Monday. His quoted price of $240 is better than other places I checked. He told me that he will ship it to me the same day he received it - so hopefully I will have a running bike by next week Thursday.

Afterwards, I am planning on giving the bike a tune up. I am hoping to do the following
1. Replace the chain
2. Replace both tires
3. Polish the chrome
4. Clean the brakes
5. Lube everything that needs to be lubed
6. Replace the front brake handle (it's bent)

I am making another post to document the journey. For now, my fingers are crossed.

Frank, as soon as the stator arrives, I will ship the loaner items. Thank you for all your help.

Yeah, Custom Rewind is great. He'll treat you right. He usually has cores in stock ready to ship out, and it sounds like he does this time for your Hondamatic so you should be back on the road shortly.

Regarding the front brake handle, you can probably find one of a seized junk master cylinder for cheap. Can come off a CM400T or a wide variety of models. Here is the part and what it fits: https://www.partzilla.com/product/honda/53175-438-010. If you check ebay frequently should be able to find a junked one or even just that lever for pretty cheap.
 
Hi guys....

Good news! We have spark

Custom Rewind came through and the bike is running great!

Thank you very much guys for all your help and support - I definitely couldn't have done it without you!

Frank, I will be shipping the loaner items back to you tomorrow or Saturday, thank you very much.

As a token of thank you, I am thinking of filming a ride through Chicago on the CM400 exclusively for VHT. Will update you soon.
 
Awesome! Glad we could help. Make sure you give it a good tune up. Set the valve clearances, new plugs and caps, oil that chain and set cam chain tension and you should be good to go!
 
Received package from Amirali today. If anyone else out there needs an ignition test kit for your Hondamatic send me a PM.
 
There must be something going around, as my '78 CB400T just quit working. I fit the exhaust up last night, gave it a quick fire-up to see how it sounded. Ran it for a few minutes and shut it down. Now I want to do some carb tuning and the darn thing doesn't even cough. Pulled the plugs and.....no spark on either one.
Time to investigate..

Well, the factory CDI units are just waiting to fail at their age so it really wouldn't be that surprising. At least you're in the right place for the best help in testing and the best price for a brand new replacement if you need it.
 
Well, lucky for me, I know where to source a well tested and expertly assembled replacement unit :) (didn't see that you mentioned that in your reply!)
I'll still work thru all the tests (once I've read up on it) and go from there
 
If you can get a Peak Voltage Adapter it will do a better job of testing versus relying on resistance measurements. However, do the resistance measurements on the stator and coil to make sure they are not obviously bad. You can get the PVA cheap and will work with your digital meter here: https://www.amazon.com/dp/B0093U3TFG.

If the CDI is faulty I am back-ordered until mid-July. For a stator use Custom Rewind in Alabama. For a new coil get a DC11-2. Contact me and I can make you a harness adapter, spark plug wires, and spacers for a good price.

Before you do any of that though, just disconnect the black w/ white tracer from the kill switch. Could just be something in the switch. If the bike starts and runs then plug it back in. If the kill switch fails to respond after that and stays running anyways then disconnect any of the canon plugs coming from the CDI, Stator or Coil. You might see a bit of sparking as you disconnect. This is fine as long as you don't do it a lot.
 
Thanks, I just ordered the PVA.
No worries on the backorder. Restoring this bike is fun, and I've got plenty of other things to do to keep busy (honey-do list, other bikes to ride, side-by-side to take on the trails, camping)
 
Thanks, I just ordered the PVA.
No worries on the backorder. Restoring this bike is fun, and I've got plenty of other things to do to keep busy (honey-do list, other bikes to ride, side-by-side to take on the trails, camping)

NB: You will be a guinea pig for the 400T series with this PVA. However, I will walk you through it. As long as it's outputting some kind of voltage at the pickup, advance, lo and hi RPM coils then the stator is good. If there is no voltage coming out of the yellow to coil then the CDI is bad. Otherwise, it's the coil. If you suspect the coil after testing the other two components with the PVA let me know and I can send you a loaner coil at your expense with return shipping to test. I can also make up a prototype CDI mounted to a piece of plywood for testing the 400T bikes.

Keep us updated when you get the PVA and I will let you know what wires to probe. If your bike has starter and it works then the test should be easier. However, kicking rapidly should work just as well.
 
There must be something going around, as my '78 CB400T just quit working. I fit the exhaust up last night, gave it a quick fire-up to see how it sounded. Ran it for a few minutes and shut it down. Now I want to do some carb tuning and the darn thing doesn't even cough. Pulled the plugs and.....no spark on either one.
Time to investigate..
It sounds weird I know but there is some truth to a rash of failures. I don't know or understand why but I've seen it many times with these models and other things.
 
Well...
I'm an idiot (but an idiot that's able to delay replacing the CDI for a bit :lol:)
I did fail to mention one thing; after I fitted the exhaust, I popped the valve cover to double check my valve clearance. Apparently, when fishing the cover either out or in, it must have snagged on the 2-wire connector (green/yellow) to the coil and disconnected it just enough to kill the whole system. Plugged it back in and it's running

2023-07-01_06h50_49.png


That said, I plan on riding this bike for a while, so I'll get the CDI on order when you're back in stock :)
 
I'm still going to go thru and check all the ohm readings I can. Not sure if that connector would do this, but some of the readings I was getting were way off the mark.
 
I'm still going to go thru and check all the ohm readings I can. Not sure if that connector would do this, but some of the readings I was getting were way off the mark.

If/when you reach the point of needing diagnosis or replacement, let's start a thread for your bike since this is AmiraliM's repair thread.
 
Back
Top Bottom