• Don't overlook our Welcome Package, it contains many links to important and helpful information about functions at VHT like posting pictures and sending PMs (private messages), as well as finding the parts you need.

    AD

Galen's 69 CB350

I hope Galen is able to straddle the bike and take it for a ride;it may motivate him to enjoy life quite a bit.

I don't think he will be able to drive it himself any more, but I would love to take him for a ride around the block on it.
 
Moved on to the engine this week. Needs quite a bit of TLC.

Lots of cleaning and inspecting in my future

If those pistons are as stuck as they look, please don't hammer them out. Use the steering puller method to push them loose so you don't compromise the big end rod bearings.
 
Moved on to the engine this week. Needs quite a bit of TLC.

Lots of cleaning and inspecting in my future

I think I see Himalayan micro dust on those valves from the time overseas. ;)

Great build thread and looking forward to seeing more of it. Hopefully as you note, he can hitch a ride around the block as a passenger and relive a few old memories.
 
I don't think he will be able to drive it himself any more, but I would love to take him for a ride around the block on it.

That's what I was hoping ;):)(y) throw a hywy peg bar on the front down-tube for the short ride so he can ride up front & feel the wind in his face.
 
If those pistons are as stuck as they look, please don't hammer them out. Use the steering puller method to push them loose so you don't compromise the big end rod bearings.

The piston are not stuck. What you are seeing is carbon build up on the pistons from the failed head gasket.
100_4374.jpg
Oil had been leaking into the heads.
 
The piston are not stuck. What you are seeing is carbon build up on the pistons from the failed head gasket.

Oil had been leaking into the heads.

Good - it looked like rust in the picture for whatever reason, just hate to see people beat on stuck pistons.
 
I should give a bit more info about tearing down the top end of this project. My first hint that someone else had been in it before was nuts on the studs. 6 if them used a12mm wrench and 2 of them use a 13mm wrench. No other surprises until I took the head off of the cylinder. That's when I found out why the head gasket had failed. Someone had painted the cylinders and heads at some point, but had not cleaned the paint off of the mating surfaces.
100_4489.jpg
When it came time to pull the cylinders, that part was a bit more challenging. They were stuck on good. I ended up using gravity and chemistry to brake them loose. Rigged up an engine hoist with a couple of pieces of scrap angel iron with holes in it bolted those to the cylinders then hooked up a ratchet strap the angle pieces after I had slung it over a hook I have in the ceiling. Ratcheted the engine up so the front of the engine was about 1/4" off of the stand
100_4490.jpg
Then just sprayed parts cleaner around the base of the cylinders as I tapped on the engine with a rubber mallet. After about 8 or 10 times of repeating this procedure the cylinders broke loose. Undid my make shift lift and the cylinders came right off
100_4491.jpg
 
That base gasket will probably be like concrete.


Permatex makes a spray on gasket remover I believe. I have no experience with the Permatex item, yet that is the purpose of it. I have had good success with mixing a combination of the Dominion Sure Seal aircraft paint stripper (gel formula) and acetone at a 50/50 mix. I paint it on the old gasket and let it soak into the old gasket. Multiple applications are usually needed if it is really stuck on there to attack and soften the material Then a wide blade razor scraper will removed the heavy stuff. More stripper application and razor work will get you to a clean surface eventually.
 
That base gasket will probably be like concrete.

Actually the base gasket was pretty easy to clean off both the cylinders and the engine
100_4512.jpg 100_4515.jpg
I think part of that was from soaking that area in parts cleaner trying to get it to brake loose
 
After working all day cleaning off a lot of carbon buildup, and dirt and grime from multiple country's I got the cylinders and pistons cleaned up today. Found out the pistons are 1st over (.25).
100_4503.jpg 100_4504.jpg
Cylinders cleaned up well also. Whoever did the work boring the cylinders did a good job. Everything fits nice and snug. All within specs for 1st over
100_4513.jpg 100_4517.jpg
 
Nice, wish all engine gaskets would come off that easy.

All but the base gasket and the side cover gaskets have been easy. Basically just pull them off in one piece thanks to the painted mating surfaces
100_4516.jpg :)
This is a lesson I hope to others, that if you are going to paint your engine PLEASE do NOT paint the gasket surfaces. Mask them off.
 
A very nice cleaning/polishing job on those internal parts.
Will you be installing fresh rings ?


Thanks. No I will use the same rings they are all in good specs to the pistons and the cylinders. Ring gaps are at .2mm, and since each set of rings are already broken into each cylinder I will just reuse them
 
Need info from the wiser ones. This is what both exhaust valves look like;
100_4519.jpg 100_4520.jpg
It is white build up on the valve's. Nothing will touch it. Tried a wire brush first. Then let it soak in chem dip for 2 days and once again a wire brush still no luck getting it clean. It is only on the exhaust valves. The intake valves cleaned up fine.
My questions are:
1)what is it?
2)what would make this happen

Thank you in advance
 
Need info from the wiser ones. This is what both exhaust valves look like;

It is white build up on the valve's. Nothing will touch it. Tried a wire brush first. Then let it soak in chem dip for 2 days and once again a wire brush still no luck getting it clean. It is only on the exhaust valves. The intake valves cleaned up fine.
My questions are:
1)what is it?
2)what would make this happen

Thank you in advance

Those hard white lead deposits(someone had leaded fuel in it;use a face mask when grinding it off:toxic)in some earlier fuel that had been run through the engine,imo.
The stuff will harden-on from combustion heat(the exh. valves get the hottest)and be almost as hard as concrete.
I think you may need to find something abrasive to remove it;possibly a Dremel bit?
 
Last edited by a moderator:
Looks like they’re a little scorched from a lean condition.

Could be something as simple as dirty carbs. The inside of the pipes might be white as well. Happens to my 350 when I spend a lot of time at WOT.

Do the valves still maintain a good seal? If so, I wouldn’t sweat it *too* much, just check up one everything is cleaned and running, then re-asses.

If they aren’t sealing, you’ll need to re-grind, or new valves (if they’re truly burned, but that would be obvious).


- 1972 CL350
- 1985 VF700F
 
Can't say what it could be from and I have seen on other forums guys wire wheel the valves on a bench grinder to clean them up. No experience here myself with that practice, as I normally replace all valves when doing a build, yet I see most don't bother doing that on these bikes.

The faces and valve stem tips are stellite coated for hardness and its a pretty thin coating. Once you wear through that with prior motor use and lapping, the valve doesn't last as long. That said lots of people lap valves and it seems to be OK. The reality is these bikes are ridden so little that they could last for years with the coffee runs and local rides most people actually do.
 
And reading through the other posts on the main thread it seems like there’s a couple of opinions.

Could be additives, but I thought this bike had been garaged for some time?


- 1972 CL350
- 1985 VF700F
 
Merged the posts from the separate thread into this one, no need for the question to be in two places.
 
Those hard white lead deposits(someone had leaded fuel in it;use a face mask when grinding it off:toxic)in some earlier fuel that had been run through the engine,imo.
The stuff will harden-on from combustion heat(the exh. valves get the hottest)and be almost as hard as concrete.
I think you may need to find something abrasive to remove it;possibly a Dremel bit?

Yep it is a build up on the valves, and considering this bike has run through multiple country's and also back when you could get leaded gas that makes sense
 
Galen had not ridden it it in 20 years. Last time he had it started was 5 years ago
 
This week I worked on cleaning up the exhaust valves. I ended up putting the valve stems in my drill and then used a scotchbrite pad to clean the valve faces. Had my shop vac going while I did this so it would catch the dust. It took some time but they cleaned up well
100_4532.jpg 100_4536.jpg
 
Now a question about valve length. None of the FSM's I have (original & a reprint) show what the specs are for valve length. I did find some specs here in a FSM from the forum library, page 24. It calls for Intake length of 98.05-98.35mm and Exhaust 96.63-96.93mm
These are my measurements
100_4524.jpg 100_4525.jpg 100_4530.jpg 100_4531.jpg
They are a bit over specs. Diameters are right on spec. There is no trace of interference on the pistons or the valves. Are the valves good to run?
 
Last edited by a moderator:
The valves are on the long side which reduces the valve adjustment availability but it should be ok.
As has been mentioned multiple times on the forum the valves cannot be ground since the hard facing is only @.0002". I see what looks like rust spots on all of them. You might chuck each in a drill again and using 400-600 grit sandpaper and oil try polishing the seat area.
If the actual valve seats in the head have any blemishes like pock marks the seats should be lightly ground.
If no blemishes then using the "fine" lapping compound should give a decent seat.

Lapping valves:
A small dab of compound on the valve face and then wiped all the way around. Insert the valve in the head and turn it with your fingers to spread the compound along the valve seat. Do not pull the valve into the head while turning or push the head of the valve in.
Twist the valve in one direction only several times, remove, clean and inspect for signs of fresh rubbing/grinding on the seat and valve 360 degrees. It may be easier to see if you paint the valve and seat with a black Sharpie or tool markers dye like Dykem Blue.
If this process isn't working right after 3-4 times then you can use a lapping stick to spin the valve back and forth without pushing the valve into the head.
We're attempting to get the valves seated without cutting thru the hard facing by doing it this way.
Do Not use a drill to spin the valves like those stupid videos show.
 
I don't like to lap valves as much as I would rather re-grind(if the valve is the same material all the way through)but if I do lap them,I prefer very fine lapping compound;the stuff that they usually sell over the counter is too coarse,imo.
 
I don't like to lap valves as much as I would rather re-grind(if the valve is the same material all the way through)but if I do lap them,I prefer very fine lapping compound;the stuff that they usually sell over the counter is too coarse,imo.
Lapping used valve and even new ones is less than ideal. These valves cannot be ground with the expectation that they will have a long life since the grinding will cut thru the hard facing.
 
OK.I did a bit more cleaning of the valves, then I used a dab of polishing compound on each valve and hand lapped them by just setting each valve in it's seat and just turning the valves by hand maybe 10 or 15 rotations until it felt smooth. Cleaned everything up and put the heads back together. Did a liquid test with denatured alcohol. No leaks. So I went ahead and put the top end back together and got the engine back in the frame. I also have the side covers painted.Did the oil transfer mod and polished up the stater & oil filter cover.
100_4542.jpg 100_4549.jpg 100_4551.jpg
100_4553.jpg 100_4554.jpg 100_4537.jpg
 
Another week of progress. Rebuild kit for the starter came in so started working on that. A few tricks I used for the starter rebuild. I used the little fiberglass tip of a touch up pen to clean the areas I needed to solder together
View attachment 18553
My next issue was how to hold everything in place while soldering. After about an hour of trying many different things I decided to use an old rubber joint that is off of the air cleaner cross over tube. It fit perfect to hold everything in place
View attachment 18554 View attachment 18555
With a bit of flux and solder problem fixed
View attachment 18556
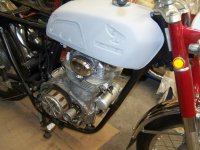
Everything was cleaned up. New bushings (the kit I got had the planetary gear bushings) all new seals and o-rings fresh grease. Painted the case parts and new screws
View attachment 18557
Bench tested it and it tried to jump off the bench.

Excellent work,where did you locate the large cross-point screws that hold the coil windings in place ?
 
Nice work on the valves, I've never thought about using a polishing compound but I can see it did a nice job. Very clean gasket surface as well.
Good progress(y)
 
Nice work on the valves, I've never thought about using a polishing compound but I can see it did a nice job. Very clean gasket surface as well.
Good progress(y)

Thanks Jim. I used your trick of using a wet-stone to finish dressing the gasket surfaces. I have some lapping compound, but as bilbikek411 mentioned and I agree, I didn't want anything that aggressive. That is why I thought about the polish compound. I turned the valves by holding the stems and just letting gravity add the pressure.
 
Thanks Jim. I used your trick of using a wet-stone to finish dressing the gasket surfaces. I have some lapping compound, but as bilbikek411 mentioned and I agree, I didn't want anything that aggressive. That is why I thought about the polish compound. I turned the valves by holding the stems and just letting gravity add the pressure.

How did the valve seats look after the work you did ?
 
Not much progress in the shop the past month and a half, life outside of the shop has been keeping me busy. I was able to get the exhaust and pegs on, but that's about it.
 

Attachments

  • 100_4553.jpg
    100_4553.jpg
    140.2 KB · Views: 8
Give that cat a wrench! It is still coming along even if it is one part at a time ;)

Worthwhile and an excellent project you have there.
 
Finally got some time to get back in the shop this weekend. Got the carb's and air box's mounted, and the final paint work done. Still need to get new tach, speedo, and clutch cables, but it feels good to start moving forward again.
100_4569.jpg 100_4573.jpg 100_4574.jpg
 
Give that cat a wrench! It is still coming along even if it is one part at a time ;)

Worthwhile and an excellent project you have there.

That is my shop cat Duke. He has earned his room and board in the shop. So far he has caught a snake, a mouse, and a pack rat. He's real good at chasing down the occasional nut or bolt that I drop also
 
That is my shop cat Duke. He has earned his room and board in the shop. So far he has caught a snake, a mouse, and a pack rat. He's real good at chasing down the occasional nut or bolt that I drop also

Does he find missing 10mm sockets too? If so LDR could use his services :lol:
 
Back
Top Bottom