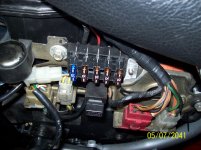
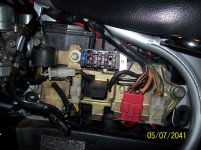
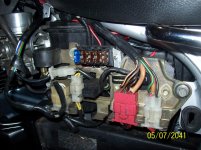
As many people have discovered the Honda fuse block with the glass fuses has inherent problems. The brass clips that the fuses snap into become corroded making poor connections. People install SAE automotive fuses that are too long where on one it ends up only 1/2 connected which results in overheating of the connection and melting the fuse block. Plus the cover for the fuse box is frequently missing which allows water into the connections.
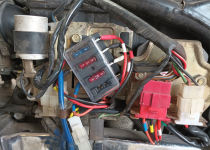
The answer is to update the fuse block/box to modern ATC blade type fuses. There are several different versions available and an internet search for auxiliary fuse box will give you lots of choices.
Replacement is as simple as removing the old part and matching up the 6 wires into the correct pairs for each circuit they control. Then cut the wires off the old part and solder them onto the new one. Solve how you want to mount it on the left electrical panel and you'll now have easy to find fuses if you blow one and a good reliable connection for years to come.
I did this conversion in 2011 after melting a fuse block in the middle of nowhere Maine, I lived in California, at night and lost my headlight. I found a 5 position part made by Littel Fuse to use in an auto parts store and solved the problem.


The nice thing about a 5 position unit is you have 2 free slots for extra fuses or installing extra circuits for things like heated grips.
The answer is to update the fuse block/box to modern ATC blade type fuses. There are several different versions available and an internet search for auxiliary fuse box will give you lots of choices.
Replacement is as simple as removing the old part and matching up the 6 wires into the correct pairs for each circuit they control. Then cut the wires off the old part and solder them onto the new one. Solve how you want to mount it on the left electrical panel and you'll now have easy to find fuses if you blow one and a good reliable connection for years to come.
I did this conversion in 2011 after melting a fuse block in the middle of nowhere Maine, I lived in California, at night and lost my headlight. I found a 5 position part made by Littel Fuse to use in an auto parts store and solved the problem.


The nice thing about a 5 position unit is you have 2 free slots for extra fuses or installing extra circuits for things like heated grips.


