
This is really puzzling. It's almost as if the shift drum has something wrong with it, which would be pretty rare (other than worn areas of the grooves for the fork pins)

-
Don't overlook our Welcome Package, it contains many links to important and helpful information about functions at VHT like posting pictures and sending PMs (private messages), as well as finding the parts you need.
AD
You are using an out of date browser. It may not display this or other websites correctly.
You should upgrade or use an alternative browser.
You should upgrade or use an alternative browser.
The “Good Looking” Build
- Thread starter Ribrickulous
- Start date
Ribrickulous
Veteran Member
I think I narrowed it down to something to do with the shift drum stopper - the pizza cutter looking thing.
Honda did move to a different style of stopper and a different star in that year - it almost looks like the gold one is supposed to pair with the later stopper

Re-using all the parts from the old engine seems to free things up, but only if the bolt holding the stopper in place is loose. Once it’s tightened everything binds up again.
I’m wondering if the collar (#13 in the above fiche) isn’t tall enough, and it’s letting the bolt and washer bottom out on the stopper instead of the collar.
If so it’s a simple lathe project, though I really shouldn’t have to.
-Ed
1972 CL350
1985 VF700F
Honda did move to a different style of stopper and a different star in that year - it almost looks like the gold one is supposed to pair with the later stopper
Re-using all the parts from the old engine seems to free things up, but only if the bolt holding the stopper in place is loose. Once it’s tightened everything binds up again.
I’m wondering if the collar (#13 in the above fiche) isn’t tall enough, and it’s letting the bolt and washer bottom out on the stopper instead of the collar.
If so it’s a simple lathe project, though I really shouldn’t have to.
-Ed
1972 CL350
1985 VF700F
That's what I'm seeing on Partzilla. There's an engine break number for all the related parts which only the later ones appear for the CL350K5 or CB350G
Ribrickulous
Veteran Member
Solved.
I remade both the collar and the piece that the tapered screw fit into with about .010” more slop on each than before and I’m shifting with just the wheel.
Occasionally it gets stuck but wiggling the main shaft a bit frees it up - I’m taking that to just mean that when there’s a bit of clutch drag it’ll be able to work no problem… I hope.

-Ed
1972 CL350
1985 VF700F
I remade both the collar and the piece that the tapered screw fit into with about .010” more slop on each than before and I’m shifting with just the wheel.
Occasionally it gets stuck but wiggling the main shaft a bit frees it up - I’m taking that to just mean that when there’s a bit of clutch drag it’ll be able to work no problem… I hope.
-Ed
1972 CL350
1985 VF700F
I hope this does it for you. This is one of the crazier things I've ever seen.
Ribrickulous
Veteran Member
That makes two of us!
All back together now, waiting for a test ride.
-Ed
1972 CL350
1985 VF700F
All back together now, waiting for a test ride.
-Ed
1972 CL350
1985 VF700F
Ribrickulous
Veteran Member
Test tonight and knock on wood but it seems OK. I’m not going to call it done done until I’ve got ~100 more miles on it, though.
Next little job will be fitting a little fuse box where the reg/Rec used to be… I’ve got three individual fuse holders (main fuse/ricks regulator/battery tender fuse) and a rats nest of wiring there now.
Picked up a little four fuse holder to consolidate the clutter.
-Ed
1972 CL350
1985 VF700F
Next little job will be fitting a little fuse box where the reg/Rec used to be… I’ve got three individual fuse holders (main fuse/ricks regulator/battery tender fuse) and a rats nest of wiring there now.
Picked up a little four fuse holder to consolidate the clutter.
-Ed
1972 CL350
1985 VF700F
Ribrickulous
Veteran Member
Put another 100 on it today. Felt sluggish and off because my homemade silencer didn’t quite stay put.
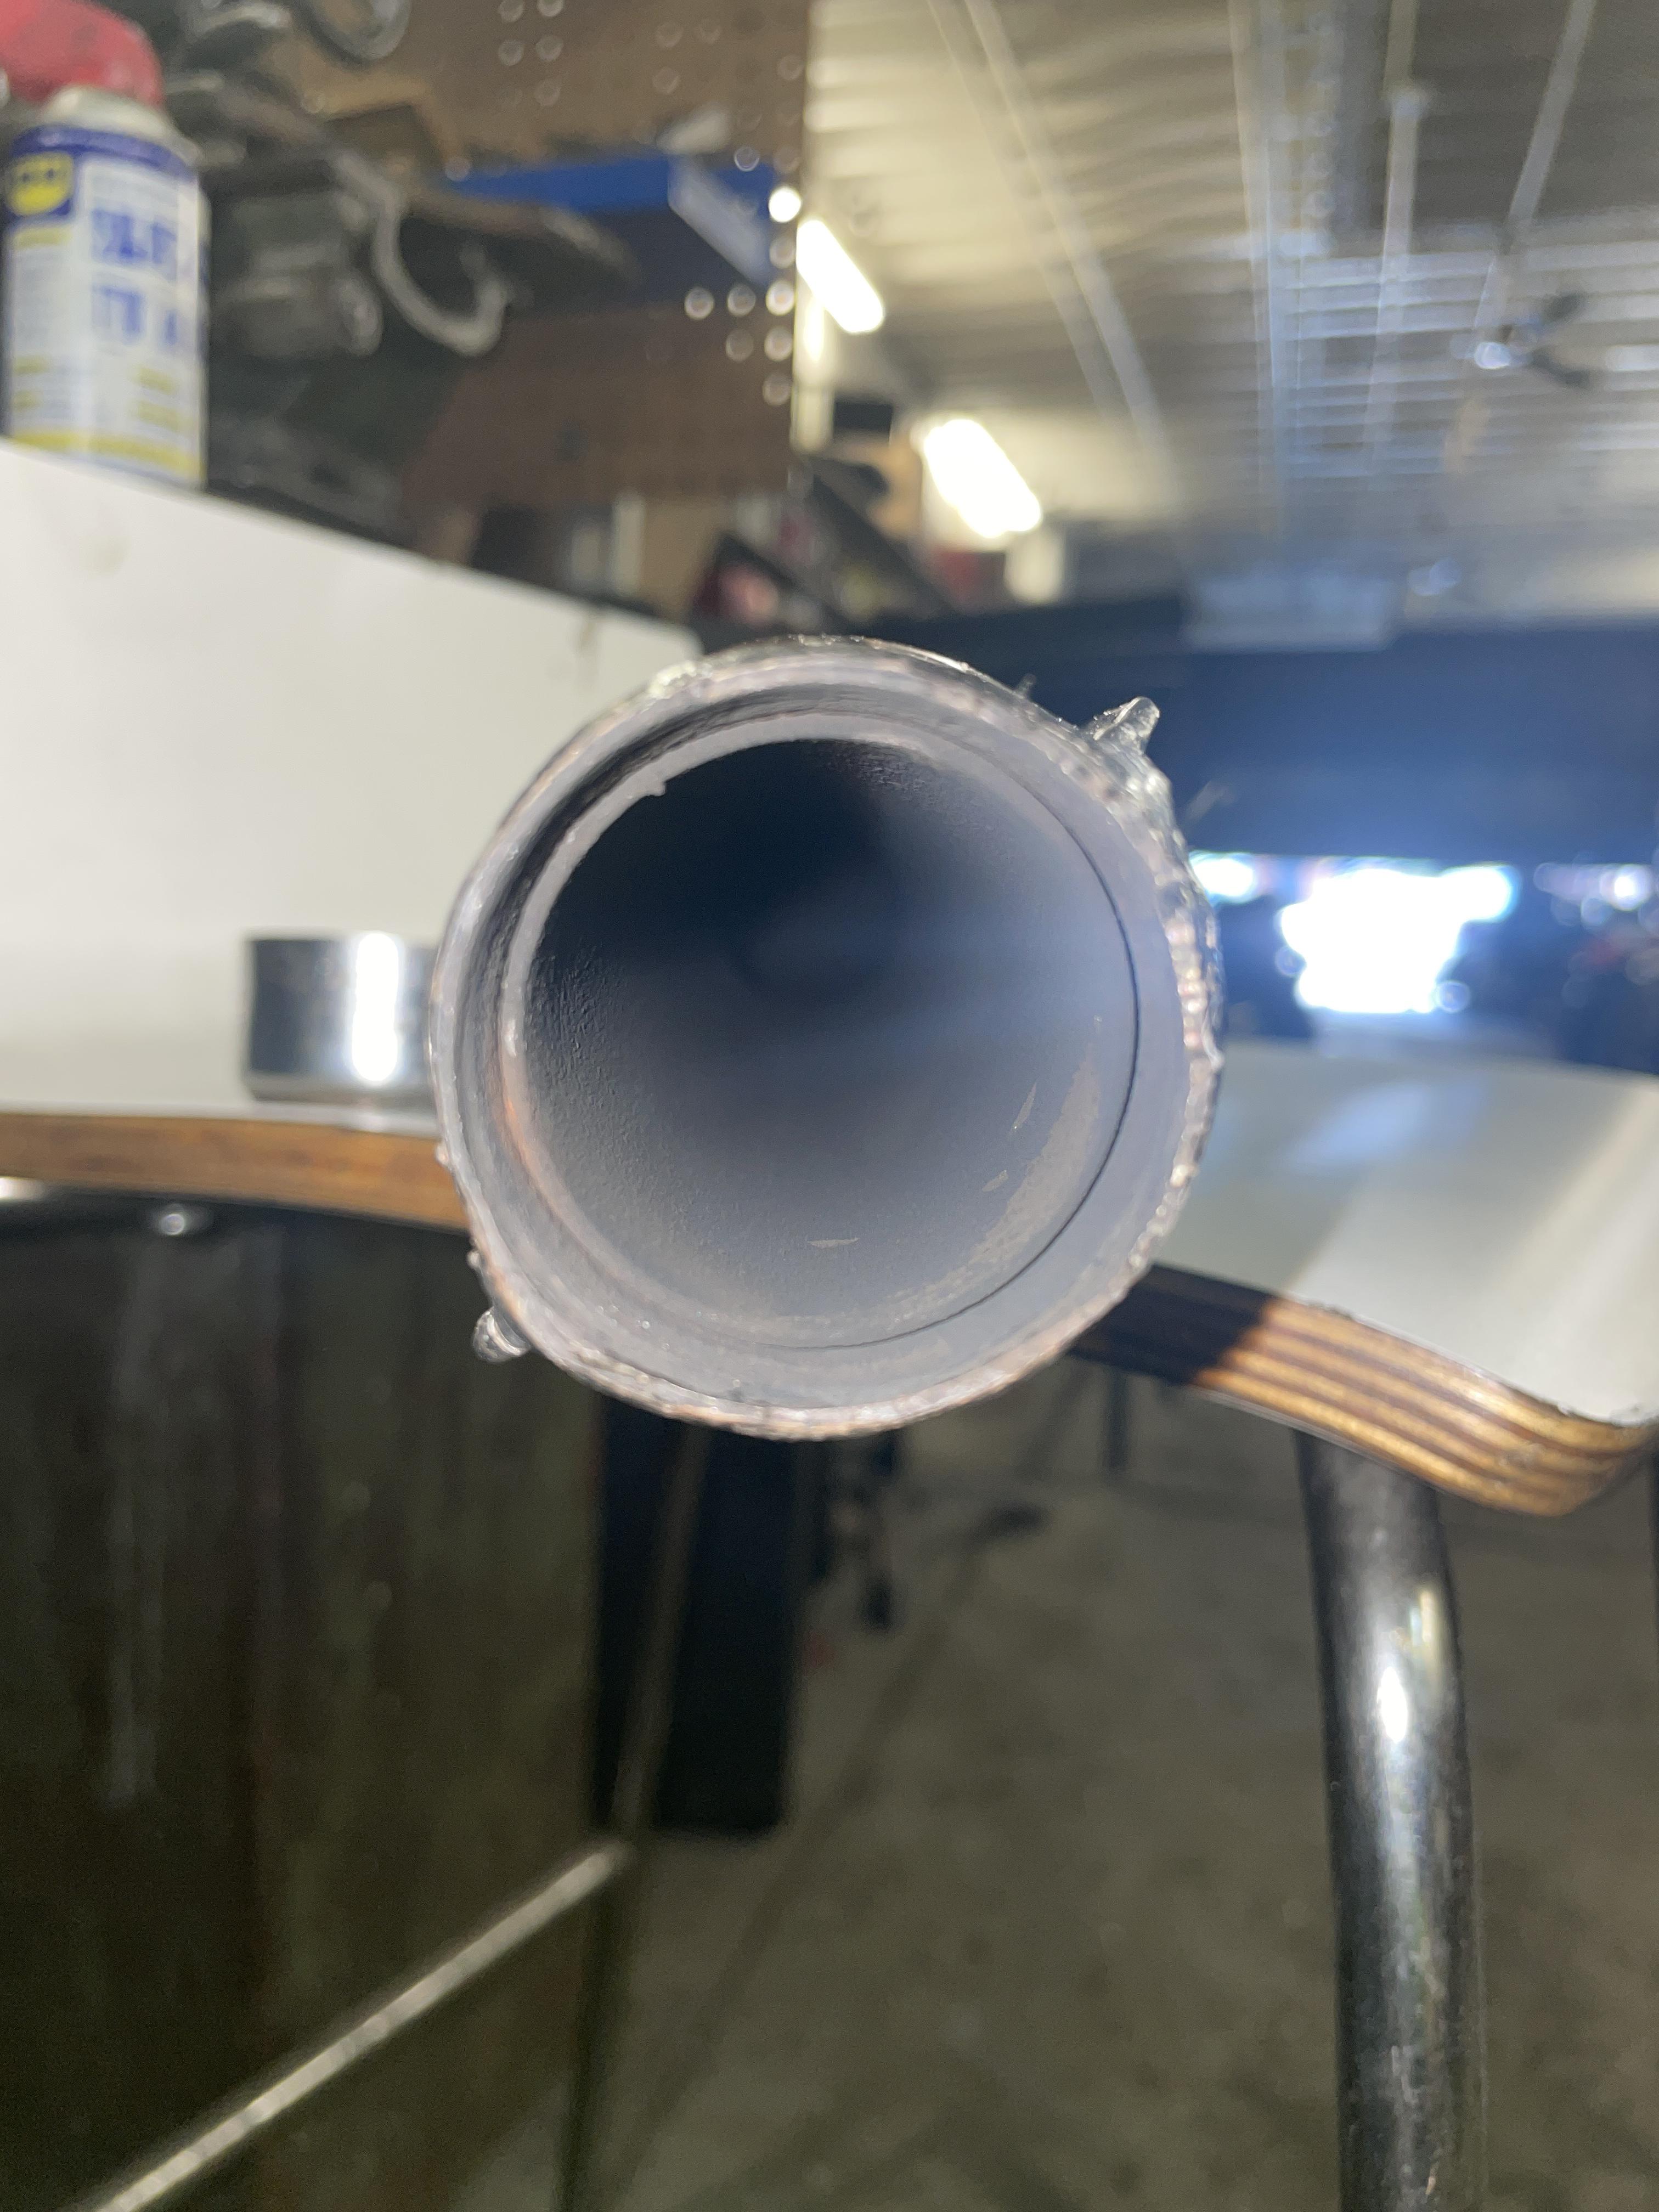
The inner pipe began to slide out, and I think it was bouncing around causing the left cylinder to behave oddly. Pulled the pipe while leaving the rest of the silencer and it performed swell:
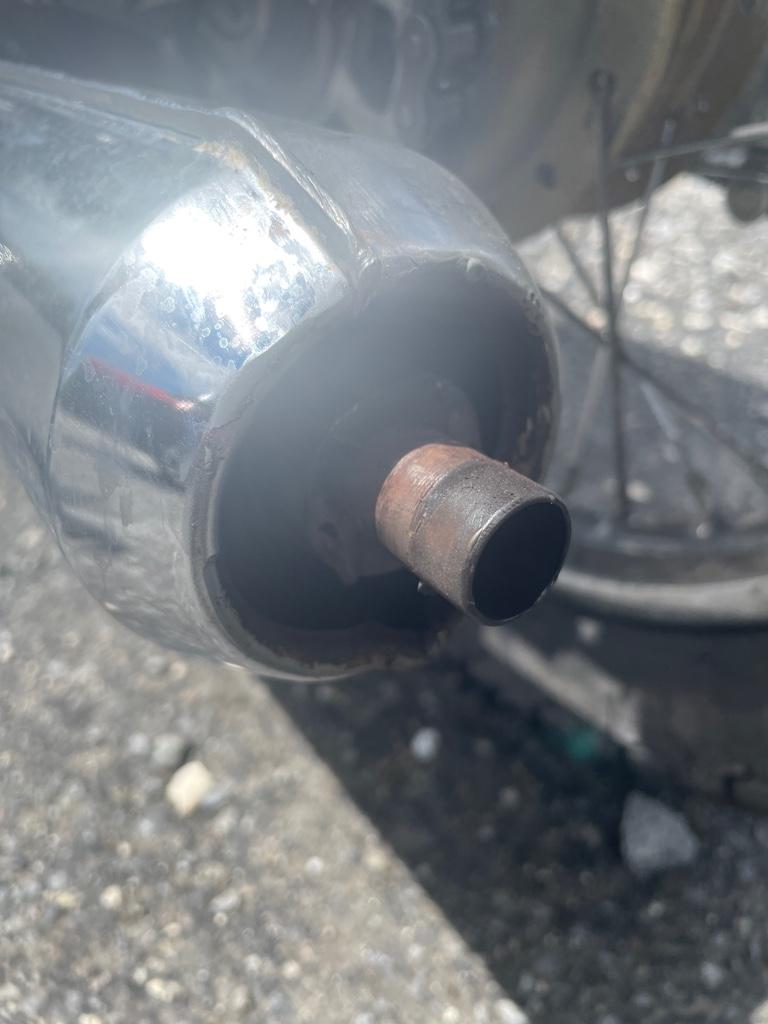
You can see where the paint stops is where it was supposed to be inserted to.
Still having some transmission issues, though they’re much more minor than previously.
2nd through 5th are great, and I feel like I can index into every gear smoothly, but I get a grinding noise when letting the clutch out while pulling away in 1st that wasn’t there previously - before I opened the cases or on the test ride on Monday.
I’m going to pull the left side cover to make sure all is copacetic there (the neutral light is making a bad ground somewhere causing it to weakly illuminate in all gears), and if need be pull the right cover, maybe with the bike on its side so I don’t lose the brand new oil I just put in.
Oh! And some lady tapped the bike while backing out with her car while I was on the other side of it adjusting the clutch. Nothing like a pucker up moment.
In bad and good news - she put a very minor scratch on the new paint job for the tank, meaning I don’t need to worry about where the first one will come from anymore.
Whoopee.
-Ed
1972 CL350
1985 VF700F
The inner pipe began to slide out, and I think it was bouncing around causing the left cylinder to behave oddly. Pulled the pipe while leaving the rest of the silencer and it performed swell:
You can see where the paint stops is where it was supposed to be inserted to.
Still having some transmission issues, though they’re much more minor than previously.
2nd through 5th are great, and I feel like I can index into every gear smoothly, but I get a grinding noise when letting the clutch out while pulling away in 1st that wasn’t there previously - before I opened the cases or on the test ride on Monday.
I’m going to pull the left side cover to make sure all is copacetic there (the neutral light is making a bad ground somewhere causing it to weakly illuminate in all gears), and if need be pull the right cover, maybe with the bike on its side so I don’t lose the brand new oil I just put in.
Oh! And some lady tapped the bike while backing out with her car while I was on the other side of it adjusting the clutch. Nothing like a pucker up moment.
In bad and good news - she put a very minor scratch on the new paint job for the tank, meaning I don’t need to worry about where the first one will come from anymore.
Whoopee.
-Ed
1972 CL350
1985 VF700F
Oh! And some lady tapped the bike while backing out with her car while I was on the other side of it adjusting the clutch. Nothing like a pucker up moment.
In bad and good news - she put a very minor scratch on the new paint job for the tank, meaning I don’t need to worry about where the first one will come from anymore.
Whoopee.
Arrrgh. Jeez, it's so hard to keep something nice nice. Not gonna blame NY though....
Ribrickulous
Veteran Member
Arrrgh. Jeez, it's so hard to keep something nice nice. Not gonna blame NY though....
To be fair this was up in the burbs, not in the city.
-Ed
1972 CL350
1985 VF700F
To be fair this was up in the burbs, not in the city.
-Ed
1972 CL350
1985 VF700F
Ah. I wondered, considering apparently there isn't enough room in the city to be working near any cars backing up unless you're in the street. :lol:
Ribrickulous
Veteran Member
Put some more miles on it today. I believe we’re up to about 350-375, forgot to check the trip meter before I left the garage.
Hot compression is 170 on left and right, just about dead even.
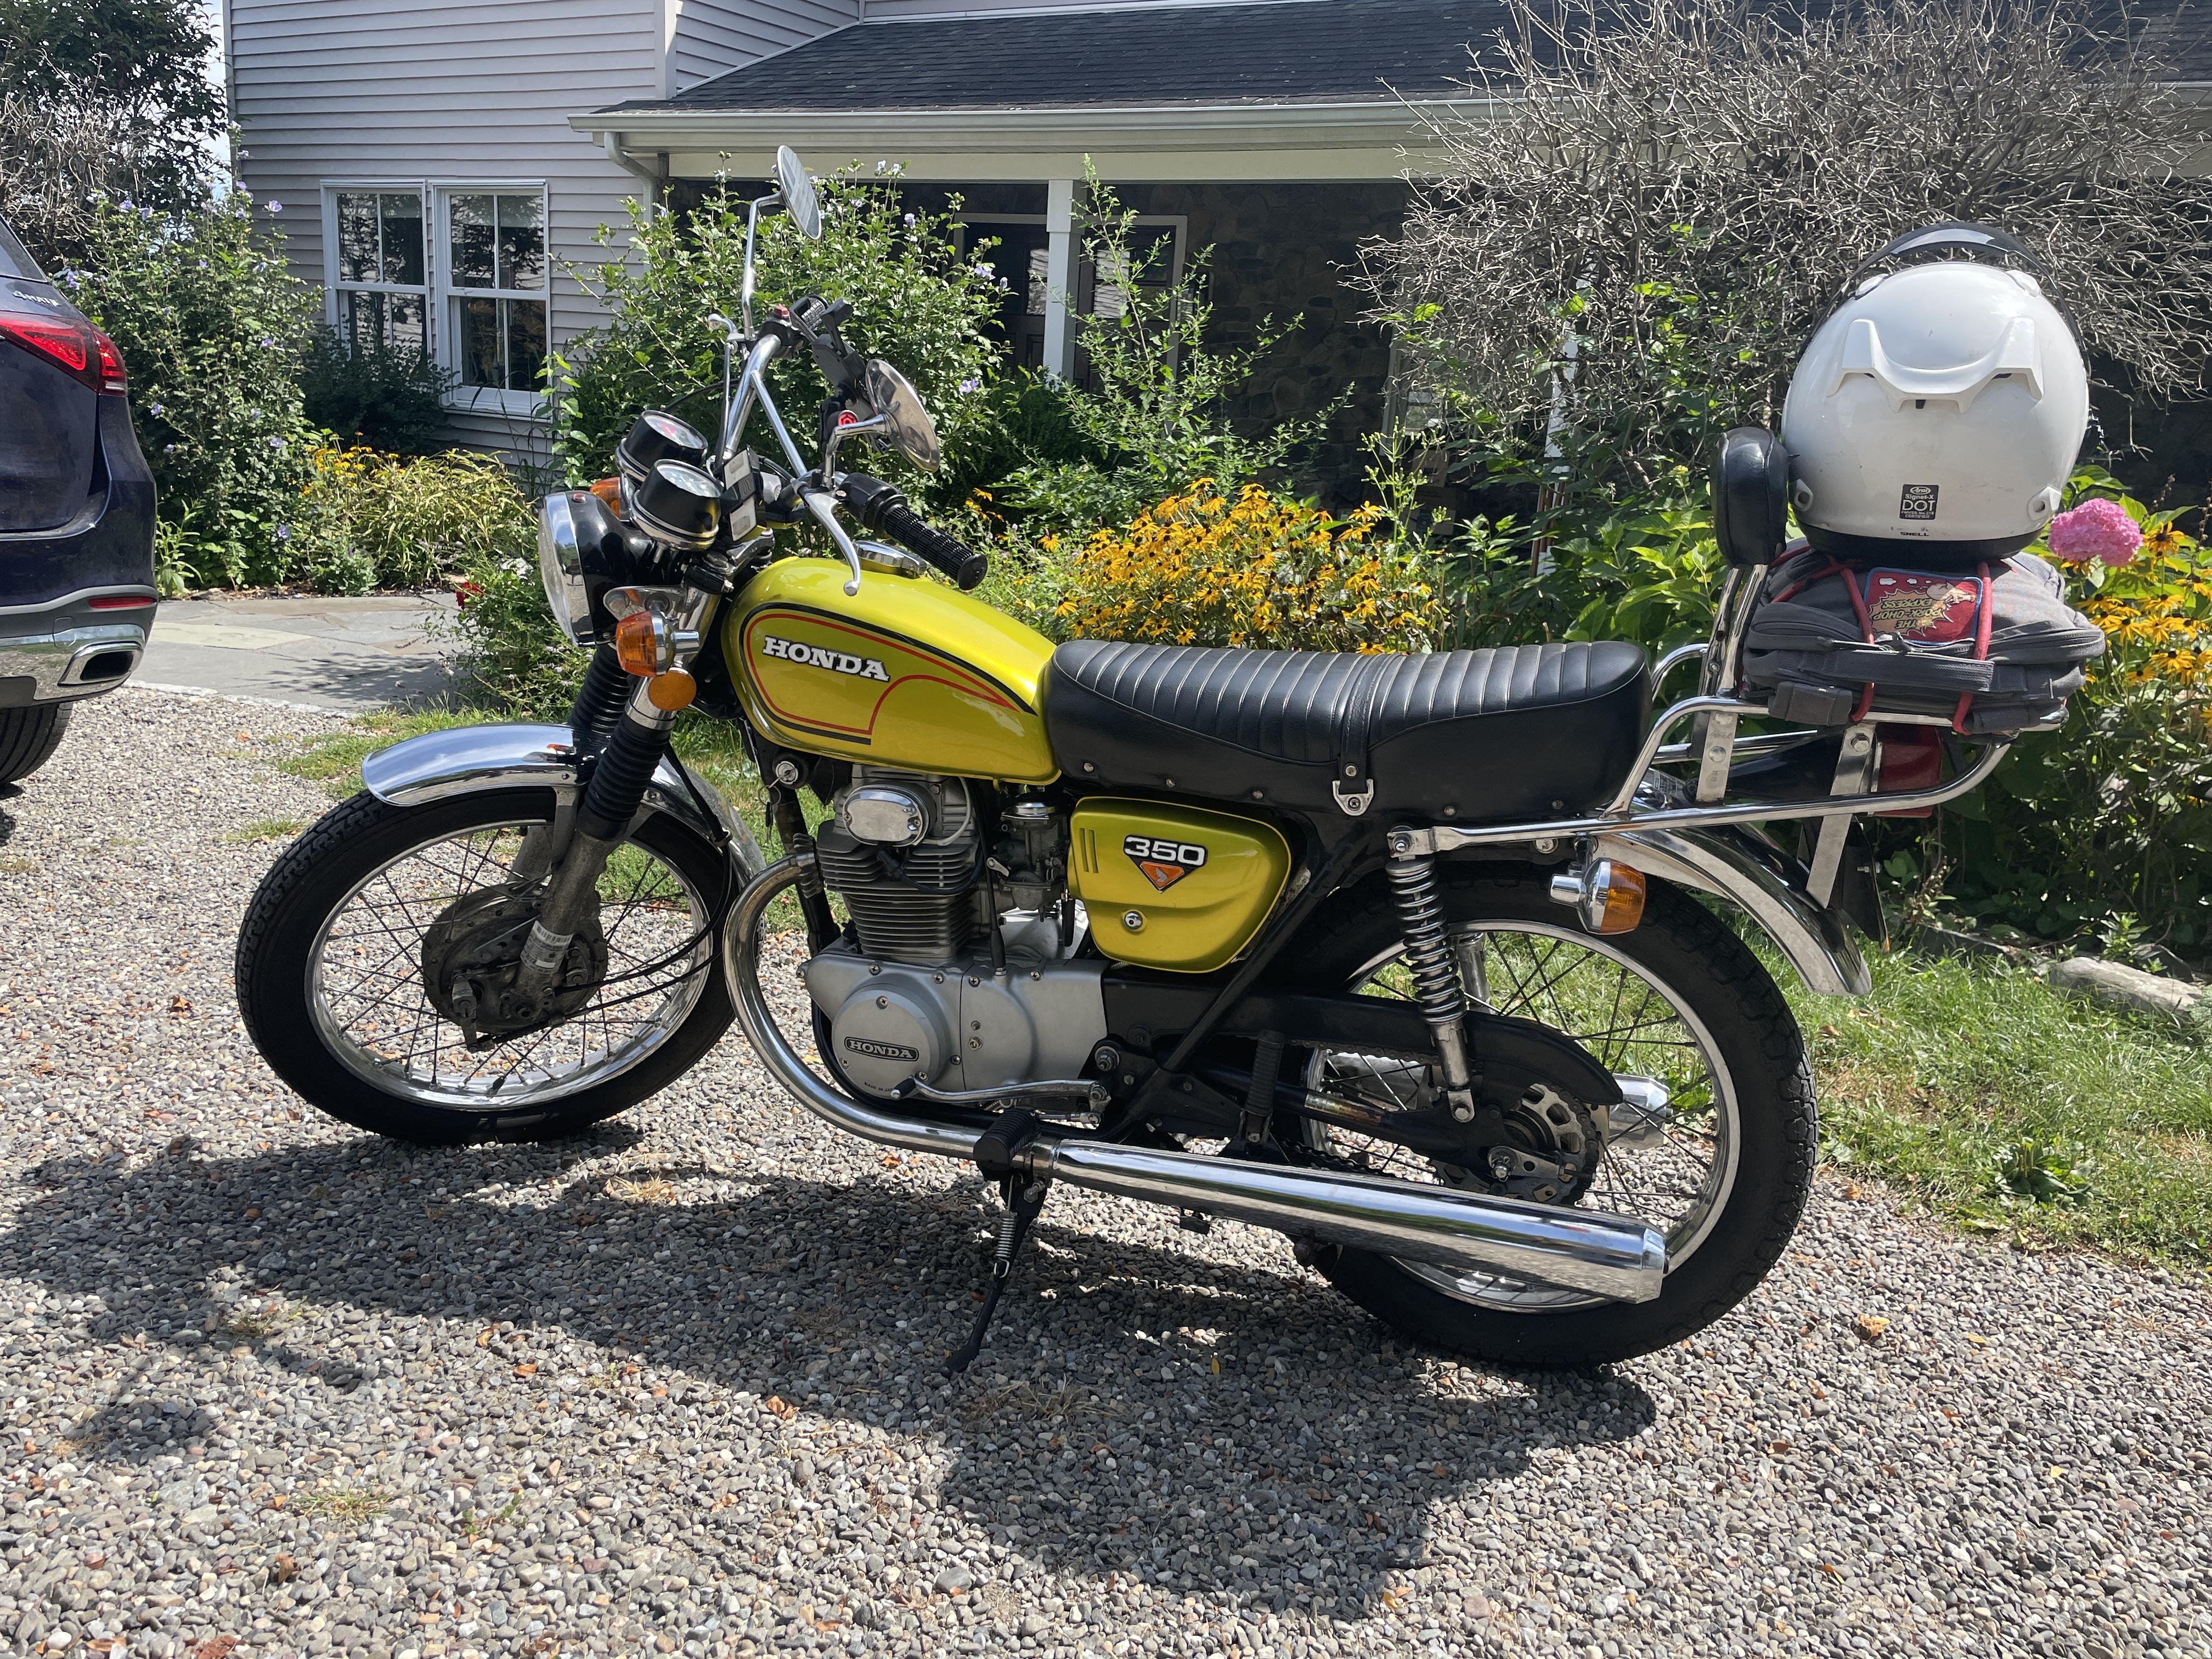
Looking good on a stop in The Bronx:


Still getting some grinding sounds when clutching into first, but it isn’t consistent.
Seems at lower rpm it’s content to “clunk” into gear without much fuss albeit it feels sloppy, and letting out the clutch at higher revs brings out the noise.
The last engine was running Barnett clutches and springs, this one runs OEM plates and EBC springs. Much easier in traffic.
It’s otherwise running great. Maybe needs a bit for fine tuning - still buzzier than I remember.
Any thoughts on this grinding sound?
-Ed
1972 CL350
1985 VF700F
Hot compression is 170 on left and right, just about dead even.
Looking good on a stop in The Bronx:
Still getting some grinding sounds when clutching into first, but it isn’t consistent.
Seems at lower rpm it’s content to “clunk” into gear without much fuss albeit it feels sloppy, and letting out the clutch at higher revs brings out the noise.
The last engine was running Barnett clutches and springs, this one runs OEM plates and EBC springs. Much easier in traffic.
It’s otherwise running great. Maybe needs a bit for fine tuning - still buzzier than I remember.
Any thoughts on this grinding sound?
-Ed
1972 CL350
1985 VF700F
I'm still puzzled by it, not something I've ever heard as you've described it. Putting the bike in gear briskly (while not stomping on the lever) should typically result in a clunk, but the grinding sound part is not something I could hazard a guess at without actually hearing it. There's so much less going on in our twins transmissions compared to say, a CB750 which has 3 transmission shafts, so unusual noises like that can be harder to explain.
Ribrickulous
Veteran Member
So I feel the “clunk” of the wheel landing in the shift star, that much is smooth.
It’s only letting the clutch out that’s the problem. No odd noises in neutral, no odd noises shifting up in the 2nd or any other gear, or shifting down while I’m moving along - even downshifting into first while moving.
Very flustering… when I open the right side cover for the next oil change/cleanout I’m going to poke around the back of the clutch basket. Maybe something’s scraping… but I can’t understand why it would only happen in first.
Last point is that everything does happen smoothly - no jerkiness, all the gears snap in well, no excessive slip - power is moving the whole time.
Vexing.
-Ed
1972 CL350
1985 VF700F
ballbearian
Veteran Member
I just opened a clutch side case and found a pressure plate screw that had worked out, fortunately only slight damage to the case.
Ribrickulous
Veteran Member
Got a good 250 miles in today - bike running flawless except for the grinding noise.
I believe I’ve narrowed it down to the clutch - it happens when slipping into other gears as well. I never noticed because, well, I’ve never slipped the other gears.
Will report more tomorrow.
Scenes from a stop to visit family on the ride:

-Ed
1972 CL350
1985 VF700F
I believe I’ve narrowed it down to the clutch - it happens when slipping into other gears as well. I never noticed because, well, I’ve never slipped the other gears.
Will report more tomorrow.
Scenes from a stop to visit family on the ride:
-Ed
1972 CL350
1985 VF700F
Ribrickulous
Veteran Member
This doesn’t look right to me, but I yield you those with more knowledge:
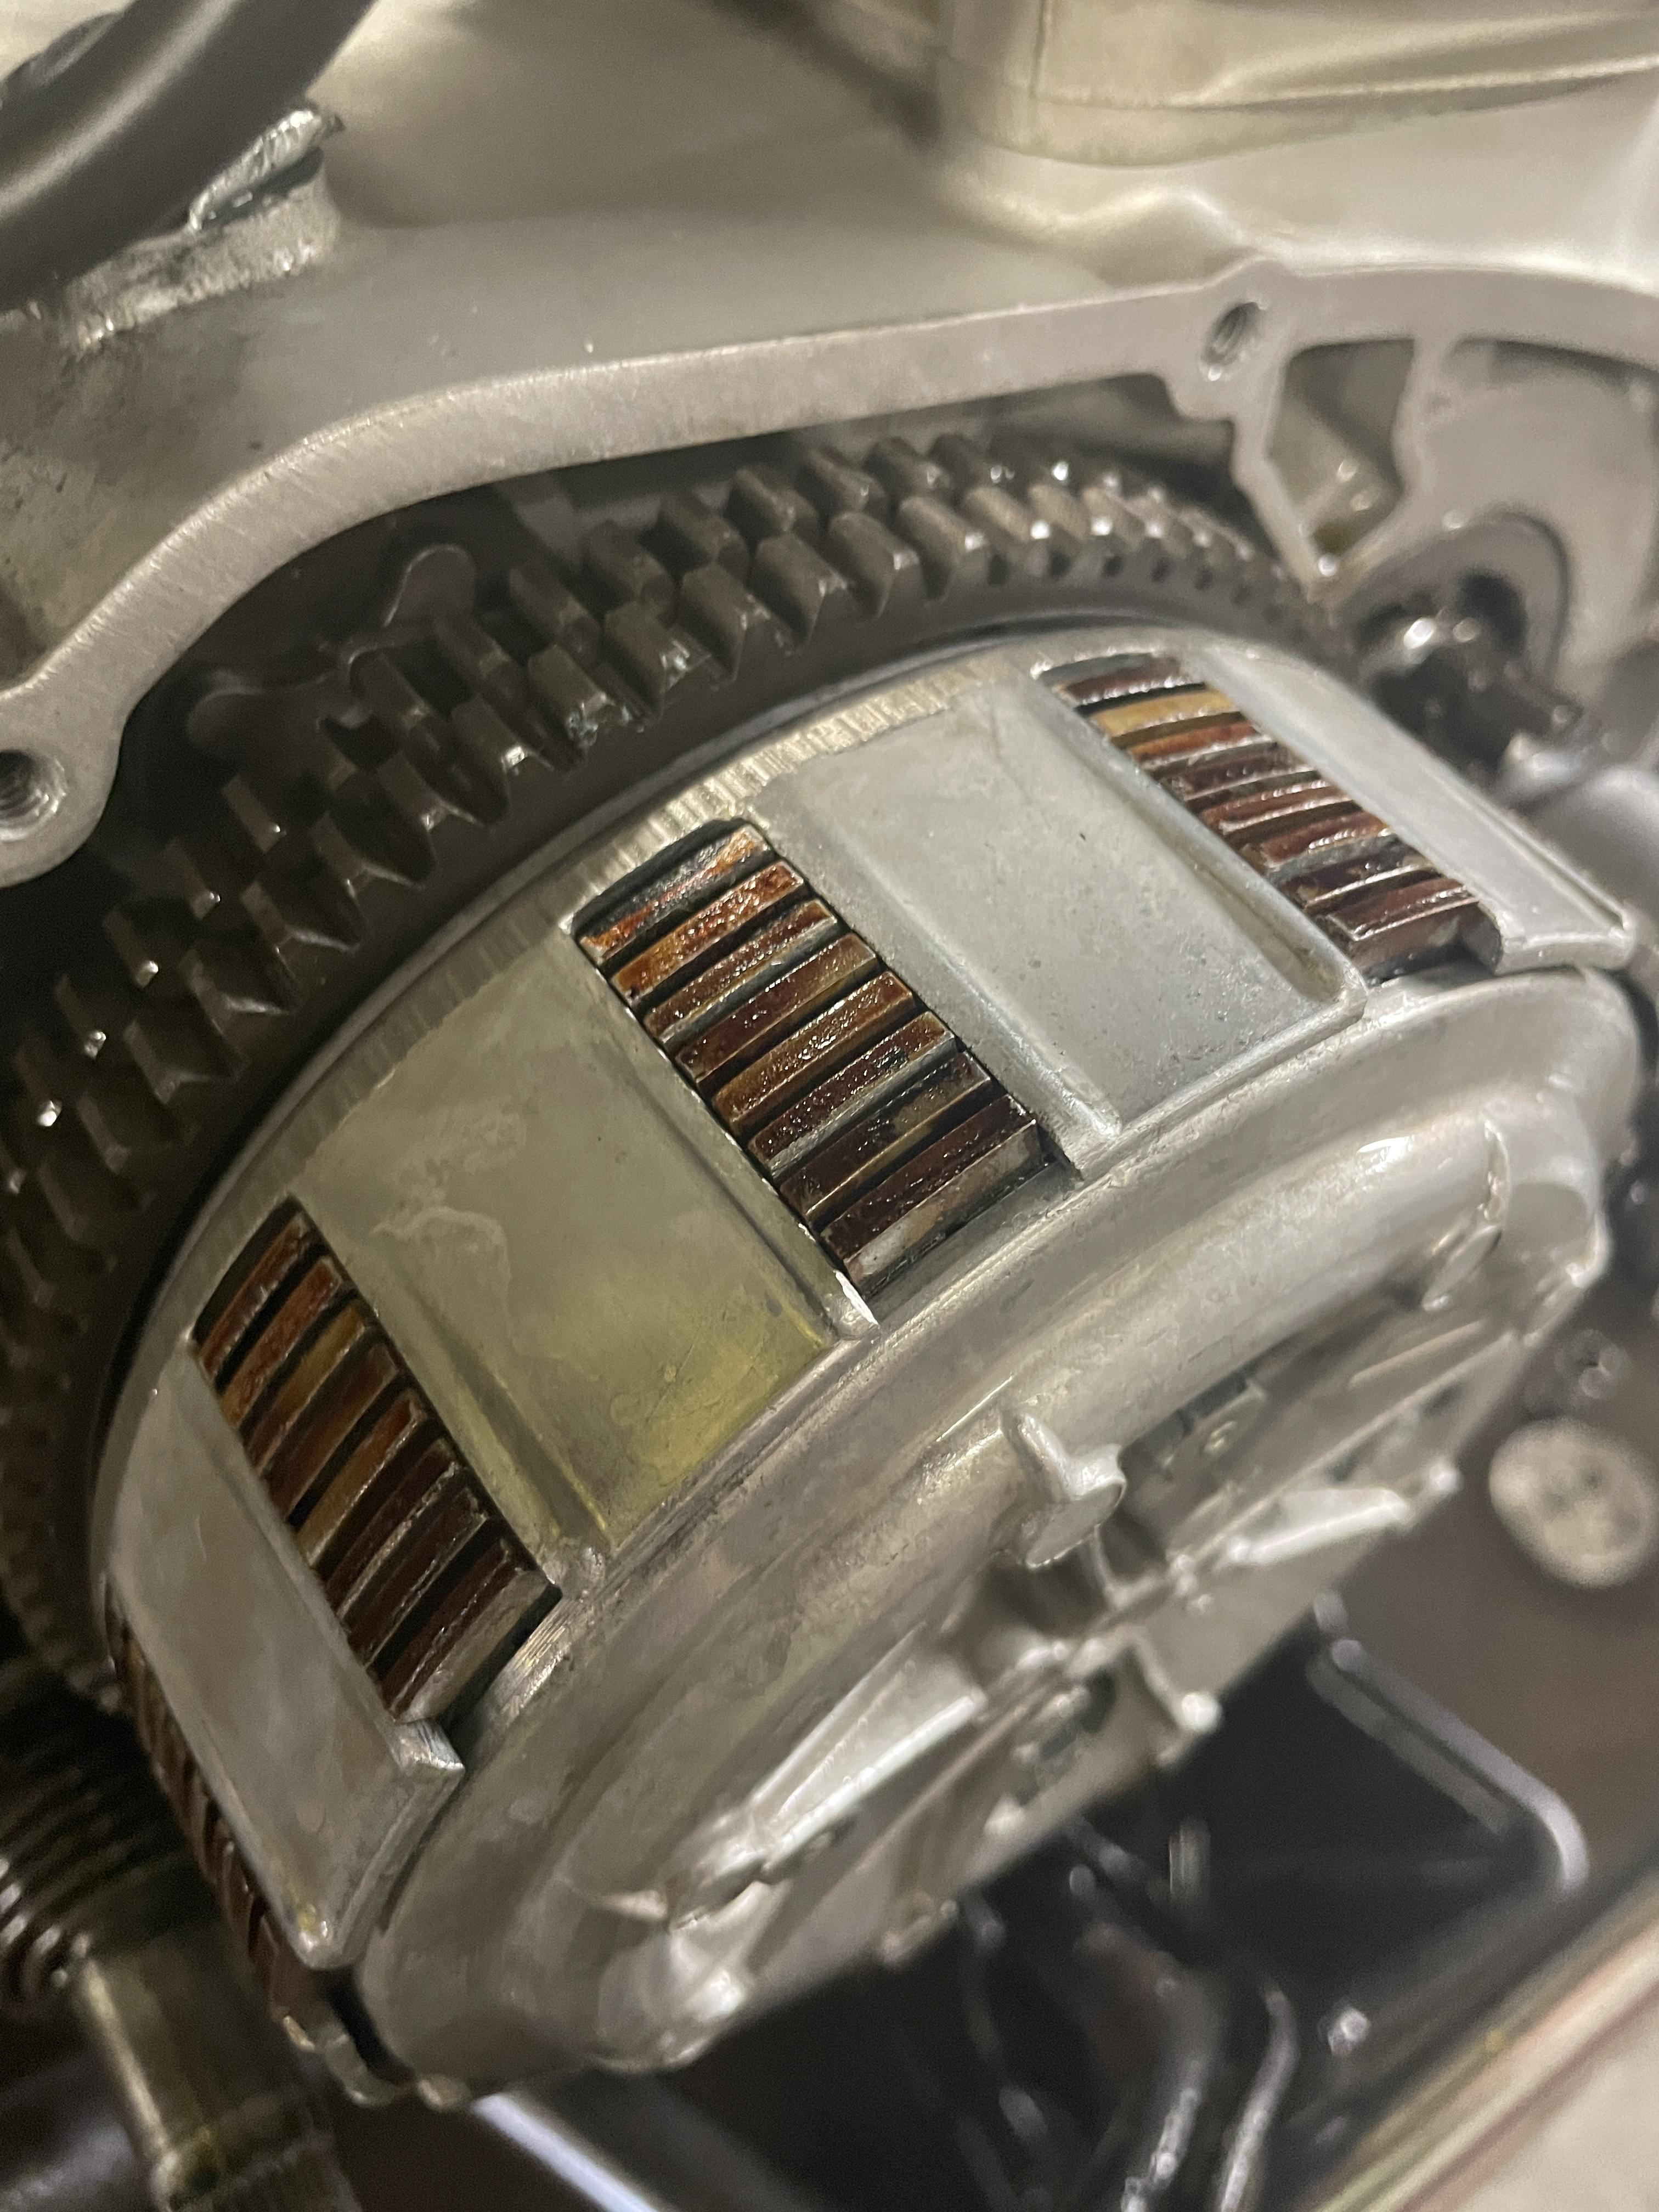
No sign of where the rubbing is coming from inside the right cover:

There is some play in the clutch basket back and forth on the shaft, so I need to check to make sure all the washers etc are there.
Will update soon.
-Ed
1972 CL350
1985 VF700F
No sign of where the rubbing is coming from inside the right cover:
There is some play in the clutch basket back and forth on the shaft, so I need to check to make sure all the washers etc are there.
Will update soon.
-Ed
1972 CL350
1985 VF700F
Are you referring to the marks on the clutch basket gear teeth?
Ribrickulous
Veteran Member
More to the grind marks on the rear of the clutch basket, but pulling my old one it looks the same
-Ed
1972 CL350
1985 VF700F
-Ed
1972 CL350
1985 VF700F
More to the grind marks on the rear of the clutch basket, but pulling my old one it looks the same
-Ed
1972 CL350
1985 VF700F
Yeah, nothing new there, Honda cleaning up casting stuff, they're all that way.
Ribrickulous
Veteran Member
I’m putting the clutch basket and plates in from the old bike - we’ll see if it clears up the issue
-Ed
1972 CL350
1985 VF700F
-Ed
1972 CL350
1985 VF700F
Ribrickulous
Veteran Member
Spun it around the block and everything feels fine, but this problem so far has only presented itself when hot, so I’m holding off on calling it done.
Those Barnett springs are a bear in city traffic, though [emoji31]
At least my left forearm is going to have some heft to it maybe?
-Ed
1972 CL350
1985 VF700F
Those Barnett springs are a bear in city traffic, though [emoji31]
At least my left forearm is going to have some heft to it maybe?
-Ed
1972 CL350
1985 VF700F
Yeah, I wouldn't have gone with Barnett springs but IIRC your concern was riding 2 up a lot so I get it. Hopefully your grinding noise is gone.
Ribrickulous
Veteran Member
Correct - riding two up like today. Another ~200 miles on the build puts me well over the break in period. As always one step forward two back though.
Replacement clutch basket and pack work great - no more horrible noises and everything engages smoothly.
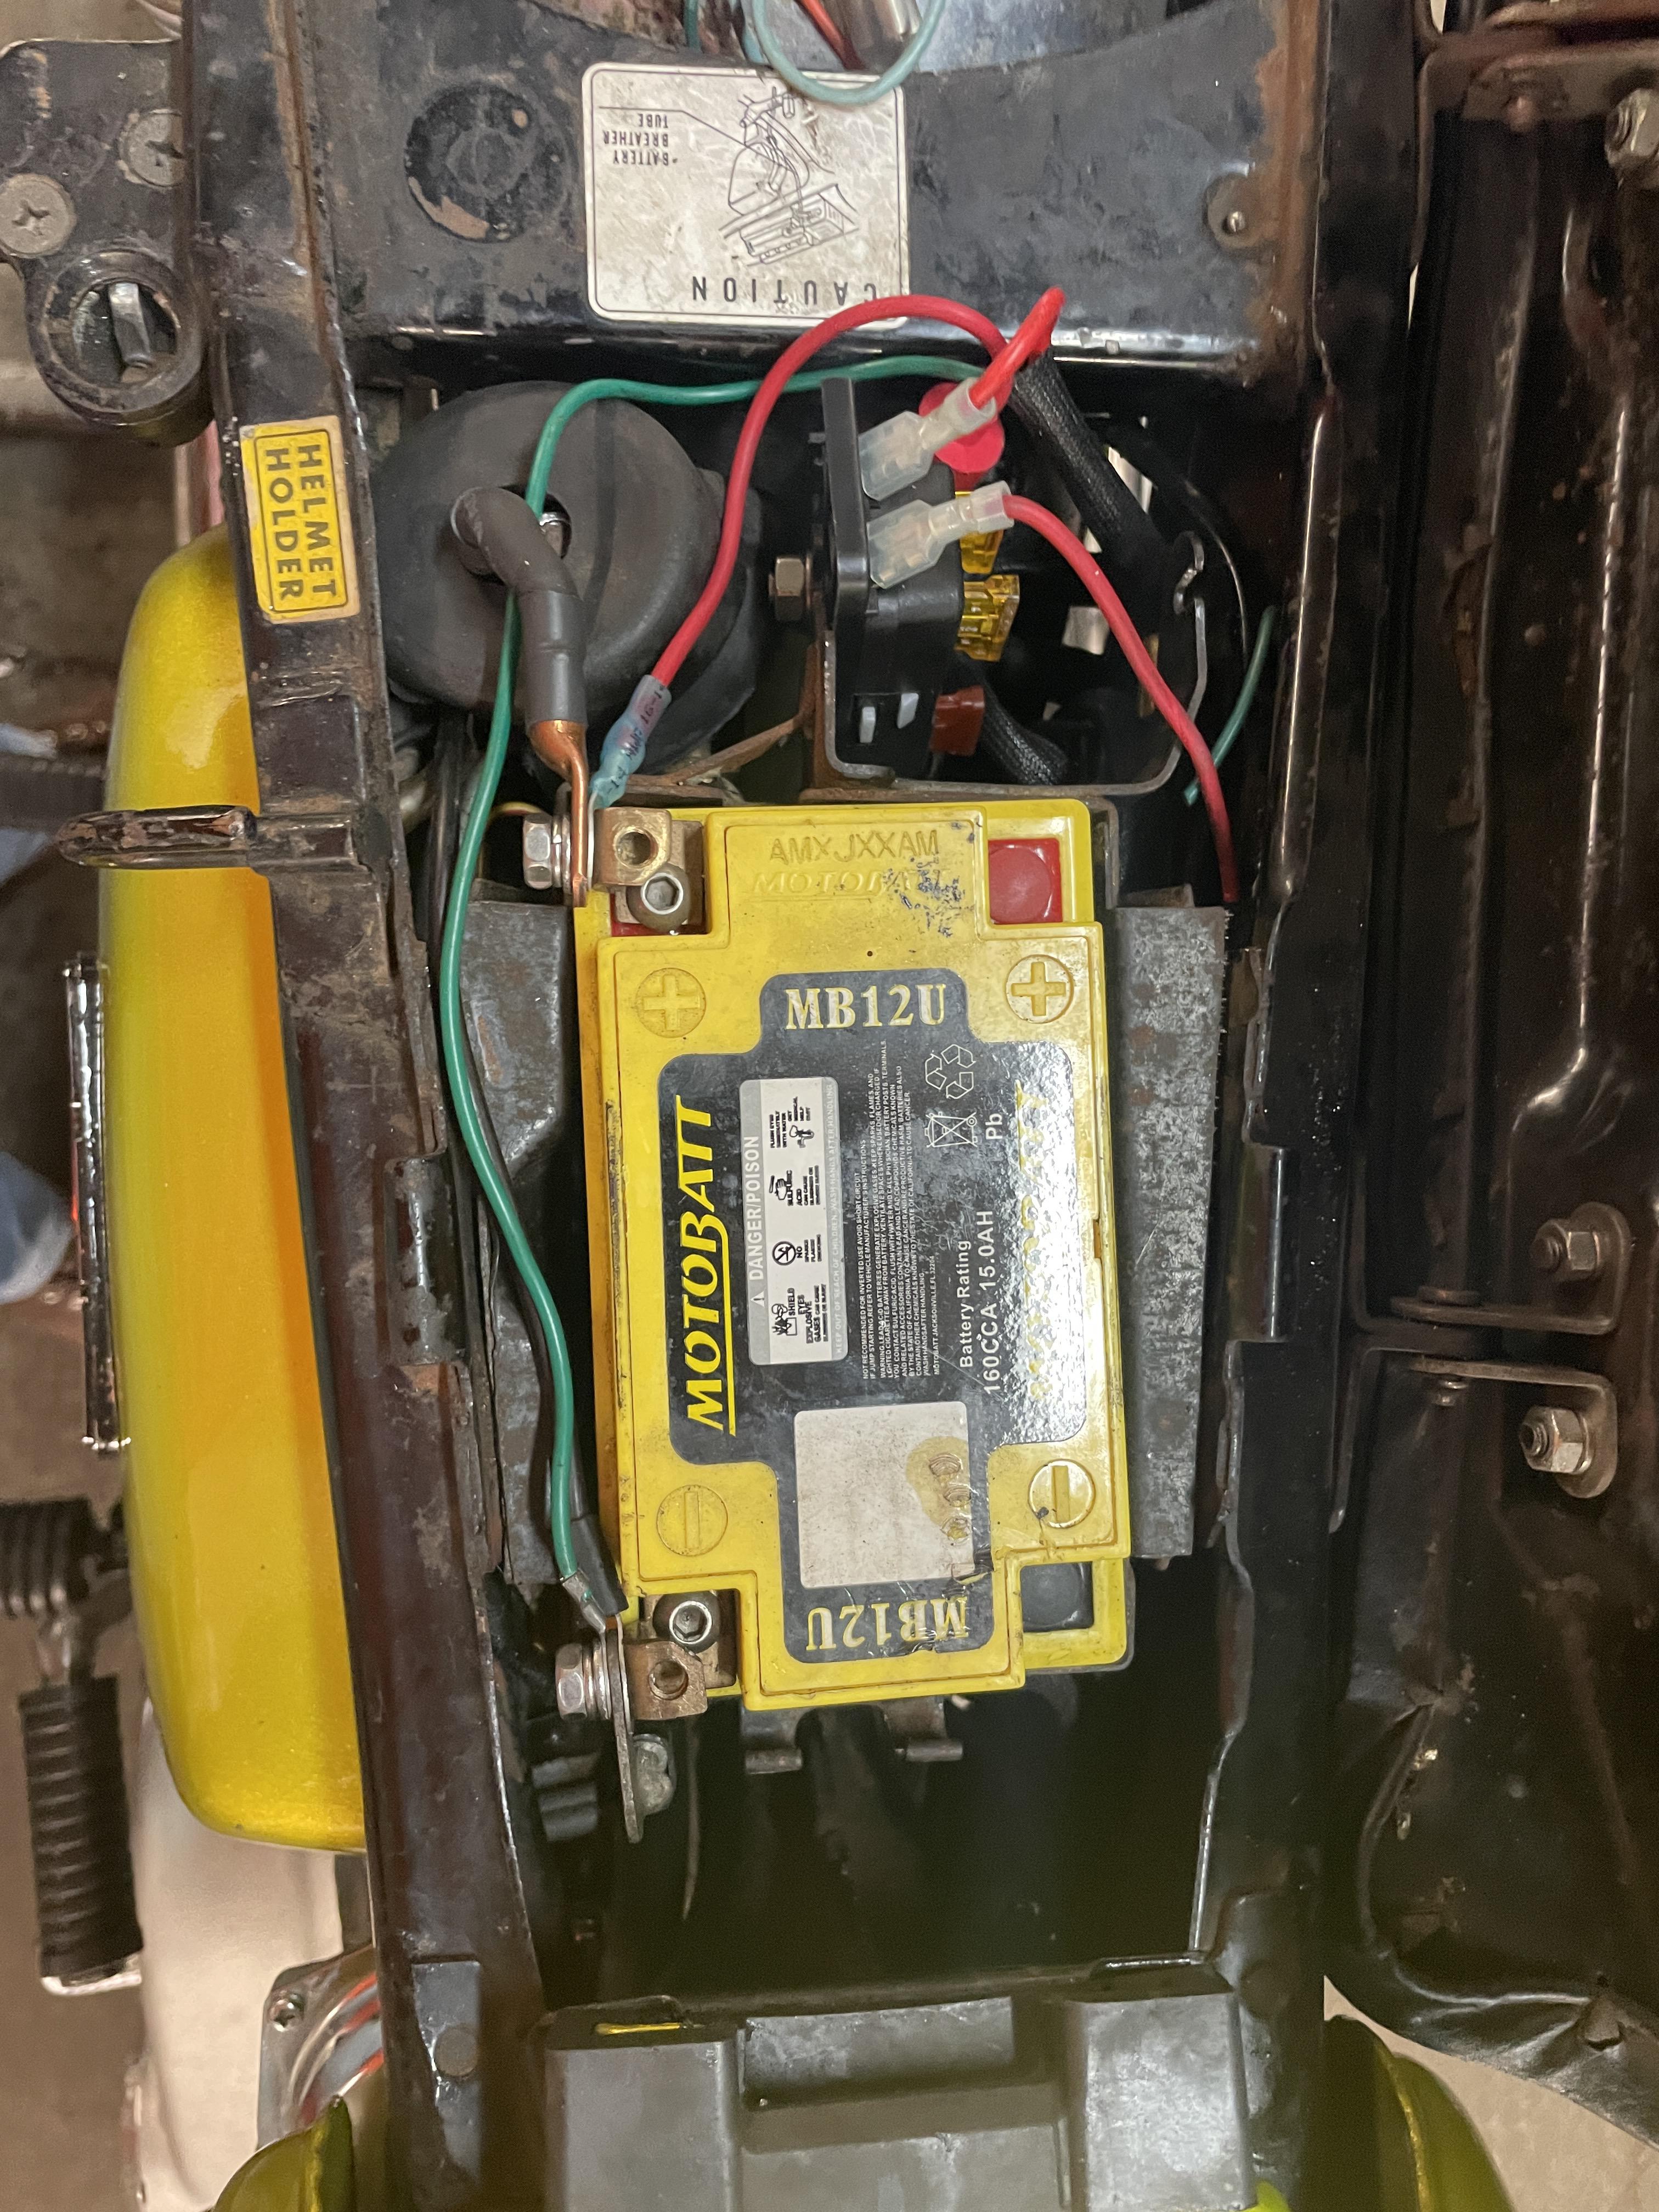
Problem number one is no biggie - the jumper between the battery and the starter solenoid gave up the ghost. Corrosion got the best of it after 50 years:

The second one is a bit more of a bummer.
Hit heavy traffic on the way home, about 40 minutes of it, including in the Lincoln tunnel where it was much hotter than everywhere else.
Honest to god worried I spoiled the oil by overheating it, so I might do a change. Was keeping moving in the traffic leading up to the tunnel by lane filtering, but once in the tunnel there isn’t much space. Basically kept walking the bike forwards and back to at least keep air moving.
I’d have shut it off for the longer stretches if the starter was working [emoji849]
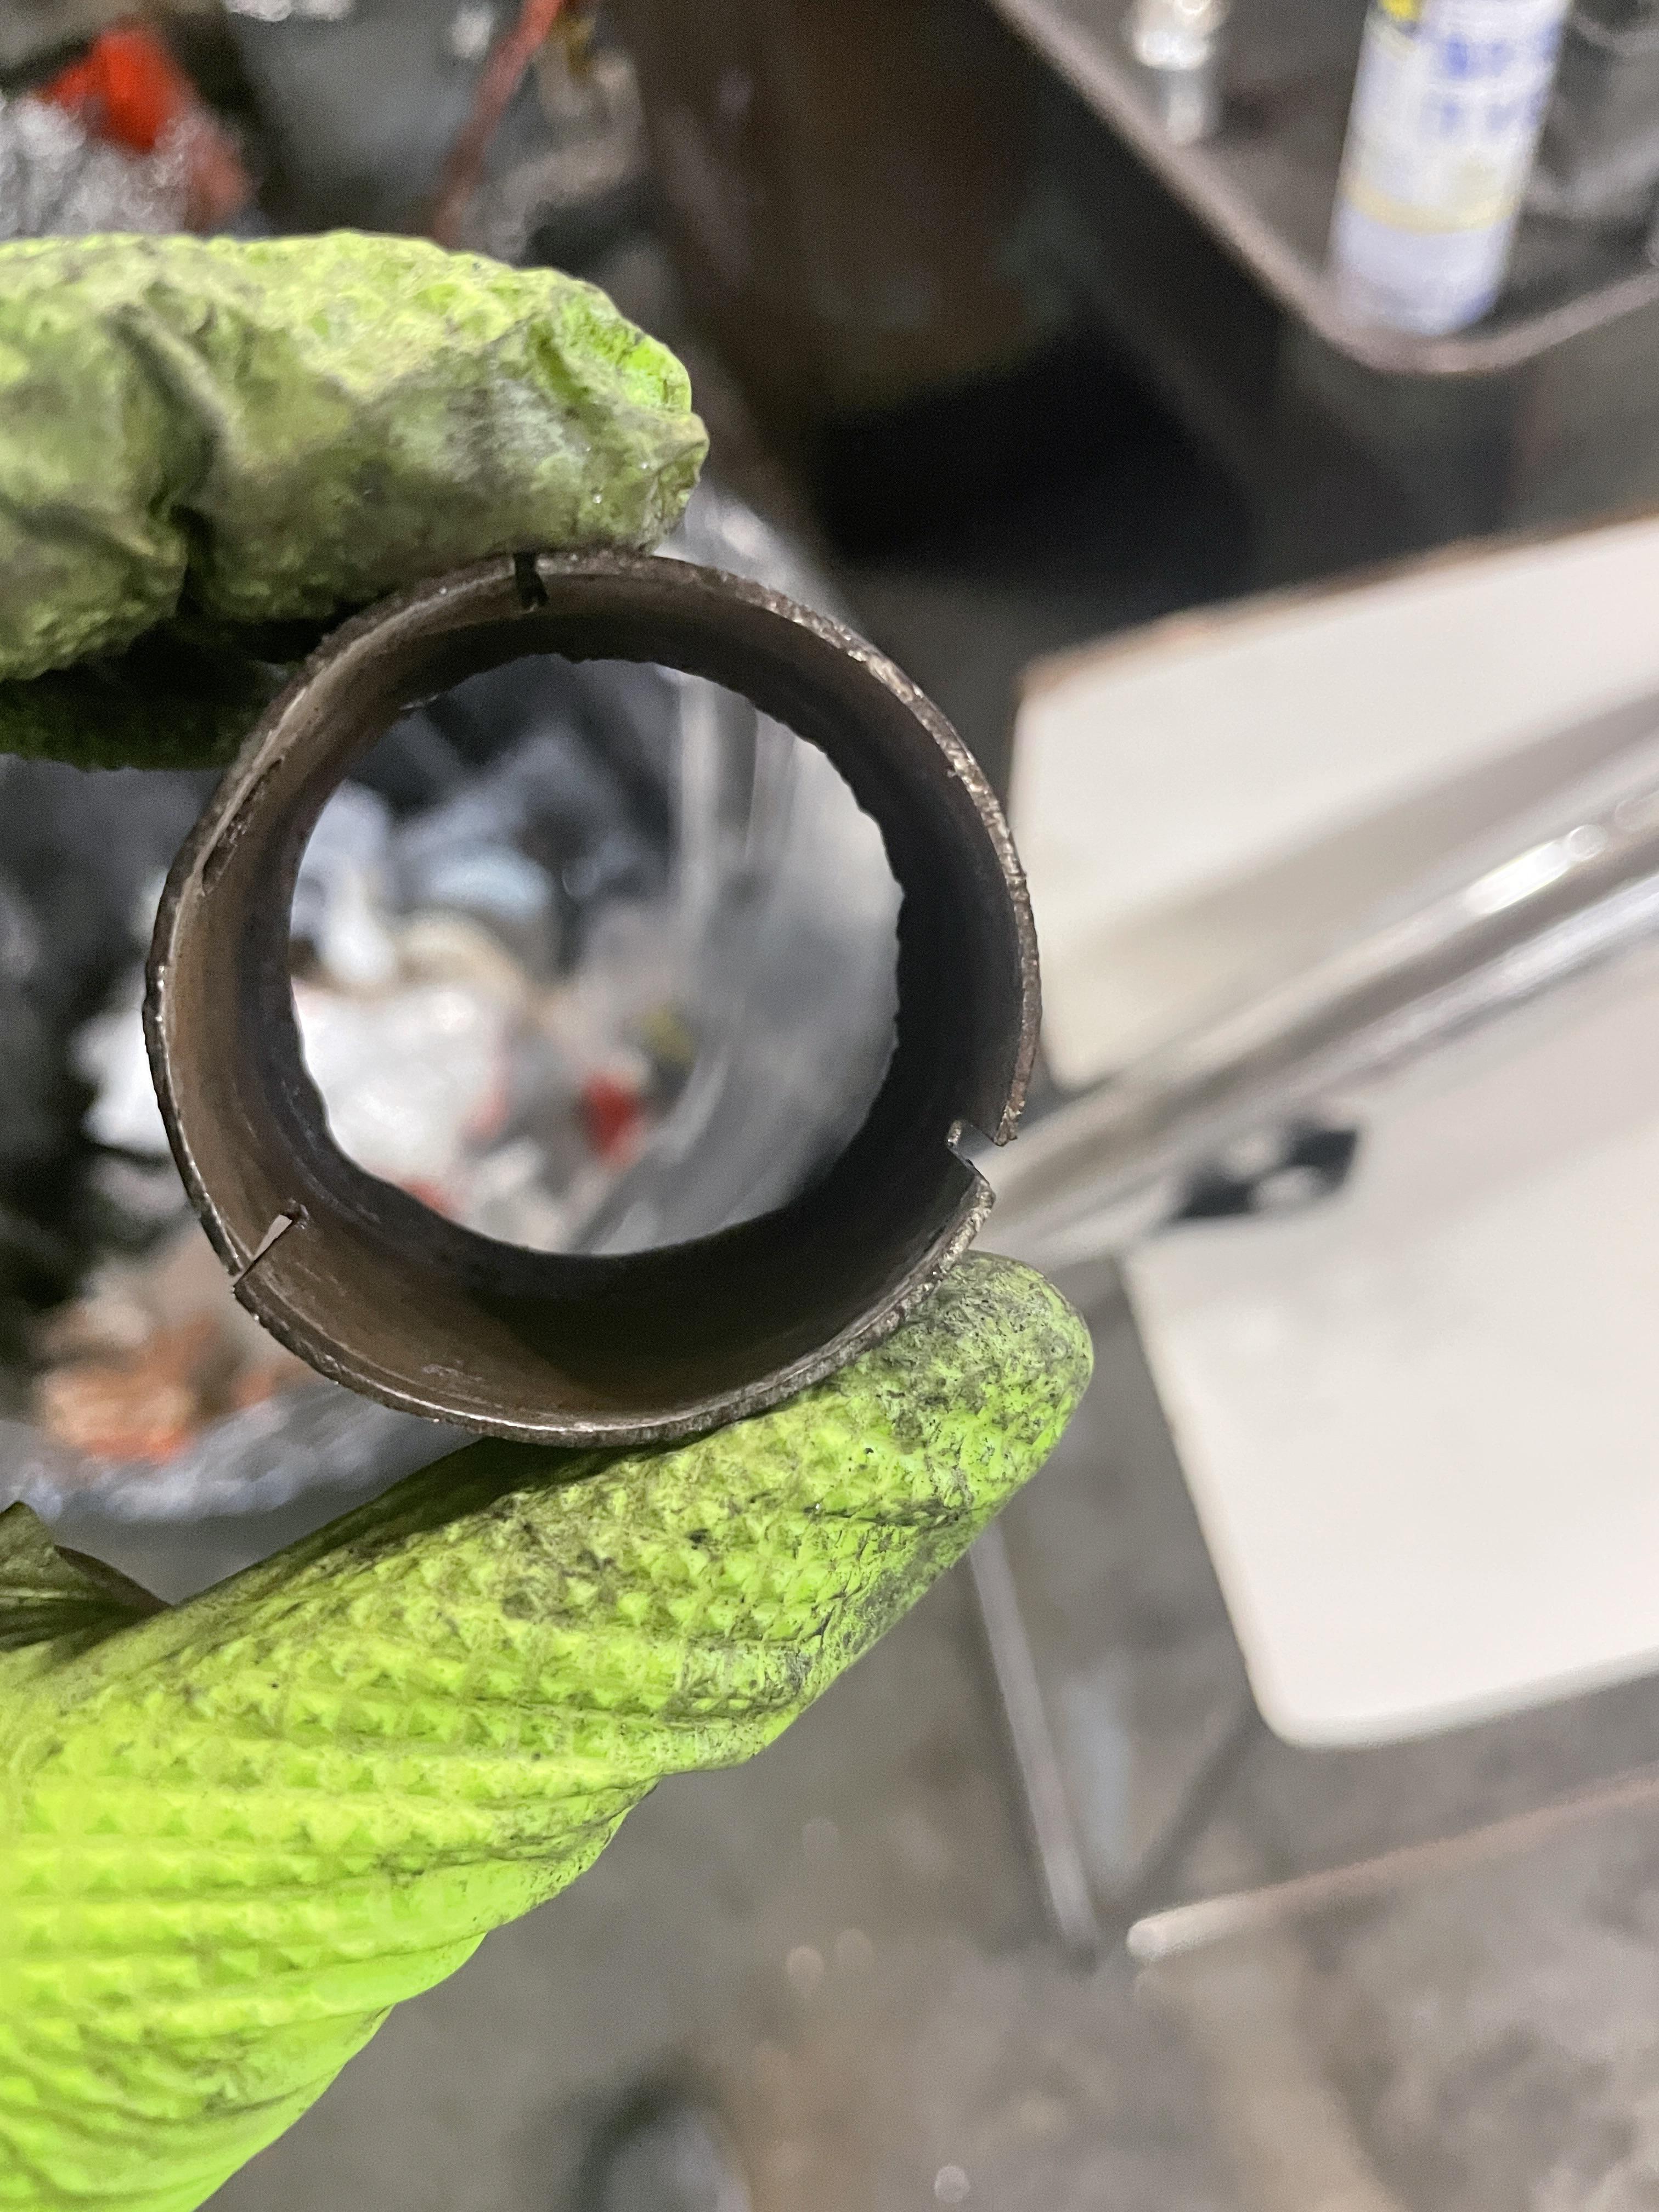
I get back to the garage and find this:
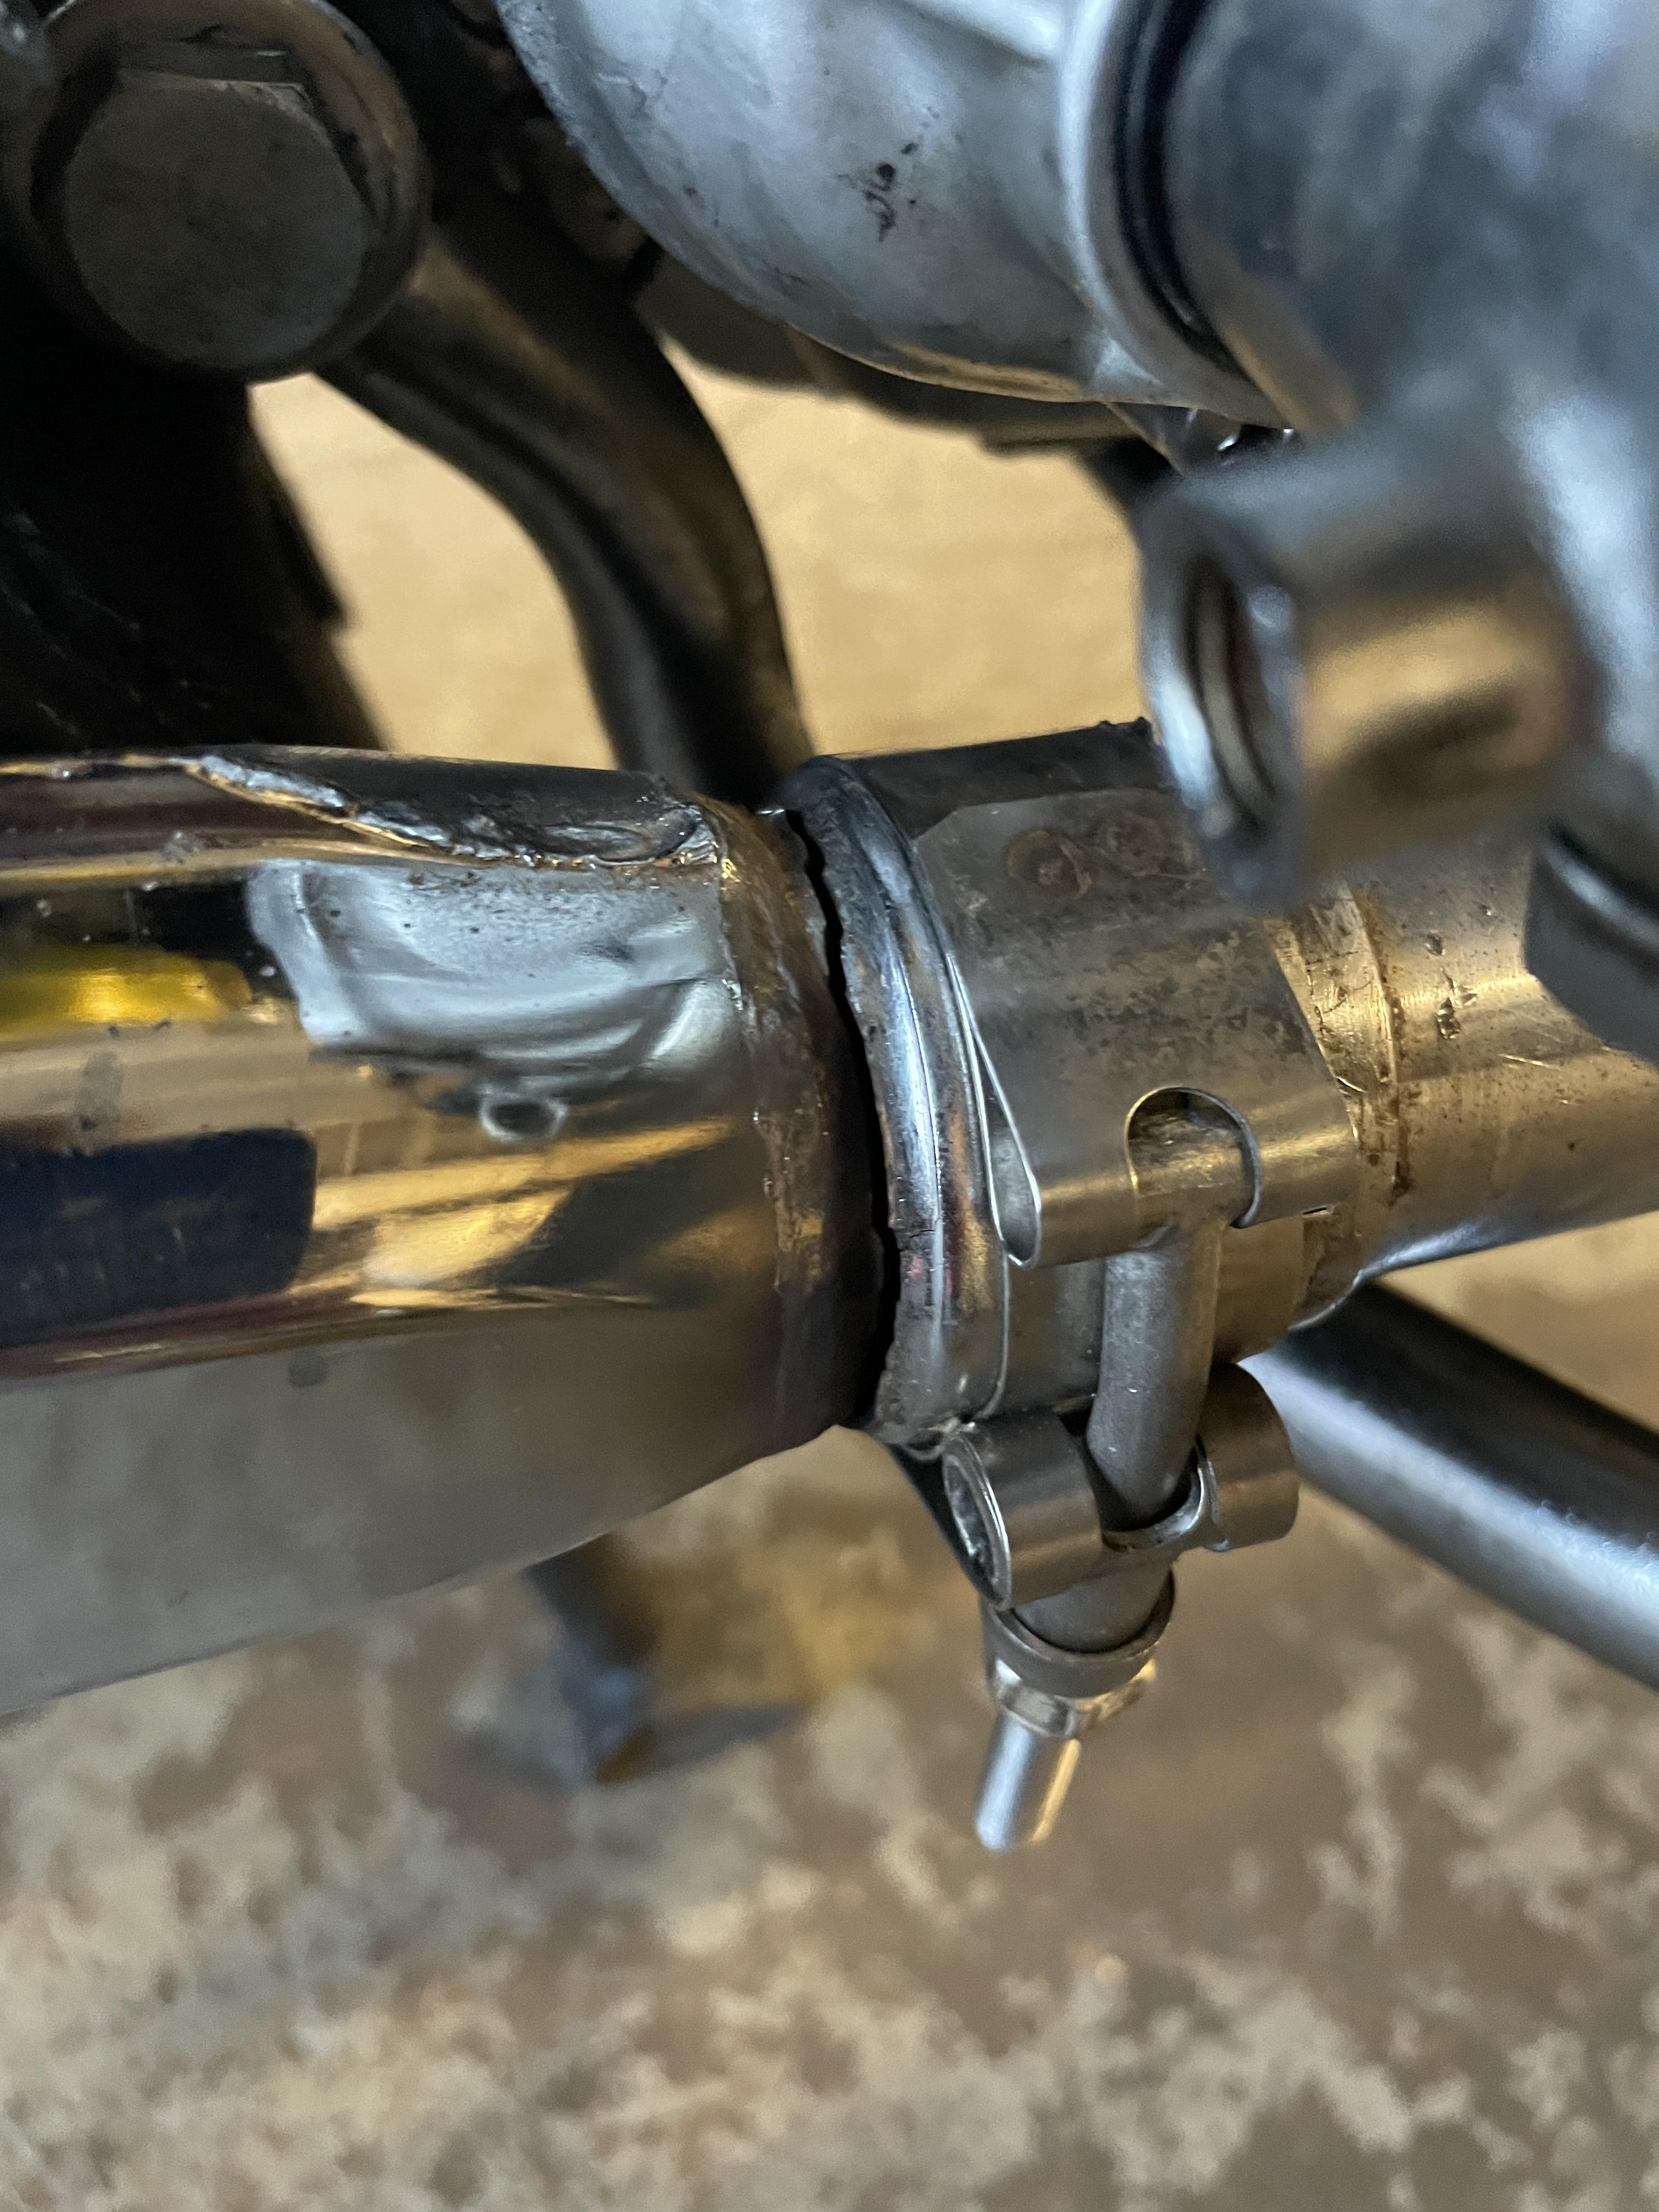
Perfect hairline crack around as much of the muffler as I can see.
Going to try bringing it to a shop and see if they can weld it back on.
-Ed
1972 CL350
1985 VF700F
Replacement clutch basket and pack work great - no more horrible noises and everything engages smoothly.
Problem number one is no biggie - the jumper between the battery and the starter solenoid gave up the ghost. Corrosion got the best of it after 50 years:
The second one is a bit more of a bummer.
Hit heavy traffic on the way home, about 40 minutes of it, including in the Lincoln tunnel where it was much hotter than everywhere else.
Honest to god worried I spoiled the oil by overheating it, so I might do a change. Was keeping moving in the traffic leading up to the tunnel by lane filtering, but once in the tunnel there isn’t much space. Basically kept walking the bike forwards and back to at least keep air moving.
I’d have shut it off for the longer stretches if the starter was working [emoji849]
I get back to the garage and find this:
Perfect hairline crack around as much of the muffler as I can see.
Going to try bringing it to a shop and see if they can weld it back on.
-Ed
1972 CL350
1985 VF700F
Bummer, stock pipes are so hard to find in good condition but even at best they've aged some too. Only drawback of even a good weld will be the chrome discoloration, but a little silver paint helps.
Ribrickulous
Veteran Member
I’m just wondering why - was the clamp too tight, was it just age, or could it have really been something to do with how hot the motor got.
Same fix no matter what, but hey, always curious
-Ed
1972 CL350
1985 VF700F
Same fix no matter what, but hey, always curious
-Ed
1972 CL350
1985 VF700F
I’m just wondering why - was the clamp too tight, was it just age, or could it have really been something to do with how hot the motor got.
Same fix no matter what, but hey, always curious
-Ed
1972 CL350
1985 VF700F
My reference was really to age. Even the best cared-for mufflers will rust inside and most of these bikes haven't been in continuous use over the decades, so my guess would be some level of weakness due to rust occurring internally.
Ribrickulous
Veteran Member
Thankfully there looks like plenty of material left in this area. I’m hopeful it can be repaired.

-Ed
1972 CL350
1985 VF700F
-Ed
1972 CL350
1985 VF700F
Last edited by a moderator:
If you could sleeve it internally it would weld much stronger and last. Usually an automotive supply house will have short exhaust adaptors that are 4” or shorter in various diameters that would work well.
wentwest
Veteran Member
50 years of heating and cooling, significant corrosion from exhaust gasses and water vapor, and lots of vibration and stresses from bouncing down the road. With all that it's not really surprising that the pipes cracked at that spot. An internal sleeve makes a lot of sense.
bilbikek411
Veteran Member
I like stock OEM mufflers;those things can take a Lot and repairs able to make them last another decade or more.
Ribrickulous
Veteran Member
I feel like the gap in the crack indicates it’s something to do with either heat cycling, being under too much stress when installed, or some combo of the two.
The right muffler has always sat higher and tighter to the rear wheel than the left, and getting everything lined up has always been difficult.
I think when I do get the crack repaired I’ll figure a way to re-work the bracket so the muffler sits a bit more naturally where it wants to be.
The sleeve idea is a good one, but frankly I’m going to turn this over to a shop and let them do what they can.
Made a new starter jumper, crushed some battery terminals in a Vice over the 6awg cable and flowed solder into them. I actually don’t have the compression tool that size.
Re-checked and compression is still ~175/180 on each side, so hopeful even though the pipe might’ve gotten too hot that the engine remains a-ok.
-Ed
1972 CL350
1985 VF700F
bilbikek411
Veteran Member
I stressed an OEM Honda pipe flange mount where it mounts to the headpipe before  The reason mine broke was I tried to re-allign the rear muffler mounting brackets,the way it sits on the bike;I wanted the muffler closer to the bike in back.
I made a mistake by not loosening the two headpipe nuts where it mounts to the cyl. head/port;I just used the leverage of the muffler to move the pipe over..
The reason mine broke was I tried to re-allign the rear muffler mounting brackets,the way it sits on the bike;I wanted the muffler closer to the bike in back.I made a mistake by not loosening the two headpipe nuts where it mounts to the cyl. head/port;I just used the leverage of the muffler to move the pipe over..
ballbearian
Veteran Member
Sleeve or not, I'd tack in about 4 places then check alignment on bike and adjust to suit (cut weld to bend) then finish bead around.
Ribrickulous
Veteran Member
Sleeve or not, I'd tack in about 4 places then check alignment on bike and adjust to suit (cut weld to bend) then finish bead around.
In this case it doesn’t matter - the muffler slips on over the header, it isn’t the solid unit from the early models.
The piece that snapped off just spins around the graphite gasket.
I did mark off three alignment points before removing it, but it’s sort of like a puzzle piece - the break line only works in one orientation to get it back together onto the muffler.
-Ed
1972 CL350
1985 VF700F
bilbikek411
Veteran Member
The bike is looking good,for sure.
Ribrickulous
Veteran Member
While each bike is having some sort of issue or another, I treated myself to a nice-to-have [emoji14]
Repro battery covers are available on eBay now for like $25. Vintage motorcycle rescue I believe is the company that’s selling them.
Sent from my iPhone using Tapatalk
Repro battery covers are available on eBay now for like $25. Vintage motorcycle rescue I believe is the company that’s selling them.
Sent from my iPhone using Tapatalk
Ribrickulous
Veteran Member
Knock on wood but… I think I’m pretty much done with this thread?
Really the only things left, are:
- Getting the cargo rack seat rest and saddle rest re-upholstered
- The CL pipes repaired
- Getting some bits and pieces here and there re-chromed.
I’m really in no rush to do those, so I guess I’ll add a few posts here and there as time goes on.
But yeah, more or less wrapped (knock on wood). Cheers for all the help along the way ^_^
Sent from my iPhone using Tapatalk
Knock on wood but… I think I’m pretty much done with this thread?
Really the only things left, are:
- Getting the cargo rack seat rest and saddle rest re-upholstered
- The CL pipes repaired
- Getting some bits and pieces here and there re-chromed.
I’m really in no rush to do those, so I guess I’ll add a few posts here and there as time goes on.
But yeah, more or less wrapped (knock on wood). Cheers for all the help along the way ^_^
Sent from my iPhone using Tapatalk
And we thoroughly enjoyed the adventure/journey along the way too. No point in "finalizing", it will eventually need something... and we'll be here to see what it is when you add to the story.
Ribrickulous
Veteran Member
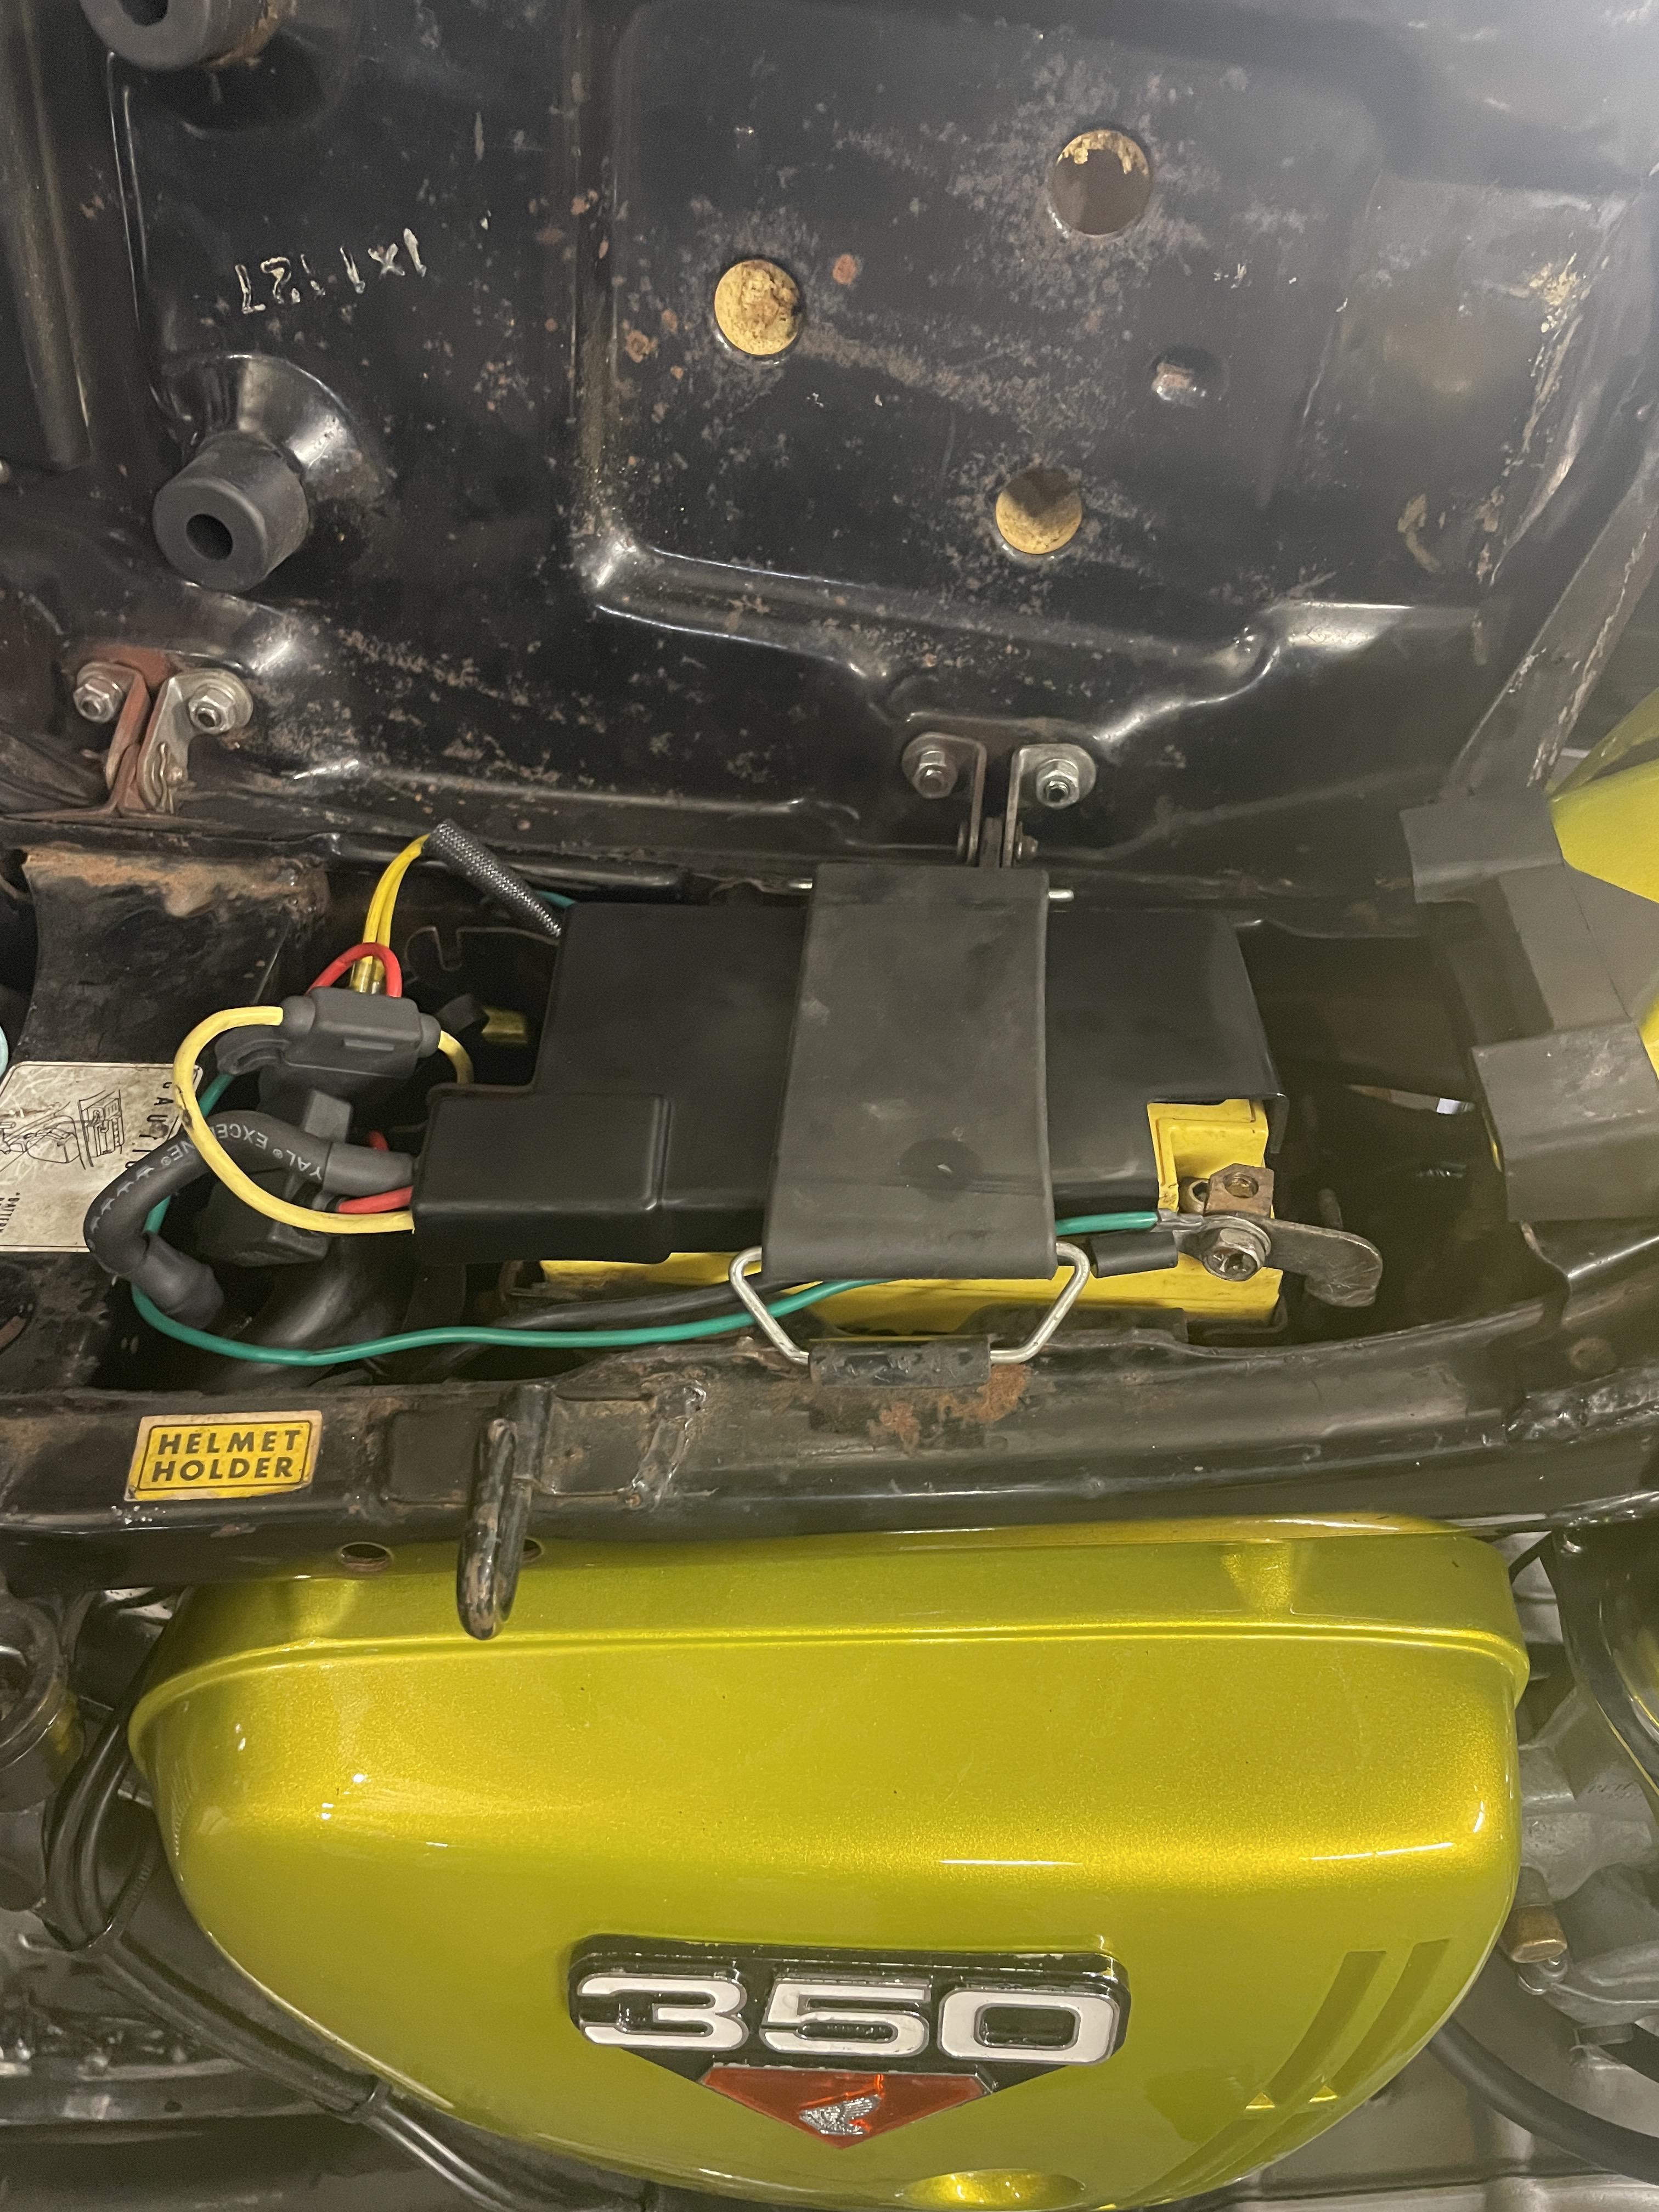
Little update - consolidated the mess of fuse holders with this little fuse box. Only using 3/4 of them:
- Harness fuse
- Charger fuse
- Rick’s reg/Rec fuse


Pulling two wires off the battery when I need to is way easier than trying to jam all four onto the posts.
Re-made the starter relay jumper also, which is mildly cleaner now.
And yes, there’s clearance for everything even with a rider on. I used the supports for the OEM rectifier, which is empty when a combo reg/Rec is used underneath the battery box.
- 1972 CL350
- 1985 VF700F
- Harness fuse
- Charger fuse
- Rick’s reg/Rec fuse
Pulling two wires off the battery when I need to is way easier than trying to jam all four onto the posts.
Re-made the starter relay jumper also, which is mildly cleaner now.
And yes, there’s clearance for everything even with a rider on. I used the supports for the OEM rectifier, which is empty when a combo reg/Rec is used underneath the battery box.
- 1972 CL350
- 1985 VF700F
Ribrickulous
Veteran Member
Popped a small side bag on. It’s got room for a quart of oil, bottle of seafoam, and a can of chain lube, with room to spare for any specialty tools I want to bring with me:

It’s a little smushed up against the rear right blinker, but I don’t foresee any issue. Far back and small enough that a passenger can still get on.
Also swapped the center stand to a CB version so my exhaust isn’t getting dinged every time I use it.
It’s a little smushed up against the rear right blinker, but I don’t foresee any issue. Far back and small enough that a passenger can still get on.
Also swapped the center stand to a CB version so my exhaust isn’t getting dinged every time I use it.
The ongoing process of making it the Good-Looking (and functional) Build.
Yendor
Veteran Member
I'm thinking you mean you swapped the Center Stand for a CL Version with the Tab Stop.
The CB Version relied on Muffer Mounted Bumpers to keep it from dinging the Pipes
The CB Version relied on Muffer Mounted Bumpers to keep it from dinging the Pipes
bilbikek411
Veteran Member
I have always enjoyed the title And thread of this !
Ribrickulous
Veteran Member
I'm thinking you mean you swapped the Center Stand for a CL Version with the Tab Stop.
The CB Version relied on Muffer Mounted Bumpers to keep it from dinging the Pipes
If you have a CL center stand with CB pipes it’ll ding the muffler before the tab stop or bumper hits.
The CL stand not only has the tab stop, the step arm on the left side is shorter. So short that it interferes with the muffler (and not on the bumper) before the bumper can contact the left leg on the center stand.
If I remember everything correctly, aside from the obvious brackets, the pieces needed to fully convert from CL to CB are:
- Center Stand
- Kick Start
- Rear Brake Pedal
- Footpeg Bar
I believe the only part you need to go from CB to CL is the center stand, so that you have a stop (that was provided by the CB muffler bumper).
Sent from my iPhone using Tapatalk
Ribrickulous
Veteran Member
Ok. Ok. Now it’s *really* the last thing:
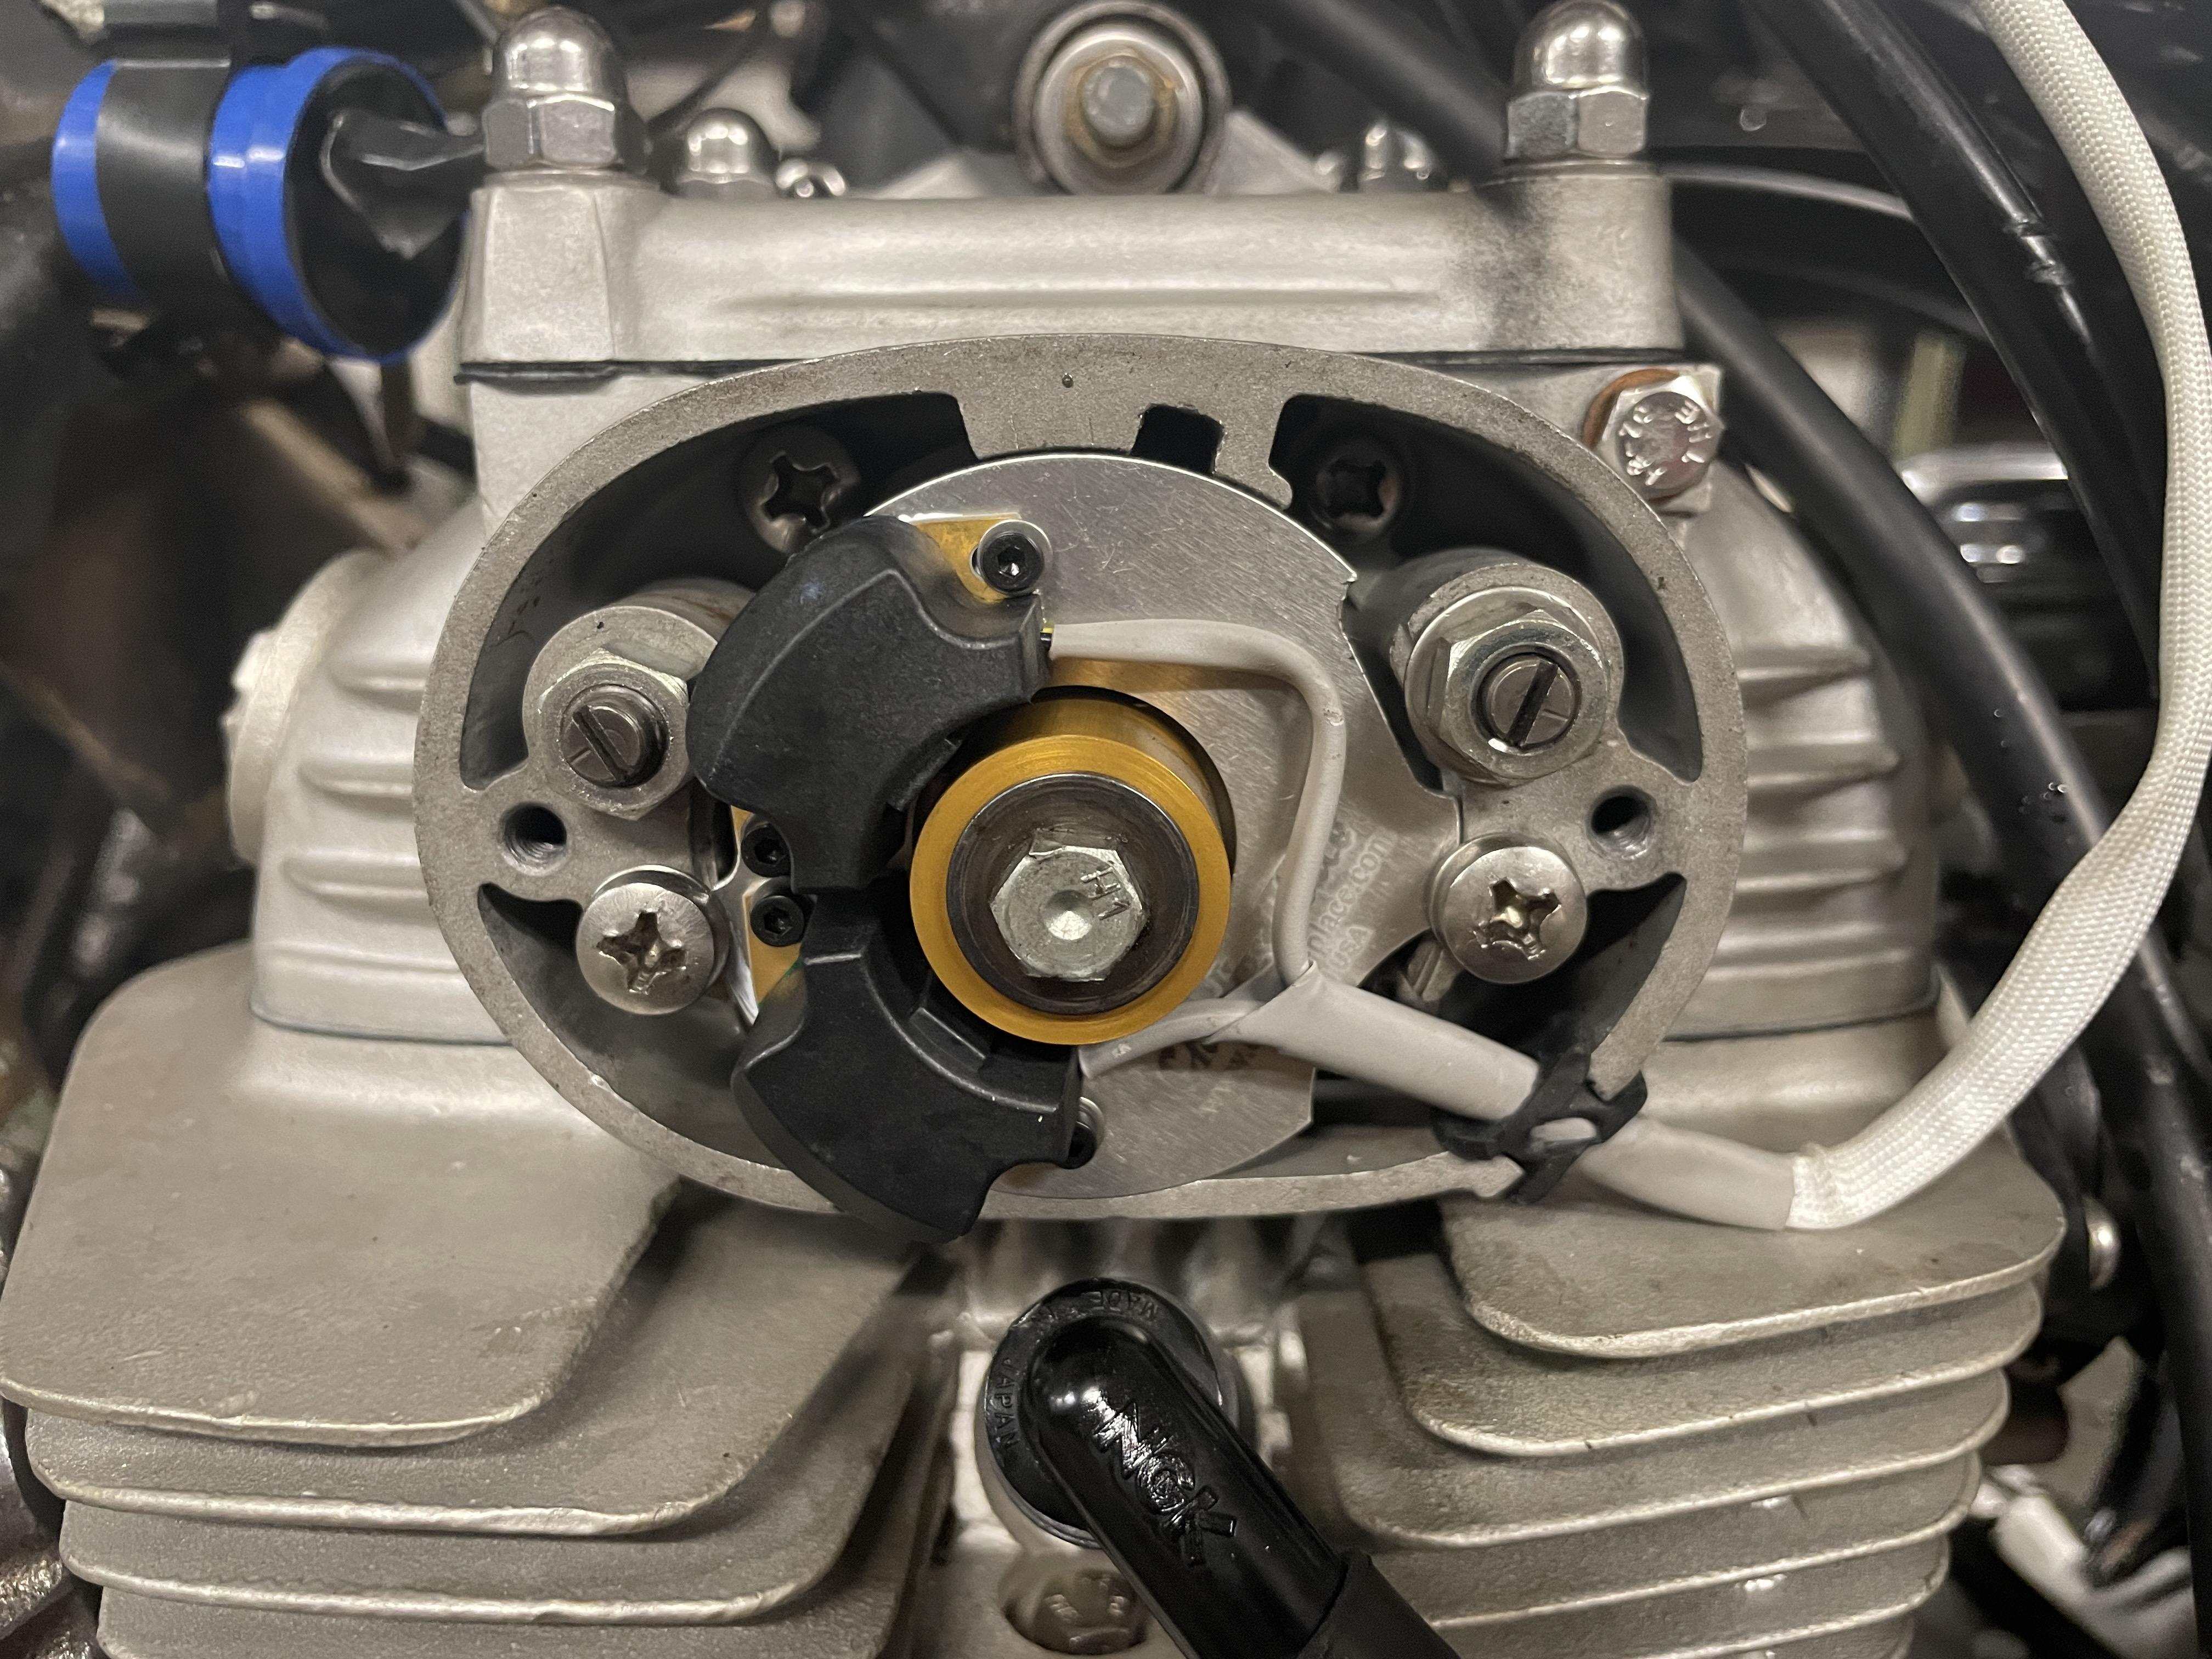
Work was extra nice this year, so I put some of it towards the electronic ignition.
Charlie’s place. Way easier to setup than I thought.
Maybe 30 minutes of fiddling with the placement of the plate but I didn’t have to adjust either pickup once it was settled in nice.
Put a strobe on it and after one more adjustment (done with the bike off - trying to *truly* dynamically adjust will damage the ignition) had the timing dead on for both cylinders
Only scare was when the whole thing quit on me while running - I had forgotten the washer and bolt on the end of the camshaft, letting the piece on the advance with the magnets come loose. [emoji849]
*very* happy with how it starts and advances, and hopefully it stays that way for a good long while.
The new saddlebag has a perfect pocket for the points and advancer cam should anything go wrong with the electronic ignition modules. Condensers are still on the bike just not hooked up.
Nicest touch IMO was that they use the original style fiberglass insulation on the wires going to the module.
Need to find a thinner OD washer for the valve adjuster - it was interfering with one of the pickups and not letting me advance to where I needed. Odd problem but solvable.
Sent from my iPhone using Tapatalk