• Don't overlook our Welcome Package, it contains many links to important and helpful information about functions at VHT like posting pictures and sending PMs (private messages), as well as finding the parts you need.

    AD

Badge Restoration

Ribrickulous

Veteran Member
Joined
Jun 8, 2020
Total Posts
1,706
Total likes
122
Location
Brooklyn, NY, USA
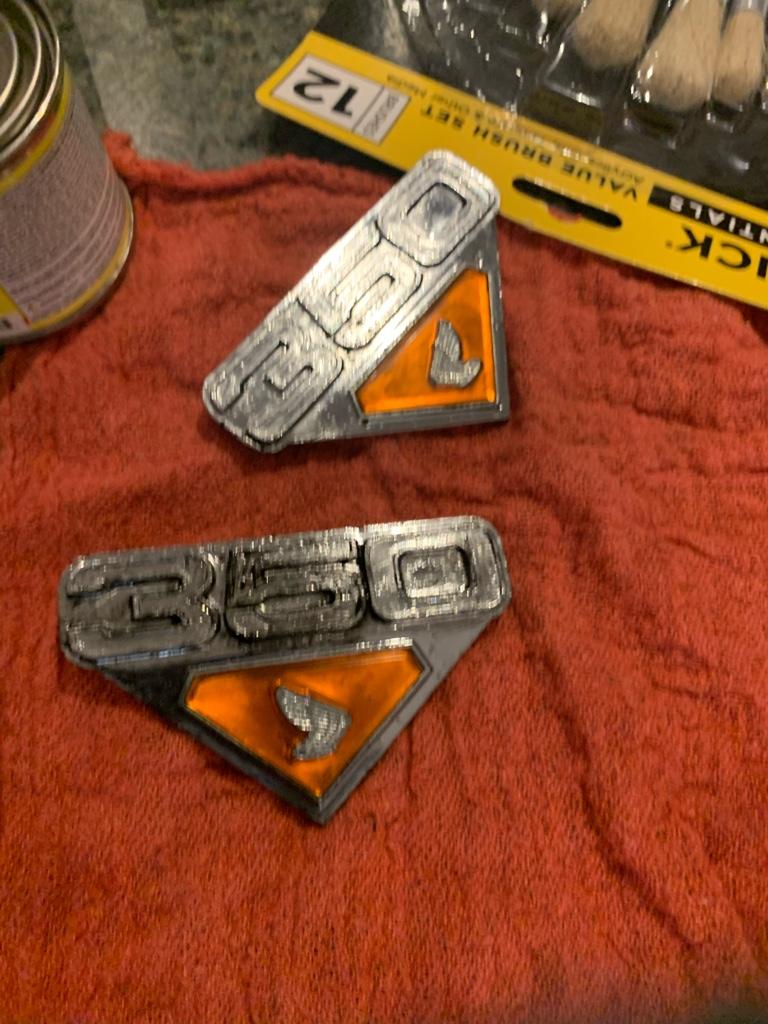
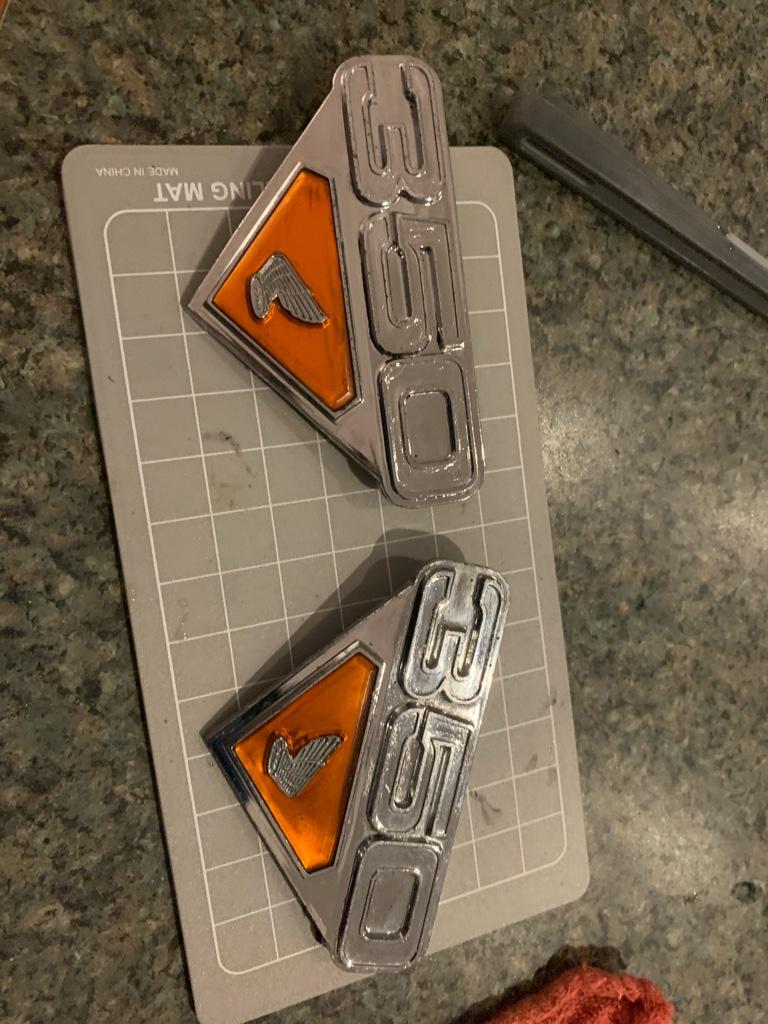
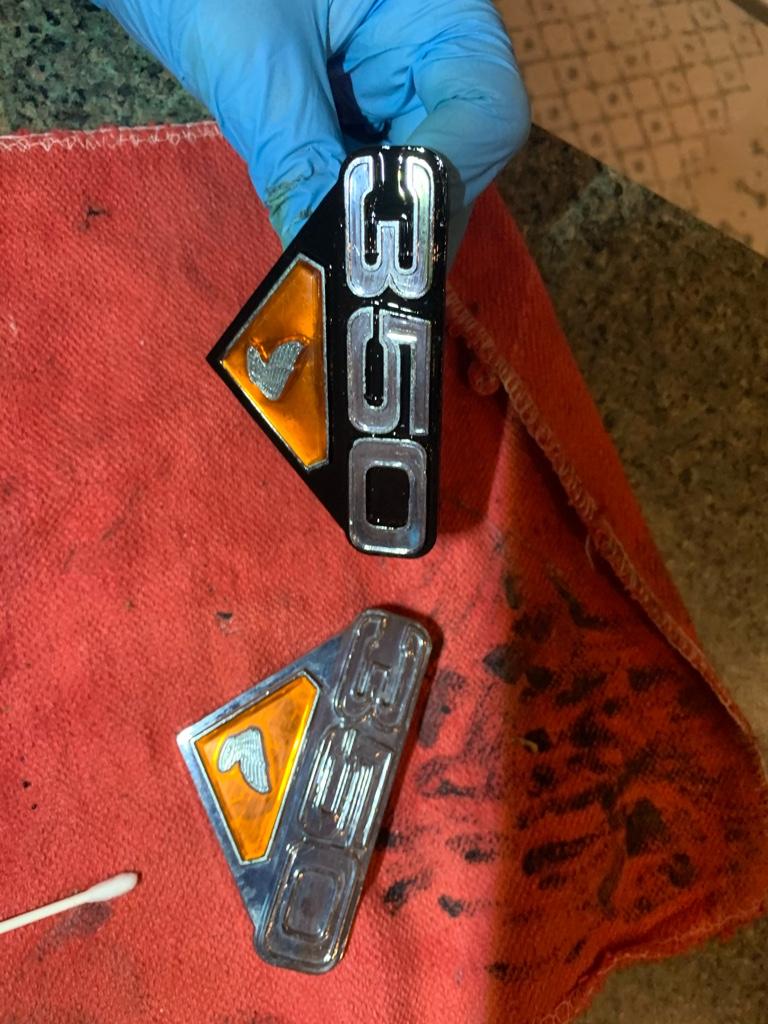
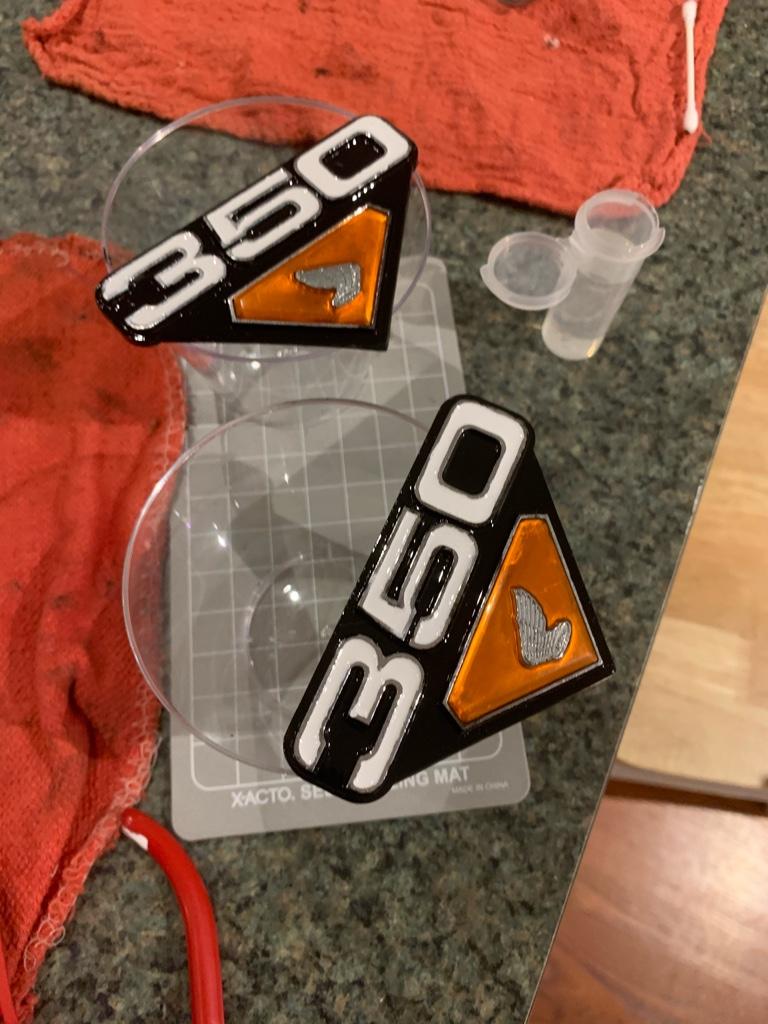
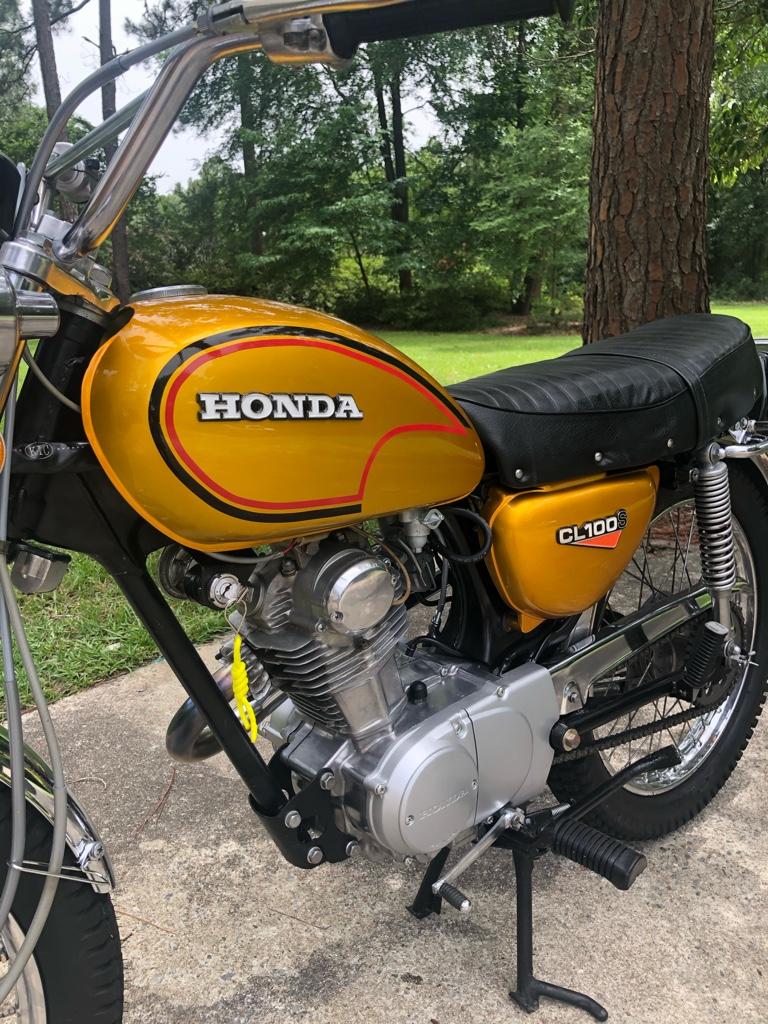
I’m going to be restoring the tank and side badges on my ‘72 CL350.

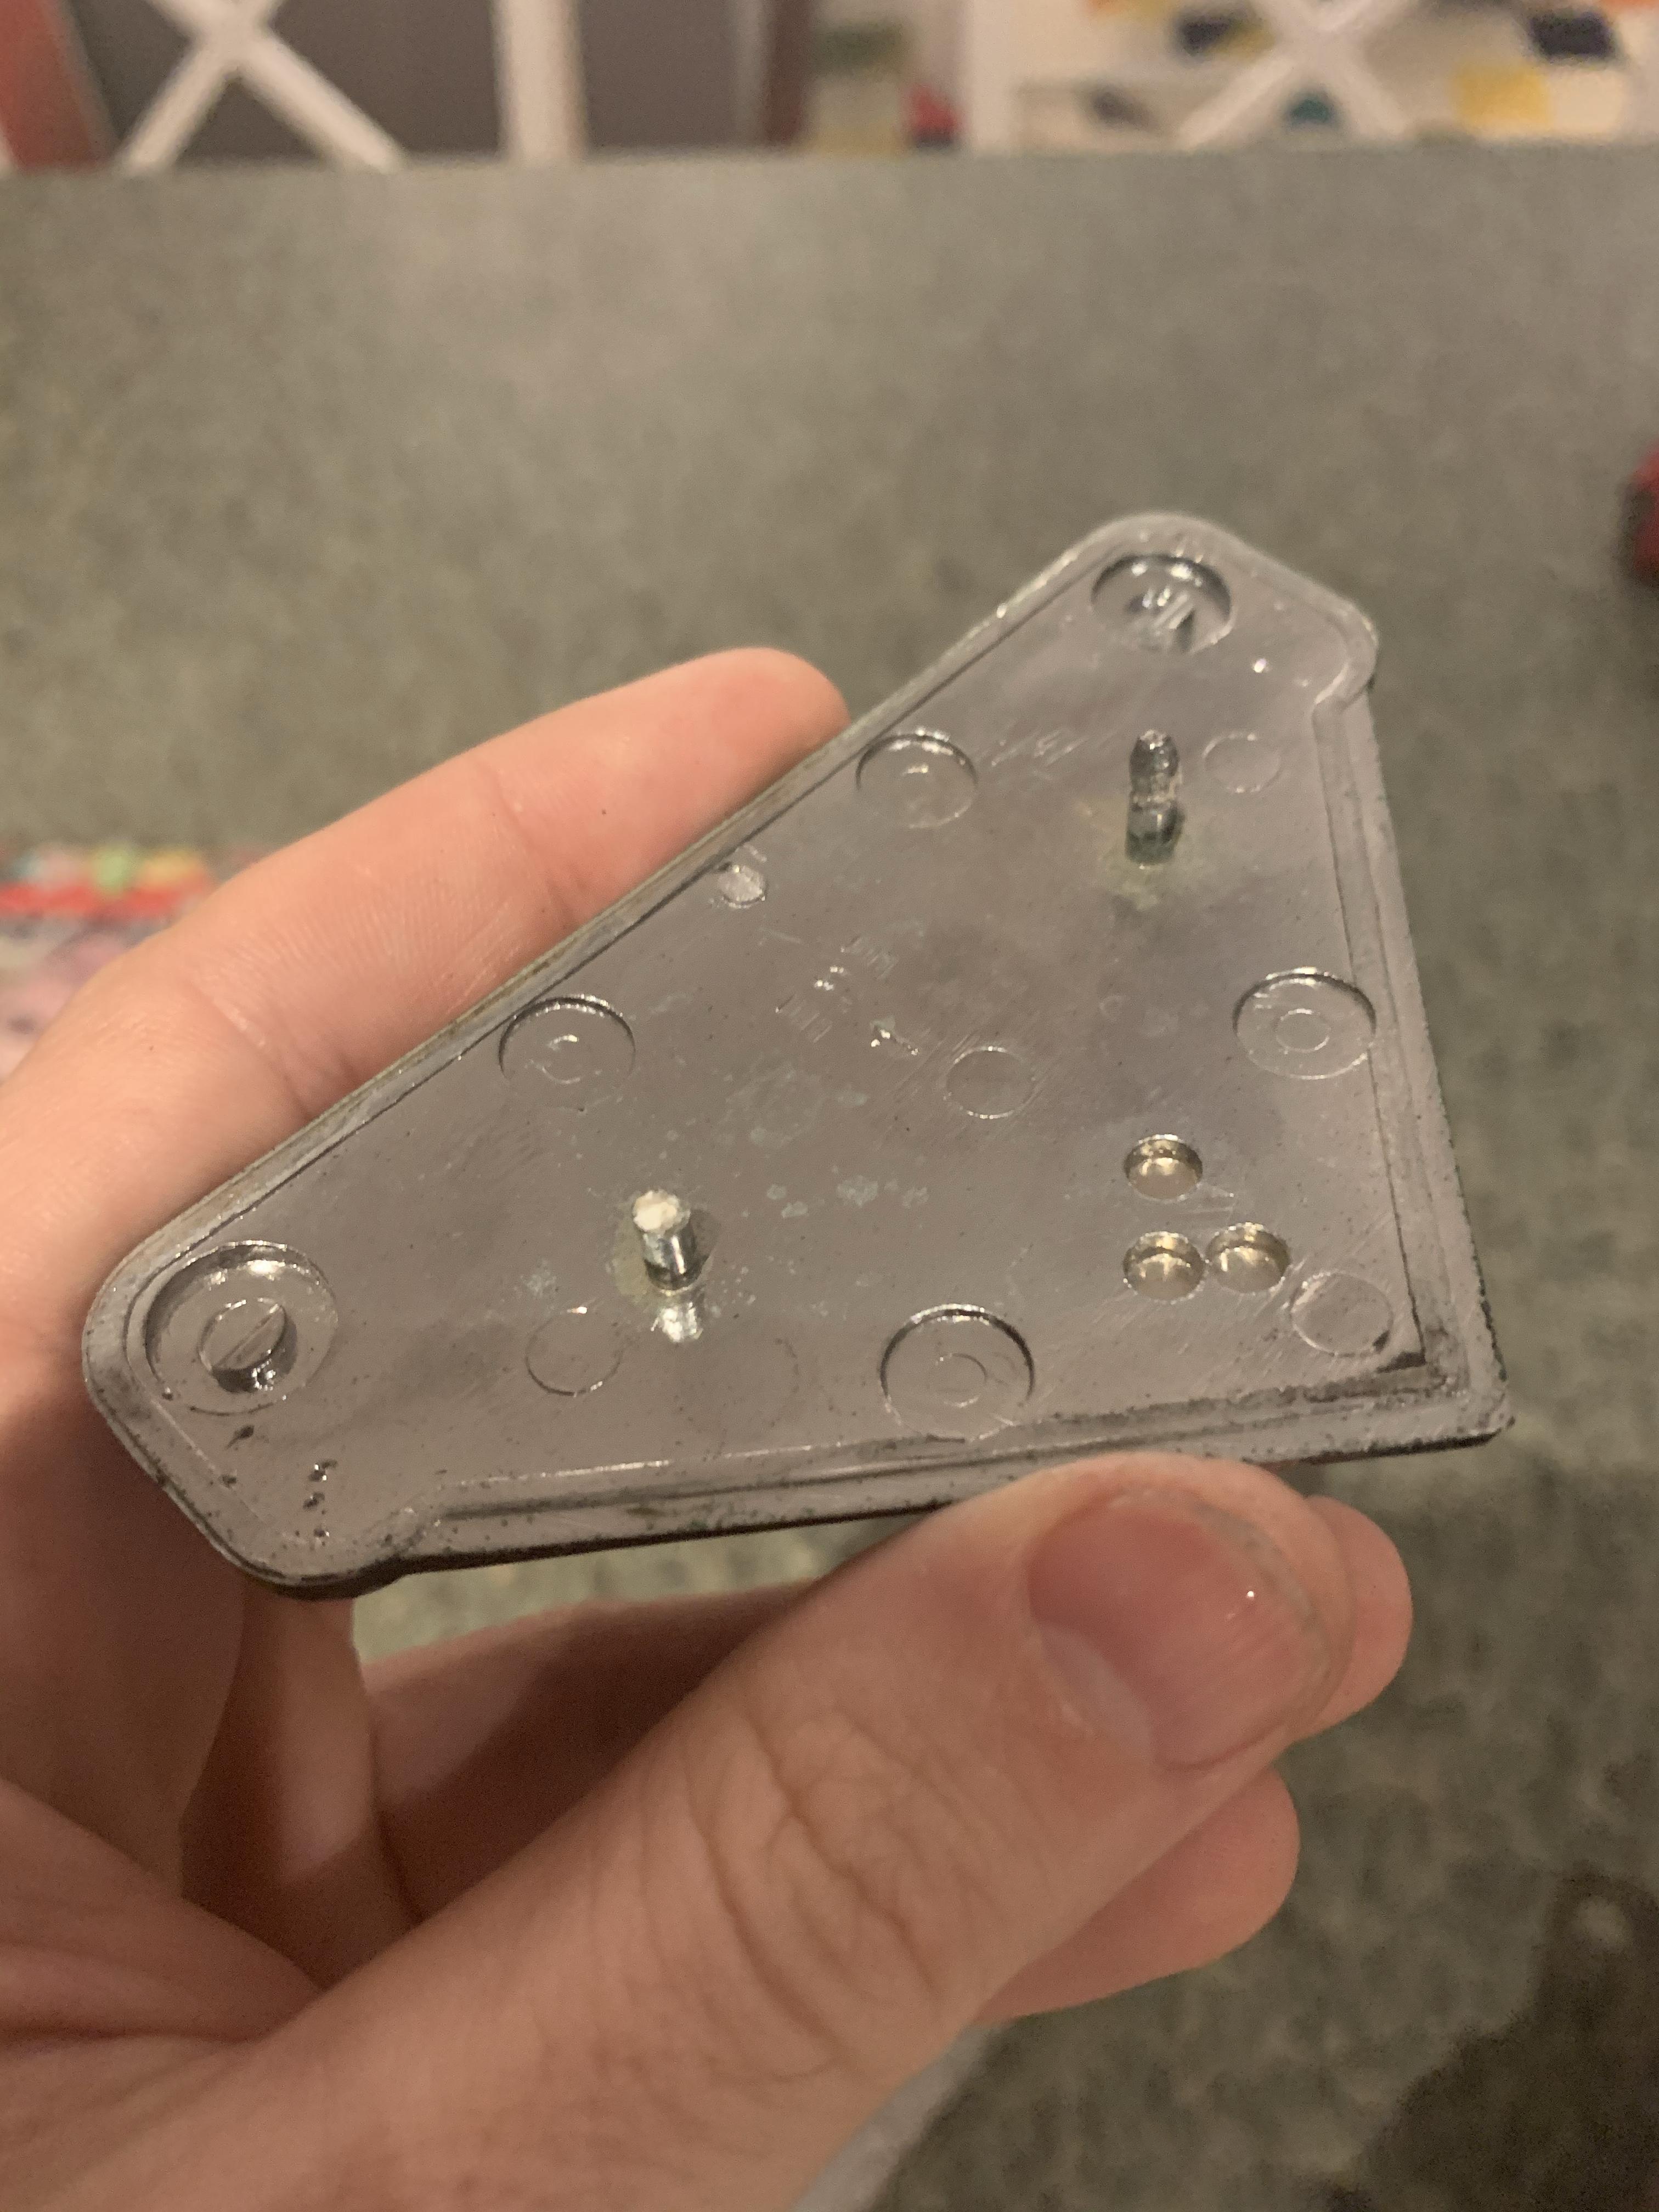
When removing one of them, the speed nut sheared off the little post. It’s now pretty much just flush with the back of the side cover.

I’m assuming I can just epoxy this one in place and keep the speed nut on the other, right?

I’ll post progress in stripping/repainting in this thread also.

bbb175b2016a9bb733d678c76ab0fd0f.jpg

fd132e623f5297ba0469c335485d4159.jpg


Ed
1972 Honda CL350
 
For the epoxy or the paint?

I test sanded a bit on the back - seems like this is just silver plastic.


Ed
1972 Honda CL350
 
Before/During/After paint stripper.

Did a test patch on the back to make sure it wouldn’t corrode anything.

Paint pops right off, used a cheapo brush from an art supply store near me to push off most of it. Nylon bristle brush for any stubborn stuff.

2250274b18fa455b540e5671a76162de.jpg

97cffd2f1d29e36079aa0ba8a0e8ce2c.jpg

df0f8825634784f3551a5954600e7b65.jpg


Ed
1972 Honda CL350
 
Well that was actually pretty easy.

What I used:

- pack of cheap detail brushes
- some paint thinner
- enamel sign paint
- dropper bottle with a needle attachment
- some Q tips

798206b6b43c699fee1ceda676d611c2.jpg

c375eb9b417c74e4ac970951da08cf0a.jpg


Before:
b0c016e6f57c07b01c41c47a02cadde5.jpg


After stripping:
3499573013a4201960da36f95494d3ac.jpg


Black done on one:
0dba24cdd451de483098884a346be112.jpg


Black and white done:
1379deebdb278fadc921fb680cc14957.jpg


Used the fine detail brushes for most of the black, except where it’s real tight between the numbers, used the squeeze bottle for that. The bottle is easy to use to push the paint around and up the sides of the numbers.

Q tips were pretty good for cleaning off any excess that made its way to the top of the raised area surrounding the numbers.

Squeeze bottle #2 was all I used for the white inside the 350. The reservoir is very shallow and easy to overfill, so take it slow and push the paint around. Add a drop at a time once you’ve got about half of the surface covered if you still need more.

Now to wait 12 hours for the stuff to dry [emoji15]

Note - the one shot stuff here is expensive, like $14 for those little 4oz pots if I recall. I had it laying around from another project, I’m sure any enamel brush on paint is going to do well here.

I think they had a cheaper one in a small container (I probably used about 1/2-1oz for both badges)


Ed
1972 Honda CL350
 
Nice job and write-up. Time-consuming and tedious I'm sure, but worth it. I had my wife do the alternator cover on my 450, I don't have the patience or steady hand for it myself.
 
Honestly, just over an hour. Not bad at all.

Will have to do it again for the tank side badges, but this was a good primer on it.

Oh - one more piece of advice that I always forget to follow: don’t paint with those red shop rags around. Little red fibers always manage to get everywhere no matter how cautious you are.

Pretty sure they won’t be too visible, but there may be some touch up in the future.

Need to clean the top of the numbers anyway, probably either the razor blade mentioned above or some fine sandpaper once it’s dry [emoji2371]


Ed
1972 Honda CL350
 
Those look great! I used Testor’s model enamel and flowed paint into the recesses with a small brush, placing the emblems horizontal to let the wet paint self-level. After it dried completely (which took a couple days), I scraped off any paint I had gotten on the raised chrome edges with my fingernail.

437082EA-46FE-4E3B-8A2E-DC8E3B743ECD.jpeg

C7EE1DBB-2DF0-42D6-9A0A-CB5952A85BED.jpeg

1DE6D901-C795-4B26-9B27-E3CB38693882.jpeg
 
That was the other one at Blick (the art store) Testor’s enamel.

I believe they sell 1/4 oz jars... my guess is you probably used one for both panels, yeah? It’s two or three bucks per jar, not bad at all.

And as always, the 69CL is looking great [emoji1303]


Ed
1972 Honda CL350
 
I have had good results with Testors but I’m sure any good quality enamel paint will work. Requires a small brush, patience and a steady hand. Some I did for my cl100.
2118742dea47622923be0c04ae9d8e11.jpg

37afd353013f3aa1459c0b8bcd44e153.jpg

8ab39412ccddd8f314999c5b58d8782f.jpg


Sent from my iPhone using Tapatalk
 
Tight work.

I go at them first with dental picks -- sometimes the old paint is so brittle that it just chips right off.

I also use enamel model paint -- easy to buy in small quantities.

And I've used epoxy to adhere badges with broken pins to side covers -- no problems.
 
A small piece of 3M emblem tape on the side with the broken pin will probably work fine to hold the emblem on. It’s thin and works great.
 
I have had good results with Testors but I’m sure any good quality enamel paint will work. Requires a small brush, patience and a steady hand. Some I did for my cl100.

Yakeye,

How did you strip the tank badges? The side badges on mine were silvered, but I believe plastic? The paint jumped off when I used stripper. For the tank badges, they're definitely metal. tin maybe? and the paint is holding on for dear life. I've been brushing stripper on them for about half an hour now with no effect... going to try lifting some of it manually and see if the opening gives the stripper a way in?
 
I would be interested in which stripper to use for badges. I had some mixed results with the aircraft strippers I tried on my tank repaint...
 
f408f16e29a5b36a91d65a863987e0a9.jpg


This is the stuff I’ve been using. Couldn’t have expired in a month, could it have? Supposedly this stuff has a shelf life.


Ed
1972 Honda CL350
 
When I stripped my tank, I first used Klean-Strip brand aircraft stripper over and over again but there were places it just wouldn't work on. I spent hours and couldn't figure out why it didn't work. So I tried a second brand of aircraft stripper from Rustoleum and bam...the paint literally jumped off. I don't get it, maybe it does lose its effectiveness. Anyway, I've got badges to do next and was just curious.
 
Back
Top Bottom